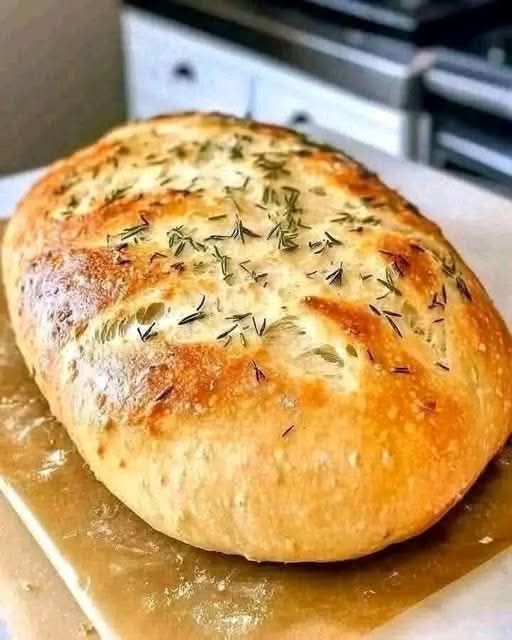
There’s something deeply comforting about pulling a fresh loaf of bread from your oven—the warm aroma filling your kitchen, the satisfying crackle as the crust cools, and that first slice you tear off while it’s still warm enough to melt into your fingertips. And the best part? You don’t need to be a professional baker, have special equipment, or spend hours kneading dough. Today, I’ll show you how to make a beautifully soft, airy, and flavorful bread without kneading, without eggs, and without butter. This recipe is incredibly forgiving, beginner-friendly, and naturally dairy-free and egg-free—yet the finished loaf tastes like something from an artisan bakery.
This dough uses time instead of muscle. The long rest allows gluten to develop naturally, forming a structure that traps air and creates that perfect bread texture—soft inside with a golden chewy exterior. And since this is a no-knead dough, your hands stay clean and your arms stay relaxed. The yeast does the work for you.
Ingredients
-
3 cups (360g) all-purpose flour (or bread flour for extra chewiness)
-
1 ½ teaspoons salt
-
1 tablespoon sugar (optional but helps browning and boosts flavor)
-
1 teaspoon instant yeast (or 1 ½ tsp active dry yeast)
-
1 ½ cups (360 ml) warm water (not hot, just warm to touch)
-
2 tablespoons oil (olive oil recommended for flavor, but vegetable oil works)
Equipment Needed
-
A large mixing bowl
-
A spatula or wooden spoon
-
Plastic wrap or a clean kitchen towel
-
A loaf pan or a heavy lidded pot (like a Dutch oven)
-
Oven
Instructions
Step 1: Mixing the Dough
In a large bowl, combine the flour, salt, sugar, and yeast. Stir with a fork or spoon to evenly disperse the ingredients. Add the warm water and oil. Stir until everything comes together into a sticky, shaggy dough. It will look messy—that’s exactly what we want.
There is absolutely no need to knead. Just make sure there are no dry pockets of flour. The dough will be wet and sticky, softer than a normal bread dough. That moisture is key—it produces steam while baking, which makes the bread fluffy and tender.
Step 2: First Rise (Let Time Do the Work)
Cover the bowl tightly with plastic wrap or a slightly damp kitchen towel. Leave it in a warm place for 2 hours—or up to 8–12 hours for overnight fermentation. The longer it sits, the more flavor it develops.
During this time, the yeast slowly ferments the carbohydrates in the flour, building flavor and gluten naturally. You’ll know it’s ready when the dough has doubled or even tripled in size and is filled with tiny bubbles on the surface.
Step 3: Shape the Dough (Gently!)
Once risen, lightly oil your hands and gently lift the dough from the bowl. Do not punch it or knead it. Just fold it over itself a few times to form a rounded or loaf shape.
If you’re using a loaf pan, lightly oil the inside and place the dough in. If baking in a Dutch oven, simply place the dough on parchment paper.
Step 4: Second Rise (Quick Rest)
Let the shaped dough rest for 30–45 minutes. This allows it to relax and expand again, giving you that fluffy texture.
Meanwhile, preheat your oven to 220°C (425°F). If using a Dutch oven, preheat it inside the oven for at least 20 minutes—this helps create steam, making the crust beautifully crisp.
Step 5: Baking
If using a loaf pan:
Bake uncovered for 35–40 minutes until golden on top.
If using a Dutch oven:
Place dough inside (on parchment), cover with the lid, and bake 30 minutes, then remove the lid and bake 10–15 minutes more to brown the crust.
When the bread is done, it should sound hollow when tapped on the bottom.
Let it cool at least 20 minutes before slicing. Yes, waiting is hard—but it helps the texture set and prevents gumminess.
Why This Bread Works Without Kneading or Eggs
Bread structure comes from gluten. Normally, kneading develops gluten manually. But when dough sits for hours, gluten forms naturally. This slow fermentation also creates a more complex, bakery-quality flavor.
Eggs and butter are usually added to enrich bread, making it softer or adding richness. But oil and high hydration (more water) accomplish the same—keeping the loaf moist, tender, and airy.
Variations to Try
Make this recipe your own! Here are delicious ways to switch it up:
| Style | What to Add |
|---|---|
| Garlic Herb Bread | 1 tsp garlic powder + 1 tbsp dried herbs |
| Sweet Breakfast Loaf | Extra 2 tbsp sugar + raisins or chocolate chips |
| Rustic Italian Bread | Use olive oil + sprinkle coarse salt on top |
| Whole Wheat | Replace up to 1 cup flour with whole wheat |
Serving Ideas
-
Fresh with honey or jam
-
Toasted with avocado and sea salt
-
Dipped in olive oil and balsamic
-
Served alongside soups, stews, or pasta
-
For sandwiches—makes AMAZING grilled cheese!
Storing Your Bread
-
Room Temperature: Keep in a sealed bag for up to 3 days.
-
Freezing: Slice and freeze for up to 2 months. Toast straight from frozen!
