There’s something wonderfully nostalgic about condensed milk — that thick, sweet, creamy nectar that adds richness to desserts, beverages, and baked goods. Store-bought versions are convenient, but making your own homemade condensed milk is surprisingly easy, incredibly satisfying, and often far more flavorful. This unique recipe delivers a perfectly smooth and luscious condensed milk using simple pantry ingredients, yet it has a depth of flavor and creaminess that’s hard to beat. Whether you’re crafting fudge, flan, tres leches cake, or simply sweetening your morning coffee, this homemade version will elevate every spoonful.
Ingredients You’ll Need
To make about 1½ cups of homemade condensed milk, gather:
-
2 cups (480 ml) whole milk – full-fat milk gives a rich, creamy base.
-
⅔ cup (130 g) granulated sugar – balances sweetness perfectly.
-
2 tablespoons unsalted butter – adds smoothness and gloss.
-
½ teaspoon pure vanilla extract (optional) – for a hint of warmth.
-
Pinch of salt – enhances flavor and balances the sweetness.
(Optional twist: Add 1 tablespoon of heavy cream for extra silkiness or 1 tablespoon of honey for a floral undertone.)
Step-by-Step Instructions
Step 1: Combine and Heat
In a heavy-bottomed saucepan, combine the milk and sugar. Stir well with a whisk to dissolve the sugar before heating. Turn the stove to medium-low heat, and let the mixture warm slowly — rushing it will cause the milk to scorch or curdle.
Keep stirring occasionally until the sugar completely dissolves and the milk begins to steam gently. You should see small bubbles around the edge but no rolling boil. This stage is about developing a smooth foundation for your condensed milk.
Step 2: Simmer Slowly
Once the milk is hot and the sugar is fully dissolved, reduce the heat to low. Let it simmer gently for 30–40 minutes, stirring every few minutes. You’ll notice it gradually thickening and reducing in volume. The key is patience — this slow reduction allows the natural sugars in the milk to caramelize slightly, giving the mixture a pale golden hue and rich, creamy flavor.
As it simmers, you might notice a thin film forming on top. Don’t worry — just whisk it back in or remove it gently with a spoon. The texture should be thick enough to coat the back of a spoon when it’s ready.
Step 3: Add Butter and Vanilla
When the milk has reduced by about half and feels syrupy, remove it from the heat. Stir in the butter, vanilla extract, and salt while it’s still warm. The butter will melt into the mixture, creating a luxurious, glossy texture. The salt rounds out the sweetness and makes the flavor more balanced and sophisticated.
If you like, you can blend the finished mixture for 10–15 seconds to ensure complete smoothness — this is especially helpful if small milk solids have formed.
Step 4: Cool and Store
Allow the condensed milk to cool to room temperature before transferring it to a clean, airtight glass jar or container. It will thicken further as it cools. Store it in the refrigerator for up to 2 weeks. If you plan to use it over time, it can also be frozen for up to 3 months — simply thaw in the fridge overnight before using.
Texture and Flavor Notes
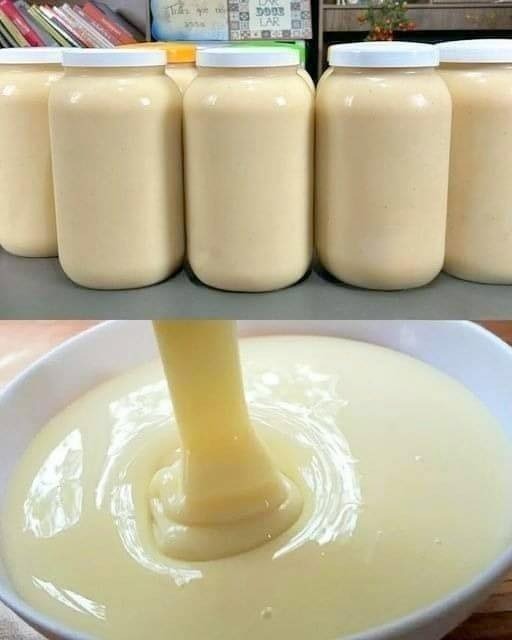
This homemade condensed milk has a rich, velvety consistency — slightly thicker than store-bought varieties but far creamier. The flavor is deep and buttery, with a subtle hint of caramel and vanilla. Because it’s not overly sweet, it pairs beautifully with desserts, fruit, and coffee without overwhelming them.
If you prefer a lighter flavor, reduce the sugar slightly. For an extra caramelized note, let it simmer for an additional 5–10 minutes until slightly darker in color.
Creative Variations
You can personalize this condensed milk recipe in countless ways:
-
Coconut Condensed Milk: Replace regular milk with full-fat coconut milk. The result is luxuriously thick with a tropical flavor — perfect for vegan desserts and Thai coffee.
-
Honey or Maple Sweetened: Swap half the sugar for honey or maple syrup for a natural sweetness and subtle flavor depth.
-
Caramel Condensed Milk: Stir in 1 tablespoon of brown sugar instead of white sugar for a butterscotch twist.
-
Non-Dairy Almond Version: Use almond milk with 1 teaspoon of cornstarch for creaminess — ideal for lactose-intolerant or vegan users.
How to Use Your Homemade Condensed Milk
Homemade condensed milk can be used anywhere you’d use the canned version — and often with even more delicious results! Here are some irresistible ideas:
-
Desserts: Drizzle over pancakes, waffles, or French toast. Use it to make fudge, flan, key lime pie, or tres leches cake.
-
Coffee & Tea: Stir into espresso, Thai iced tea, or Vietnamese coffee for a luxurious sweetness.
-
Baking: Use it in cookie dough, cakes, and pies to add moisture and sweetness.
-
Fruit Topping: Pour over sliced strawberries, mangoes, or bananas for a quick dessert.
-
Homemade Ice Cream: Blend it into whipped cream or milk before freezing for a silky, scoopable treat.
Pro Tips for Success
-
Low and Slow: Never boil the milk — gentle simmering ensures a smooth texture.
-
Use a Heavy Pot: Prevents scorching and allows even heat distribution.
-
Whisk Often: Keeps sugar from sticking to the bottom and burning.
-
Measure by Reduction: When it has reduced by half, it’s done.
-
Flavor While Warm: Add extracts, butter, or other flavorings before it cools for the best infusion.
Final Thoughts
Homemade condensed milk is one of those old-fashioned kitchen treasures that remind us how simple ingredients can create extraordinary results. The process is calming and sensory — the warm aroma of sweet milk simmering slowly, the transformation into a thick, golden cream, and the satisfaction of tasting your own handcrafted sweetness. Once you make it yourself, you’ll likely never go back to the canned version again.
