Few things compare to the nostalgia of biting into a warm, flaky Pop-Tart straight from the toaster — the tender crust, the gooey filling, and the sweet glaze that glistens on top. But for anyone who’s gluten intolerant or simply prefers gluten-free baking, traditional Pop-Tarts are off the table. That’s where this unique gluten-free Pop-Tart recipe steps in — a handcrafted, bakery-quality version made entirely from scratch, with wholesome ingredients, rich flavors, and a flaky texture that rivals the real thing.
This recipe reimagines the classic breakfast pastry with a buttery gluten-free crust, customizable fillings, and a glossy vanilla glaze. Whether you’re craving strawberry, chocolate, or cinnamon brown sugar, this base recipe allows endless creativity while remaining 100% gluten-free.
The Secret to a Perfect Gluten-Free Pop-Tart
The key challenge in making gluten-free Pop-Tarts is recreating the signature flakiness of pastry dough without gluten — the protein that gives regular dough its structure and elasticity. The trick lies in using the right blend of gluten-free flours, combined with cold butter and a touch of xanthan gum for elasticity. The dough must stay cold and be handled gently to maintain its tender, flaky layers.
For the filling, you can use any jam, chocolate, or spiced mixture you love — the magic is in the balance between sweet, tart, and buttery. And to finish, a silky glaze poured over the cooled pastry creates that iconic Pop-Tart sheen.
Ingredients
For the Gluten-Free Pastry Dough:
-
2 cups gluten-free all-purpose flour (with xanthan gum included; if not, add 1 tsp xanthan gum)
-
1 tablespoon cornstarch (adds lightness)
-
½ teaspoon salt
-
1 tablespoon granulated sugar
-
¾ cup unsalted butter, cold and cubed
-
1 large egg
-
3 tablespoons cold milk (dairy or non-dairy)
-
1 teaspoon pure vanilla extract
For the Filling (Choose One or Mix & Match):
Strawberry Jam Filling:
-
½ cup strawberry jam
-
1 teaspoon cornstarch mixed with 1 teaspoon water (to thicken if jam is too runny)
Cinnamon Brown Sugar Filling:
-
¼ cup brown sugar
-
1 teaspoon ground cinnamon
-
1 tablespoon gluten-free flour
-
1 tablespoon softened butter
Chocolate Filling:
-
¼ cup chocolate chips
-
1 tablespoon heavy cream or coconut cream
For the Glaze:
-
1 cup powdered sugar
-
2–3 tablespoons milk (dairy or non-dairy)
-
½ teaspoon vanilla extract
-
Optional: natural food coloring or sprinkles
Step-by-Step Instructions
1. Make the Dough
In a large mixing bowl, combine the gluten-free flour, cornstarch, salt, and sugar. Whisk until evenly blended. Add cold butter cubes, and using a pastry cutter or your fingertips, work the butter into the flour until the mixture resembles coarse crumbs. You should still see small pea-sized bits of butter — these are crucial for flakiness.
In a small bowl, whisk together the egg, milk, and vanilla. Pour the wet mixture into the flour mixture and gently stir with a fork until the dough begins to come together. If it feels too dry, add an extra teaspoon of milk at a time until it holds together but isn’t sticky.
Turn the dough onto a sheet of plastic wrap and form it into a rectangle. Wrap tightly and refrigerate for at least 30 minutes. Chilling helps firm up the butter and hydrate the flour for better rolling later.
2. Prepare the Filling
While the dough chills, prepare your filling.
For fruit jam: warm it slightly and mix with the cornstarch slurry to thicken if needed, then let cool.
For cinnamon sugar: stir together brown sugar, cinnamon, flour, and butter until a crumbly paste forms.
For chocolate: melt the chocolate chips and cream together in the microwave in 15-second intervals, stirring until smooth.
Let all fillings cool completely before using — this prevents the dough from becoming soggy.
3. Roll and Shape
Preheat your oven to 375°F (190°C) and line a baking sheet with parchment paper.
Remove the chilled dough from the fridge and divide it into two equal portions. Roll out one portion between two sheets of parchment paper until about ⅛ inch thick. Cut into equal rectangles (about 3×4 inches each). These will form the bottom halves of your Pop-Tarts.
Transfer the rectangles to your prepared baking sheet. Spoon about 1 tablespoon of your chosen filling into the center of each rectangle, leaving a small border around the edges.
Roll out the second portion of dough and cut matching rectangles for the tops. Gently place each top piece over the filling and press the edges with your fingertips. Use a fork to crimp the edges, sealing in the filling completely.
Prick the tops with a fork a few times to allow steam to escape during baking.
4. Bake to Golden Perfection
Brush the tops lightly with milk or beaten egg for a golden finish. Bake for 20–25 minutes, or until the Pop-Tarts turn light golden brown around the edges.
Remove from the oven and let them cool on the baking sheet for 5 minutes before transferring to a wire rack to cool completely. Cooling is essential before glazing — otherwise, the glaze will melt right off.
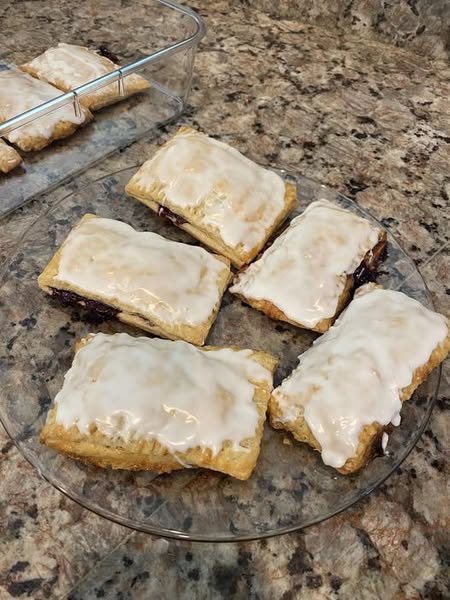
5. Glaze and Decorate
Whisk together powdered sugar, milk, and vanilla extract until smooth and glossy. Adjust consistency as needed — thicker for a bold icing, thinner for a glaze effect.
Spoon or drizzle the glaze over each Pop-Tart and, if desired, add colorful sprinkles, crushed freeze-dried fruit, or a drizzle of chocolate. Let the glaze set for about 15 minutes before serving.
Creative Variations
-
Berry Bliss Pop-Tarts:
Use mixed berry jam and top with a pale pink glaze made from powdered sugar and a drop of beet juice. -
Chocolate Hazelnut Dream:
Fill with chocolate hazelnut spread and top with a cocoa glaze and crushed nuts. -
Apple Cinnamon Delight:
Use apple butter or cooked apples with cinnamon filling for a warm fall flavor. -
Maple Pecan Pop-Tarts:
Add crushed pecans and drizzle with maple icing for a breakfast-style treat. -
Lemon Blueberry Glow:
Fill with blueberry jam and top with lemon icing — a tangy-sweet twist that tastes like summer.
Tips for Gluten-Free Success
-
Keep everything cold: Cold butter and minimal handling are key to a flaky crust.
-
Don’t skip chilling: Gluten-free dough needs time to firm up, making it easier to roll and shape.
-
Use parchment: It prevents sticking and ensures easy transfer to the baking sheet.
-
Avoid overfilling: Too much filling can cause leakage during baking.
-
Store properly: Once cooled, store in an airtight container for up to 3 days, or freeze for up to 2 months. Toast lightly before serving for that signature Pop-Tart warmth.
Why You’ll Love This Recipe
This gluten-free Pop-Tart recipe is a labor of love — one that brings together nostalgic flavors with a wholesome, from-scratch approach. Unlike store-bought versions filled with preservatives and artificial flavors, these pastries are tender, buttery, and endlessly customizable. Every bite offers a perfect balance: crisp edges, soft layers of dough, and a sweet, gooey center that melts in your mouth.
Whether you make them for breakfast, dessert, or a mid-afternoon snack, these homemade gluten-free Pop-Tarts capture the joy of childhood in a more natural, artisanal way. They’re proof that gluten-free baking doesn’t mean giving up indulgence — it means rediscovering it, one flaky, golden pastry at a time.
