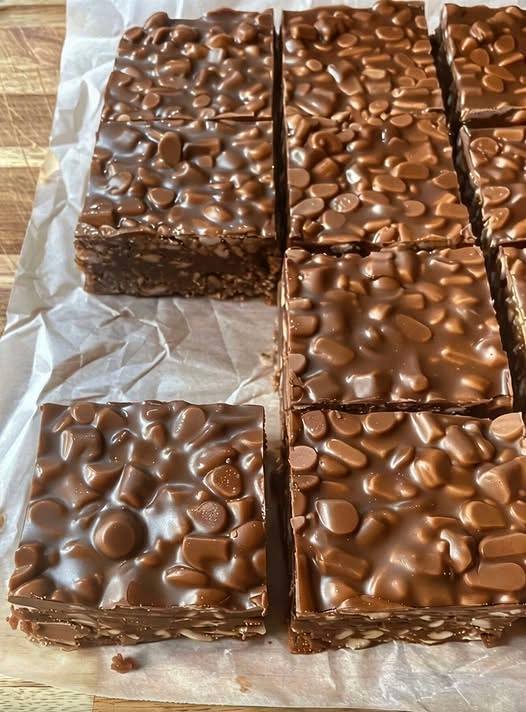
There’s something deeply comforting about chocolate crunch bars. They’re simple, unapologetically chocolatey, and packed with that irresistible crisp bite that makes you reach for just one more square. These bars are a throwback to childhood lunches and bake-sale classics, but when made from scratch with real ingredients, they transform into a grown-up dessert that still hits all the right nostalgic notes.
This homemade version skips artificial flavors and store-bought shortcuts, relying instead on quality chocolate, real butter, and a perfectly balanced crunch. Best of all, they’re no-bake, quick to assemble, and nearly impossible to mess up. Whether you’re making dessert for guests, a sweet snack for the family, or a last-minute treat for a celebration, these chocolate crunch bars deliver every single time.
Why Homemade Chocolate Crunch Bars Are Better
Making chocolate crunch bars from scratch gives you total control over flavor, texture, and sweetness. Store-bought versions often taste overly sweet or waxy, but homemade bars have a smoother chocolate finish and a more satisfying crunch. You can also customize them easily—add nuts, drizzle white chocolate, or sprinkle flaky sea salt for a gourmet twist.
Another huge bonus? No oven required. These bars come together on the stovetop and set in the fridge, making them perfect for warm days or when you just don’t feel like baking.
Ingredients You’ll Need
This recipe uses simple pantry staples, but the quality of your chocolate matters. Choose something you enjoy eating on its own.
-
2 cups semi-sweet chocolate chips or chopped chocolate
-
½ cup unsalted butter
-
¼ cup light brown sugar, packed
-
¼ cup honey or golden syrup
-
1 teaspoon vanilla extract
-
3 cups crispy rice cereal
-
¼ teaspoon salt
Optional add-ins:
Chopped peanuts, almonds, mini marshmallows, shredded coconut, or a pinch of flaky sea salt for topping.
Step-by-Step Instructions
1. Prepare the Pan
Line an 8×8-inch square pan with parchment paper, leaving a bit of overhang on the sides. This makes removing and slicing the bars much easier later. Set aside.
2. Melt the Chocolate Base
In a medium saucepan over low heat, combine the butter, brown sugar, and honey. Stir gently until the butter melts and the mixture becomes smooth and glossy. Be patient—low heat prevents scorching and keeps the texture silky.
Once melted, add the chocolate and salt. Stir continuously until the chocolate is fully melted and the mixture looks thick and luxurious. Remove from heat and stir in the vanilla extract.
3. Add the Crunch
Pour the crispy rice cereal into a large mixing bowl. Slowly add the warm chocolate mixture over the cereal, folding gently with a spatula until every piece is evenly coated. Take your time here—this ensures a perfect crunch in every bite.
If you’re adding nuts or other mix-ins, fold them in now.
4. Press and Chill
Transfer the mixture into the prepared pan. Press it down firmly using the back of a spoon or a spatula, making sure the surface is smooth and compact. A tightly packed bar slices cleanly and holds together better.
Place the pan in the refrigerator for at least 1 hour, or until fully set.
5. Slice and Serve
Once firm, lift the bars out using the parchment overhang. Slice into squares or rectangles with a sharp knife. Serve chilled or at room temperature.
Tips for Perfect Chocolate Crunch Bars
-
Low heat is key: Chocolate scorches easily, so always melt gently.
-
Don’t overmix: Stir just until combined to keep the cereal crisp.
-
Press firmly: This prevents crumbly bars when slicing.
-
Use good chocolate: It’s the star flavor—choose wisely.
Fun Variations to Try
-
Peanut Butter Crunch Bars: Swirl in ¼ cup creamy peanut butter before pressing into the pan.
-
Dark Chocolate Sea Salt Bars: Use dark chocolate and finish with flaky salt.
-
White Chocolate Drizzle: Melt white chocolate and drizzle over the top once set.
-
Holiday Version: Add red and green sprinkles or crushed candy canes.
Storage and Make-Ahead Tips
Store chocolate crunch bars in an airtight container in the refrigerator for up to 7 days. They also freeze beautifully—just wrap individual bars and freeze for up to 2 months. Let them thaw slightly before serving.
Final Thoughts
Chocolate crunch bars from scratch prove that the simplest desserts are often the most satisfying. With their glossy chocolate coating and light, crispy texture, these bars strike the perfect balance between indulgent and comforting. They’re quick, customizable, and guaranteed to disappear fast—so you might want to make a double batch.
