Crustless Pizza Bowl

If you love pizza but want to skip the carbs, this Crustless Pizza Bowl is about to become your new favorite comfort meal. It delivers all the classic flavors—rich tomato sauce, gooey melted cheese, savory meats, and colorful vegetables—without the heavy crust. Whether you’re following a low-carb, keto, or gluten-free lifestyle, or simply trying to eat lighter, this easy recipe satisfies every pizza craving in a healthier way.

Perfect for busy weeknights, meal prep, or even a quick lunch, this crustless pizza bowl comes together in under 30 minutes and is endlessly customizable.


Why You’ll Love This Crustless Pizza Bowl

  • Low in carbs but high in flavor

  • Quick and easy to prepare

  • Family-friendly and customizable

  • Great for meal prep

  • Gluten-free and keto-friendly

You won’t miss the crust—promise!


Ingredients

Here’s what you’ll need for 4 servings:

Base Layer:

  • 1 pound ground Italian sausage (or ground beef)

  • 1 tablespoon olive oil (if needed)

  • 1/2 small onion, diced

  • 2 cloves garlic, minced

Sauce:

  • 1 1/2 cups low-sugar pizza sauce or marinara

  • 1 teaspoon Italian seasoning

  • 1/2 teaspoon dried oregano

  • 1/4 teaspoon red pepper flakes (optional)

Toppings:

  • 1 1/2 cups shredded mozzarella cheese

  • 1/2 cup sliced pepperoni

  • 1/2 cup sliced mushrooms

  • 1/2 cup diced bell peppers

  • 1/4 cup sliced black olives

  • 1/4 cup grated Parmesan cheese

Feel free to adjust toppings based on your preferences.


Step-by-Step Instructions

Step 1: Preheat the Oven

Preheat your oven to 375°F (190°C). Lightly grease 4 oven-safe bowls or ramekins.

Step 2: Cook the Meat

In a large skillet over medium heat, cook the ground sausage until browned and fully cooked, breaking it apart with a spoon. If using lean ground beef, add olive oil first.

Add diced onion and cook for 3–4 minutes until softened. Stir in minced garlic and cook for another 30 seconds until fragrant.

Drain excess grease if necessary.

Step 3: Add the Sauce

Reduce heat to low. Stir in pizza sauce, Italian seasoning, oregano, and red pepper flakes. Simmer for 3–5 minutes to let the flavors blend.

This mixture becomes the hearty base of your pizza bowl.

Step 4: Assemble the Bowls

Spoon the meat and sauce mixture evenly into your prepared bowls.

Top each bowl with:

  • A generous layer of mozzarella

  • Pepperoni slices

  • Mushrooms, peppers, and olives

  • A sprinkle of Parmesan

Layering the cheese on top helps create that classic bubbly pizza finish.

Step 5: Bake

Place bowls on a baking sheet and bake for 12–15 minutes, or until the cheese is melted and bubbly.

For a golden, slightly crispy top, broil for 1–2 minutes at the end—watch carefully so it doesn’t burn.

Step 6: Rest and Serve

Let the bowls cool for 5 minutes before serving. The cheese will thicken slightly and become perfectly gooey.

Serve hot and enjoy!


Customization Ideas

One of the best things about this recipe is how flexible it is.

Make It Vegetarian

Skip the meat and use:

  • Zucchini

  • Spinach

  • Artichokes

  • Extra mushrooms

You can also add plant-based crumbles for protein.

Make It Spicy

Add:

  • Jalapeños

  • Crushed red pepper

  • Spicy Italian sausage

Add More Protein

Include:

  • Grilled chicken

  • Bacon bits

  • Ground turkey

Extra Veggie Boost

Layer in:

  • Cauliflower rice

  • Chopped broccoli

  • Eggplant cubes

This adds volume without extra carbs.


Storage and Meal Prep

This recipe is perfect for meal prep.

  • Store leftovers in an airtight container in the refrigerator for up to 4 days.

  • Reheat in the microwave for 1–2 minutes or in the oven at 350°F until warmed through.

  • You can freeze assembled (but unbaked) bowls for up to 2 months.

Simply thaw overnight and bake as directed.


Nutrition Benefits

Because there’s no crust, this meal is:

  • Lower in carbohydrates

  • Higher in protein

  • Gluten-free

  • Keto-friendly

The protein from the meat and cheese helps keep you full longer, while the vegetables add fiber and nutrients.

You get all the indulgence of pizza with fewer calories and carbs.


Tips for Perfect Pizza Bowls

  • Use high-quality cheese for the best melt and flavor.

  • Don’t overload with watery vegetables like tomatoes unless pre-cooked.

  • Drain meat well to avoid excess grease.

  • Broil briefly for that authentic pizza look.

If you want a slightly crisp base, you can sprinkle a thin layer of shredded cheese directly into the bowl first, bake for 5 minutes, then add the filling on top.


Serving Suggestions

Serve your crustless pizza bowl with:

  • A fresh green salad

  • Garlic butter zucchini noodles

  • Steamed broccoli

  • A light cucumber and tomato salad

For family members who prefer traditional pizza, you can easily serve this alongside garlic bread.


Frequently Asked Questions

Can I make this dairy-free?

Yes. Use dairy-free mozzarella and skip Parmesan. The flavor will still be delicious.

Can I cook this in an air fryer?

Absolutely. Use oven-safe ramekins and cook at 350°F for 8–10 minutes until the cheese melts.

Is this keto-friendly?

Yes, as long as you use low-sugar pizza sauce and avoid high-carb toppings.


Final Thoughts

The Crustless Pizza Bowl proves you don’t need a crust to enjoy everything you love about pizza. It’s rich, cheesy, satisfying, and incredibly easy to customize. Whether you’re cutting carbs, eating gluten-free, or just looking for a quick comfort meal, this recipe delivers big flavor in every bite.
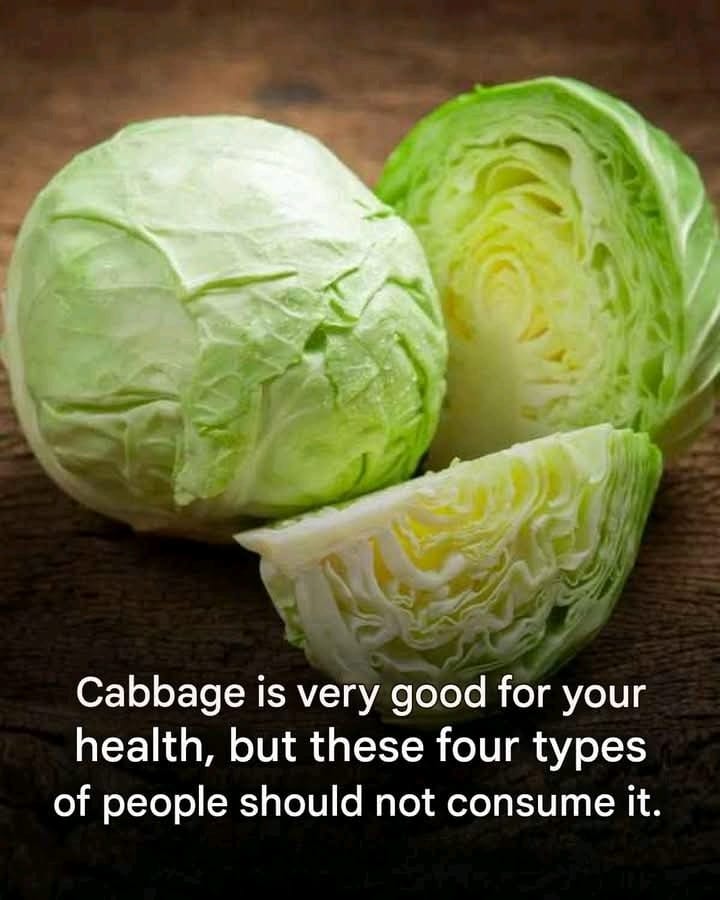
The 4 types of people who shouldn’t eat cabbage

Cabbage is one of the most affordable, versatile, and nutrient-packed vegetables you can add to your meals. Rich in fiber, vitamin C, vitamin K, and powerful antioxidants, it supports digestion, heart health, and immunity. Whether eaten raw in salads, fermented as sauerkraut, or cooked into soups and stir-fries, cabbage is a staple in many kitchens around the world.

However, despite its many benefits, cabbage isn’t ideal for everyone. Certain individuals may experience discomfort or health complications if they consume it regularly or in large amounts. If you love cabbage recipes, it’s important to understand when moderation — or avoidance — may be necessary.

Here are the four types of people who should be cautious about eating cabbage.

  1. People With Thyroid Disorders

Cabbage belongs to the cruciferous vegetable family, which also includes broccoli, cauliflower, and Brussels sprouts. These vegetables contain compounds known as goitrogens. Goitrogens can interfere with the thyroid gland’s ability to absorb iodine, a mineral essential for producing thyroid hormones.

For individuals with hypothyroidism or iodine deficiency, eating large amounts of raw cabbage may worsen symptoms such as fatigue, weight gain, hair thinning, and cold sensitivity. Cooking cabbage significantly reduces its goitrogenic effects, making it safer for those with mild thyroid concerns.

If you have a diagnosed thyroid condition, it doesn’t necessarily mean you must eliminate cabbage completely. Instead, consult your healthcare provider and consider eating it cooked rather than raw.

  1. People With Digestive Sensitivity or IBS

Cabbage is high in fiber and contains certain carbohydrates called FODMAPs (fermentable oligosaccharides, disaccharides, monosaccharides, and polyols). While fiber is generally beneficial, it can cause bloating, gas, and abdominal discomfort in individuals with sensitive digestive systems.

Those with Irritable Bowel Syndrome (IBS) may find that cabbage triggers cramping, excessive gas, or diarrhea. This happens because gut bacteria ferment the fibers and sugars in cabbage, producing gas as a byproduct.

If you experience discomfort after eating cabbage, try smaller portions or switch to cooked versions, which are often easier to digest than raw cabbage. Alternatively, you may consider other low-FODMAP vegetables that are gentler on the stomach.

  1. People Taking Blood Thinners

Cabbage is rich in vitamin K, a nutrient essential for blood clotting. While vitamin K is beneficial for most people, it can interfere with blood-thinning medications such as warfarin.

If you are on anticoagulant therapy, sudden increases in vitamin K intake can reduce the effectiveness of your medication. This may increase the risk of blood clots. On the other hand, drastically reducing vitamin K intake can increase bleeding risk.

Consistency is key. People on blood thinners don’t necessarily have to avoid cabbage entirely, but they should maintain a stable intake and consult their doctor before making significant dietary changes.

  1. People With Kidney Problems

Cabbage contains potassium, which is an important mineral for heart and muscle function. However, individuals with chronic kidney disease may need to limit potassium intake because their kidneys cannot efficiently remove excess potassium from the blood.

High potassium levels can lead to serious complications, including irregular heart rhythms. While cabbage is not the highest-potassium vegetable, large portions could contribute to elevated levels in those with advanced kidney disease.

If you have kidney issues, your healthcare provider or dietitian can help determine safe portion sizes and guide you toward kidney-friendly vegetables.

Healthy Cabbage Stir-Fry Recipe (For Those Who Can Enjoy It)

If cabbage works well for your body, here’s a simple, flavorful recipe you can enjoy as a side dish or light meal.

Ingredients:
2 cups chopped green cabbage
1 tablespoon olive oil
2 cloves garlic, minced
1 small carrot, sliced thin
1/2 teaspoon salt
1/4 teaspoon black pepper
1 teaspoon lemon juice

Instructions:
Heat olive oil in a large pan over medium heat. Add garlic and sauté for 30 seconds until fragrant. Stir in the cabbage and carrot. Cook for 5–7 minutes, stirring occasionally, until the cabbage softens but still has a slight crunch. Season with salt and pepper. Remove from heat and drizzle with lemon juice before serving.

This simple preparation reduces some digestive discomfort compared to raw cabbage and brings out its natural sweetness.

Final Thoughts

Cabbage is undeniably nutritious and budget-friendly, but it’s not suitable for everyone in large quantities. People with thyroid disorders, digestive sensitivities, those on blood thinners, and individuals with kidney disease should be mindful of how much and how often they consume it.

If you fall into one of these categories, talk to a healthcare professional before making cabbage a regular part of your diet. For everyone else, enjoying cabbage in moderation — especially cooked — can be a delicious way to boost your nutrition naturally

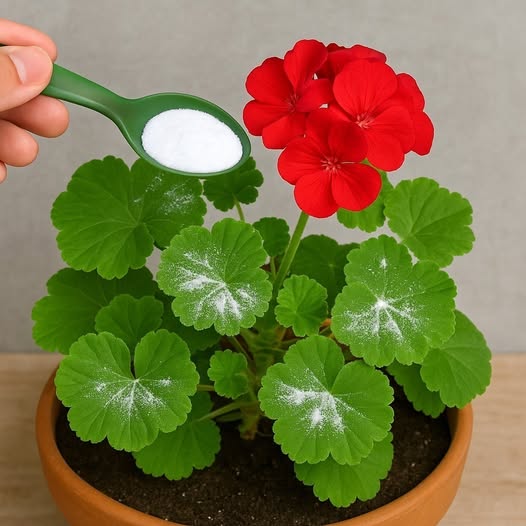
Here’s how to have geraniums full of flowers: you have to water them like this to always have them thriving

Geraniums are among the most loved flowering plants in the world — bright, cheerful, and incredibly generous with blooms when cared for properly. Known botanically as Pelargonium, these popular plants can transform balconies, patios, and gardens into colorful displays that last from spring through late autumn.

But if your geraniums look tired, produce few flowers, or grow lots of leaves but no blooms, the issue is often not sunlight or fertilizer — it’s watering. Yes, the secret to having geraniums full of flowers lies largely in how you water them.

Here’s exactly how to water geraniums so they stay thriving and covered in blooms all season long.

Why Watering Matters More Than You Think

Geraniums are native to South Africa, where they grow in sunny, well-drained conditions. Because of this origin, they are naturally drought-tolerant. Many gardeners make the mistake of treating them like thirsty annuals — and that’s where problems begin.

Overwatering is the number one reason geraniums stop flowering. When roots sit in constantly wet soil, they become stressed, oxygen-deprived, and prone to rot. A stressed plant focuses on survival, not producing flowers.

On the other hand, underwatering can also reduce blooms. If the soil becomes bone-dry for too long, the plant will drop buds and conserve energy.

The key is balance.

The Golden Rule: Let the Soil Dry First

The most important principle is simple:

Never water geraniums on a fixed schedule. Water only when the soil actually needs it.

Before watering, insert your finger about 2–3 centimeters into the soil. If it still feels moist, wait. If it feels dry at that depth, it’s time to water.

This small habit makes a huge difference.

Geraniums prefer their soil to dry out slightly between waterings. This encourages deeper root growth and stronger stems — both essential for abundant flowering.

Water Deeply, Not Lightly

Many people give their geraniums a quick splash every day. This is not ideal.

Instead, water deeply and thoroughly until excess water drains from the bottom of the pot. This ensures the entire root system receives moisture. Then allow the soil to dry before watering again.

Deep watering trains the roots to grow downward, making the plant more resilient and better able to support heavy blooms.

If your geraniums are planted in the ground, water slowly at the base so moisture penetrates deeply into the soil rather than running off the surface.

Always Water at the Base

Another crucial detail: avoid watering from above.

When water sits on leaves and flowers, especially in warm conditions, it can encourage fungal diseases and rot. Wet foliage can also cause unsightly spots.

Instead, aim the water directly at the soil around the base of the plant. Early morning is the best time to water because it allows any accidental splashes to dry quickly in the sun.

Drainage Is Everything

Even perfect watering habits won’t help if your pot or soil doesn’t drain properly.

Make sure:

  • Pots have drainage holes.

  • You use well-draining potting mix.

  • Saucers under pots are emptied after watering.

Geraniums hate “wet feet.” If water collects at the bottom and roots remain soggy, flowering will decline dramatically.

For extra drainage, you can mix a little sand or perlite into your potting soil. This improves airflow around the roots and prevents compaction.

Adjust Watering With the Weather

Geraniums need different amounts of water depending on temperature and sunlight.

  • In hot summer weather: Check soil more frequently, as containers dry quickly.

  • During cooler or cloudy periods: Reduce watering significantly.

  • In rainy conditions: Skip watering altogether.

Always observe the plant. Slightly drooping leaves that recover after watering signal thirst. Yellowing leaves and mushy stems often indicate too much water.

Learning to “read” your plant is one of the most valuable gardening skills.

The Bloom-Boosting Connection

Proper watering directly affects flowering.

When geraniums are slightly stressed (but not dehydrated), they produce more blooms. Mild dryness encourages flowering because the plant shifts energy toward reproduction.

However, constant moisture pushes the plant to produce leafy growth instead of flowers.

If your geranium is healthy but not blooming well, try slightly extending the time between waterings. This subtle adjustment often triggers a fresh wave of blossoms.

Combine Smart Watering With Deadheading

Watering alone won’t guarantee a full display of flowers. To maximize blooms:

  • Remove faded flowers regularly (deadheading).

  • Pinch back leggy stems.

  • Provide at least 6 hours of sunlight daily.

  • Use a balanced fertilizer every 2–3 weeks during peak growing season.

But remember: none of these efforts will work properly if the roots are struggling due to improper watering.

Signs You’re Watering Correctly

You’ll know your watering routine is working when:

  • The plant has firm, upright stems.

  • Leaves are vibrant green (not yellow).

  • Buds continuously form.

  • Flowers appear in dense clusters.

  • Soil dries slightly between waterings but never becomes cracked or hard.

Healthy geraniums reward good care quickly. Once you find the right rhythm, they can bloom nonstop for months.

Final Thoughts

If you want geraniums bursting with flowers, the secret isn’t complicated — it’s consistent, mindful watering.

Let the soil dry slightly.
Water deeply.
Ensure excellent drainage.
Adjust for weather.
Avoid wet leaves.

These simple steps mimic the plant’s natural environment and keep roots strong and stress-free. When roots are happy, flowers follow.

With the right watering method, your geraniums won’t just survive — they’ll thrive, producing wave after wave of vibrant blooms that brighten your home and garden all season long.

9 signs on your feet that may indicate liver problems

Your feet can reveal surprising clues about your overall health — including how well your liver is functioning. The liver plays a crucial role in detoxifying the body, producing bile, regulating hormones, and processing nutrients. When it becomes stressed or damaged, subtle signs can appear in different parts of the body — and your feet are no exception.

Here are 9 signs on your feet that may indicate liver problems, explained in detail.


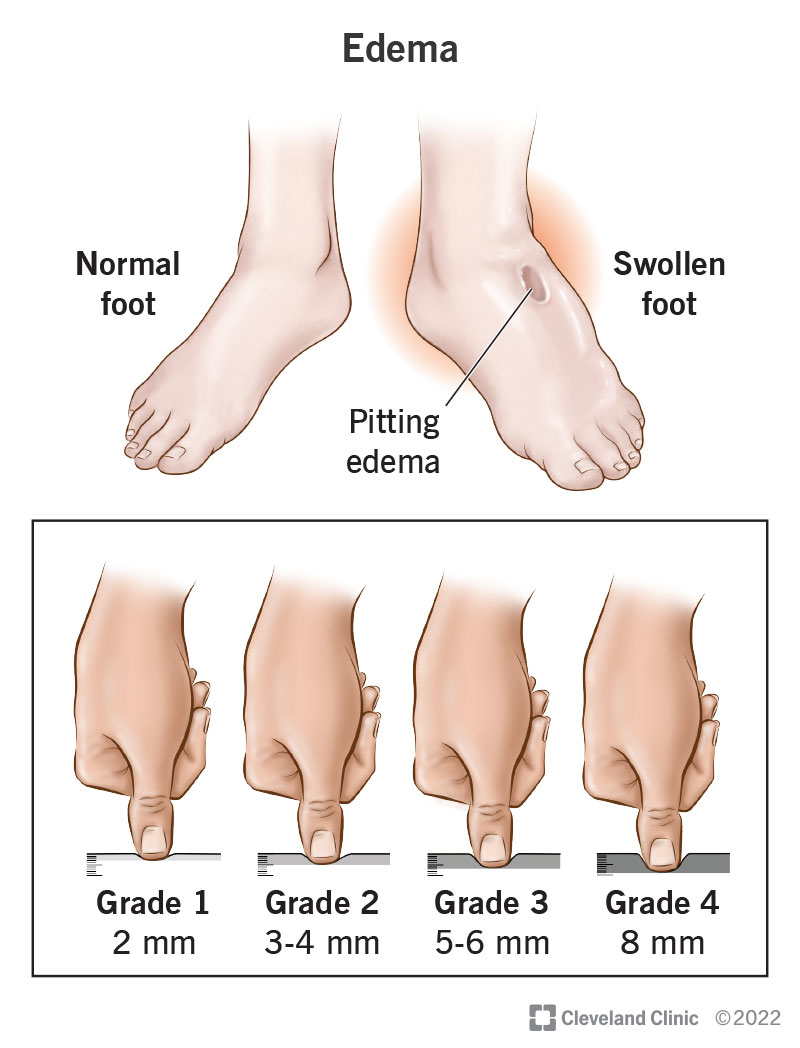
1. Swollen Feet and Ankles (Edema)

https://my.clevelandclinic.org/-/scassets/images/org/health/articles/12564-edema
https://hips.hearstapps.com/hmg-prod/images/swollen-ankles-1566239141.png
https://d16qt3wv6xm098.cloudfront.net/AMHA4I-iQOeSzGJGQAIWsXPeQpCVbu9T/_.png
4

One of the most common signs of liver disease is swelling in the feet and ankles. When the liver is damaged — especially in conditions like cirrhosis — it may not produce enough albumin, a protein that helps keep fluid in the bloodstream.

Low albumin levels allow fluid to leak into surrounding tissues, causing pitting edema (when pressing the skin leaves an indentation). Persistent swelling that doesn’t improve with rest should be evaluated by a doctor.


2. Itchy Feet (Persistent Pruritus)

https://images.squarespace-cdn.com/content/v1/5c0097f045776e176b3154b3/1550091580805-61LDH4I31IKBQP1TBVB6/57261819_S_woman_rash_itch_foot_scratch_red_hand.jpg
https://www.verywellhealth.com/thmb/KNR3_lfAqW4Yd02CUqX47cmRq6Y%3D/2064x1452/filters%3Ano_upscale%28%29%3Amax_bytes%28150000%29%3Astrip_icc%28%29/GettyImages-670950774-4397558556f04966886fbf823aa4ac50.jpg

Chronic itching — especially on the soles of the feet — may be linked to liver dysfunction. When bile flow is impaired (a condition known as cholestasis), bile salts can accumulate in the bloodstream.

This buildup can irritate nerve endings in the skin, leading to intense itching, often worse at night. Unlike allergic itching, it may occur without a visible rash.


3. Yellowing of the Skin (Jaundice)

https://www.verywellhealth.com/thmb/bukLpCJEmZctWUJPNXZZK9JcV2c%3D/1500x0/filters%3Ano_upscale%28%29%3Amax_bytes%28150000%29%3Astrip_icc%28%29/yellow-feet-GettyImages-1534000638-5c2d07ce510e4252a751f0c1cbd72ef1.jpg
https://images.ctfassets.net/ut7rzv8yehpf/4apCMJ58DFHJpSuWTSh89Y/67b80638a538a2a2fccc83dfec7825b2/Causes_of_jaundice_yellow_looking_skin.jpeg?fl=progressive&fm=jpg&h=1840&q=50&w=3264
https://assets.nhs.uk/nhsuk-cms/images/S_1117_jaundice-hand_C0016614.original.max-600x600.jpg

A yellow tint on the soles or toes can be a sign of jaundice. Jaundice occurs when the liver cannot properly process bilirubin, a yellow pigment formed during the breakdown of red blood cells.

While jaundice is often noticeable in the eyes first, it can also affect the skin of the feet. This symptom requires immediate medical attention.


4. Red or Blotchy Feet (Palmar/Plantar Erythema)

https://www.foot-pain-explored.com/images/why-are-my-feet-red.jpg
https://www.researchgate.net/publication/369518753/figure/fig1/AS%3A11431281155095407%401683043463716/Blanching-palmar-and-plantar-erythema-on-the-palm-of-the-left-hand-and-sole-of-the-left.png
https://i.dailymail.co.uk/1s/2019/01/15/23/8575444-6596177-image-a-25_1547594344059.jpg

Persistent redness on the soles — known as plantar erythema — may indicate liver stress. Hormonal imbalances caused by liver disease can lead to dilation of blood vessels, creating a flushed appearance.

This redness is usually painless but noticeable and symmetrical on both feet.


5. Easy Bruising on the Feet

https://getlabtest-assets-prod.s3.amazonaws.com/media/original_images/foot-bruising-anatomical-illustration-health-20384.webp
https://dss.fosterwebmarketing.com/upload/1094/contusion.png
https://www.medicalimages.com/imagePreview/01APAVHE?cl=1&contributor=Scott+Camazine&ds=800&icc=1&imageCode=01APAVHE&imageId=14516643&location=&newStyle=1&qv=95&siteName=www.medicalimages.com&tbc=333333&tc=FFFFFF&title=

If you notice unexplained bruises on your feet, it could be related to liver function. The liver produces clotting factors that help your blood clot properly. When it’s not functioning well, bruising can occur more easily — even from minor bumps you barely remember.

Frequent or large bruises without injury should not be ignored.


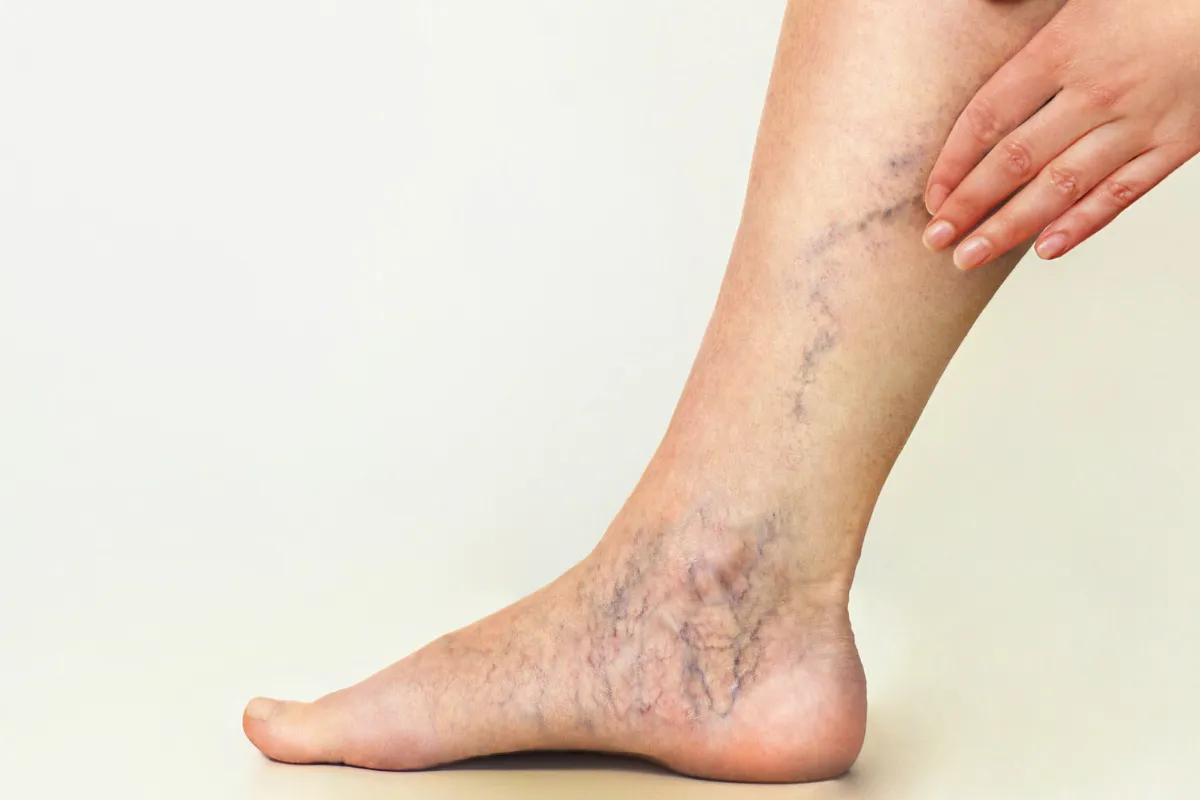
6. Spider Veins Around the Ankles

https://www.metroveincenters.com/media/pages/blog/how-to-treat-foot-and-ankle-spider-veins/0c8f5ae2d3-1754929706/2-q80.webp
https://www.researchgate.net/profile/Thomas-Wright-33/publication/361096493/figure/fig1/AS%3A1183599768403968%401659203583937/Close-up-of-left-lateral-ankle-and-lower-leg-of-Case-3-Notice-the-slight-erythema.png

Small, visible blood vessels around the ankles and feet may sometimes be associated with liver disease. Hormonal changes and increased pressure in blood vessels (portal hypertension) can contribute to the development of spider-like veins.

Although spider veins can occur for many reasons, when combined with other symptoms, they may warrant liver screening.


7. Dark or Brownish Discoloration

https://s3.amazonaws.com/HMP/c360/imported/inline-images/Figure%201_13.jpg?VersionId=iitCQ4EBCzktcChGU6qR0MKFMJJIdqu2
https://sa1s3optim.patientpop.com/assets/images/provider/photos/1747558.jpeg
https://upload.wikimedia.org/wikipedia/commons/d/d2/Foot_002.jpg
4

Changes in pigmentation — especially dark or brown patches on the feet — may signal metabolic or hormonal imbalances linked to liver problems. The liver plays a key role in hormone breakdown, and dysfunction may lead to changes in skin tone.

While discoloration can have many causes, sudden changes should be checked.


8. Cold Feet and Poor Circulation

https://images.fosterwebmarketing.com/1058/Cold_Feet.jpeg
https://www.therochesterfootdoctor.com/uploads/1/0/9/2/109275071/published/poor-circulation-the-foot-doctor.jpg?1517024593=

Advanced liver disease can affect circulation due to changes in blood flow and fluid balance. Some people may notice their feet feeling unusually cold or appearing pale or slightly bluish.

Poor circulation can also lead to numbness or tingling sensations.


9. Cracked Heels with Severe Dryness

While dry feet are common, persistent and severe dryness — especially when accompanied by itching or discoloration — may be linked to impaired bile flow. The liver helps digest fats and absorb fat-soluble vitamins like A and E, which are essential for healthy skin.

A deficiency in these nutrients may lead to rough, cracked heels.


When to See a Doctor

Not every foot change means liver disease. Many of these symptoms can result from other common conditions such as diabetes, poor circulation, skin disorders, or simple dehydration.

However, you should consult a healthcare professional if foot symptoms occur alongside:

  • Fatigue

  • Abdominal swelling

  • Dark urine

  • Pale stools

  • Nausea

  • Loss of appetite

Early detection of liver problems — including fatty liver disease, hepatitis, or cirrhosis — significantly improves outcomes.


Final Thoughts

Your feet can provide valuable clues about what’s happening inside your body. Swelling, itching, discoloration, unexplained bruising, or redness may sometimes reflect liver stress or dysfunction.

That said, these signs alone do not confirm liver disease. They are warning signals — not diagnoses. If you notice persistent or unusual changes

f peanut butter fudge

If you love smooth, melt-in-your-mouth sweets with deep nutty flavor, peanut butter fudge is a timeless treat that never disappoints. It’s creamy, rich, slightly salty, and perfectly sweet — ideal for holidays, family gatherings, or simply satisfying a craving. The best part? You don’t need fancy equipment or complicated techniques. This recipe is beginner-friendly and delivers consistent, bakery-style results every time.

Below is a detailed, step-by-step guide to making classic peanut butter fudge at home.


3 mistakes to avoid when charging your phone

3 Mistakes to Avoid When Charging Your Phone

In today’s world, smartphones are more than just communication devices — they are cameras, wallets, alarm clocks, offices, and entertainment hubs all in one. Because we rely on them so heavily, keeping the battery healthy is extremely important. Yet many people unknowingly damage their phone’s battery through poor charging habits.

Modern smartphones use lithium-ion batteries. These batteries are powerful and long-lasting, but they are also sensitive to heat, overcharging stress, and poor charging practices. If you want your phone battery to last longer and perform better, here are three major mistakes you should avoid when charging your phone.


1. Charging Your Phone to 100% All the Time

Many people believe that charging their phone to 100% every single time is the best practice. It feels logical — full battery means more usage time. However, lithium-ion batteries don’t like being at 100% for long periods.

When your phone stays at full charge for hours, especially overnight, it creates stress on the battery cells. While modern phones are smart enough to stop charging once they reach 100%, they still experience small “top-up” cycles that keep the battery full. Over time, this constant stress can reduce battery lifespan.

Experts often recommend keeping your battery between 20% and 80% for optimal health. This range reduces strain and helps maintain long-term performance. Some smartphones even include battery optimization features that delay charging past 80% until just before you wake up.

Charging to 100% occasionally is perfectly fine — especially if you need the extra power for travel or a long day. The problem arises when it becomes a daily habit.

Better habit: Try unplugging your phone once it reaches around 80–90%, especially if you’re charging during the day.


2. Letting Your Battery Drop to 0% Frequently

On the other end of the spectrum, some people wait until their phone completely dies before charging it again. This habit may have been useful years ago with older battery technologies, but it’s harmful for modern lithium-ion batteries.

Deep discharging — letting your phone drop to 0% — places significant stress on the battery. If done repeatedly, it can permanently reduce battery capacity. In extreme cases, if a battery remains fully discharged for a long time, it may struggle to charge again.

Lithium-ion batteries perform best with partial charges. They prefer short, frequent charging sessions rather than dramatic 0% to 100% cycles.

If your battery regularly drops below 10%, it’s time to change your charging routine. Keeping it above 20% is ideal for long-term battery health.

Better habit: Plug in your phone when it reaches 20–30% instead of waiting for it to die.


3. Using Cheap or Unsafe Chargers

Not all chargers are created equal. Using low-quality or counterfeit chargers can damage your battery and even pose safety risks.

Cheap chargers may not regulate voltage properly. Inconsistent power delivery can overheat your battery, which is one of the biggest enemies of lithium-ion technology. Excessive heat accelerates battery degradation and may cause swelling or long-term performance issues.

Overheating doesn’t just come from poor chargers — it can also happen when you use your phone heavily while charging. Gaming, streaming videos, or running demanding apps during charging generates additional heat. Combined with charging heat, this can strain the battery.

Whenever possible, use the original charger that came with your phone or purchase certified replacements from reputable brands. It’s a small investment that protects an expensive device.

Better habit: Use manufacturer-approved chargers and avoid heavy phone use while charging.


Bonus Tips for Healthier Charging

Beyond the three major mistakes above, here are a few additional tips that can help extend your battery life:

  • Avoid charging your phone under your pillow or in hot environments.

  • Remove thick cases if your phone becomes hot during charging.

  • Turn on battery optimization settings in your phone’s system.

  • Avoid leaving your phone in direct sunlight.

  • If storing your phone for a long period, keep it at around 50% charge.

Temperature control is just as important as charge percentage. Heat is the number one factor that reduces battery lifespan.


Why Battery Health Matters

Many people only think about battery care when they start noticing problems — shorter battery life, sudden shutdowns, or slow performance. But battery degradation happens gradually.

Replacing a battery can be expensive, and in some modern smartphones, it requires professional service. Good charging habits can extend your battery’s lifespan by months or even years.

Taking care of your battery doesn’t mean obsessing over every percentage point. It simply means avoiding extreme habits — don’t keep it full constantly, don’t let it die regularly, and don’t expose it to excessive heat.


Final Thoughts

Your smartphone battery is designed to last, but your habits determine how well it ages. Avoiding these three common mistakes — charging to 100% all the time, letting it drop to 0% frequently, and using poor-quality chargers — can significantly improve battery longevity.

Think of your battery like your health. Balance is key. Moderate charging, proper equipment, and temperature awareness will keep your phone running smoothly for years.

Small changes today can save you money and frustration tomorrow.

If your HANDS fall asleep it’s a clear sign that you might have

If you have this plant in your home, it’s because it has

Especially after 60: Who should an older person live with

Turning 60 is not just a milestone birthday — it often marks the beginning of a new chapter in life. Retirement, changing health needs, emotional shifts, and evolving family dynamics all raise an important question: who should an older person live with? The answer is deeply personal and depends on health, finances, relationships, independence, and personal preferences. There is no single “correct” arrangement, but understanding the options can help seniors and their families make thoughtful, empowering decisions.

Living With a Spouse or Partner

For many older adults, continuing to live with a spouse or long-term partner is the most natural choice. A familiar companion provides emotional stability, shared history, and daily support. Studies consistently show that companionship can reduce loneliness, depression, and cognitive decline.

However, as couples age, health differences can become more noticeable. One partner may become a caregiver for the other. While this can strengthen bonds, it can also lead to stress and burnout. Honest conversations about future care needs, finances, and possible outside help are essential. When both partners remain relatively healthy and independent, living together can offer comfort, security, and a strong sense of purpose.

Living With Adult Children

In many cultures, multigenerational living is common and valued. Living with adult children can offer practical benefits: shared expenses, assistance with medical appointments, help with daily tasks, and the joy of being close to grandchildren. It may also provide emotional reassurance for both generations.

However, this arrangement requires clear boundaries. Older parents may struggle with feeling like a burden, while adult children may face financial or emotional pressure. Privacy and independence must be respected on both sides. Successful multigenerational households usually rely on open communication, shared responsibilities, and mutual respect.

Living Alone

Many people over 60 prefer to live alone — and thrive doing so. Independence fosters confidence, control, and a sense of dignity. For seniors who are healthy and socially active, living alone can be empowering.

That said, safety becomes an important consideration. Falls, sudden illnesses, or emergencies are real risks. Seniors living alone benefit from strong community ties, regular family check-ins, accessible healthcare, and possibly medical alert systems. Social engagement is also crucial. Isolation can negatively affect both mental and physical health, so maintaining friendships, hobbies, and community involvement is essential.

Living With Other Seniors

Senior communities, retirement villages, and shared housing arrangements with peers are increasingly popular. These settings allow older adults to maintain independence while enjoying social interaction and shared activities.

Living among peers reduces loneliness and provides built-in companionship. Many communities also offer amenities such as fitness programs, meal services, and healthcare access. This option is particularly appealing for widowed or single seniors who want both independence and social support without relying entirely on family.

Assisted Living or Care Facilities

When health concerns become more complex, assisted living facilities or nursing homes may be the safest option. These environments provide medical supervision, help with daily activities, and structured routines.

Some families feel guilt when considering professional care, but it can actually improve quality of life when needs exceed what family members can provide. The key is choosing a facility that prioritizes dignity, respect, and individualized care. Regular visits from family members help maintain emotional bonds and reduce feelings of abandonment.

Factors to Consider

Choosing the right living arrangement after 60 involves more than convenience. Important factors include:

Health Status
Chronic conditions, mobility limitations, or cognitive decline may require additional support. A healthy 62-year-old may prefer independence, while an 80-year-old with medical needs might require assistance.

Financial Situation
Housing, healthcare, and daily expenses must be sustainable. Some living arrangements reduce costs through shared expenses, while others may require long-term financial planning.

Emotional Well-Being
Loneliness can significantly impact health. Living in a supportive, socially connected environment is just as important as physical care.

Level of Independence
Many seniors value autonomy. The ideal arrangement supports independence while ensuring safety.

Family Dynamics
Relationships matter. A peaceful, respectful household is far more important than simply living under the same roof.

There Is No One-Size-Fits-All Answer

The best living arrangement after 60 is one that balances independence, safety, emotional fulfillment, and practical support. For some, that means staying in their own home with occasional help. For others, it means moving closer to family or joining a senior community.

What matters most is choice. Older adults should be involved in the decision-making process whenever possible. Their voice, preferences, and dignity deserve respect. Rather than asking “Where should they live?” the better question might be, “Where will they feel safest, happiest, and most valued?”

Aging does not mean losing independence or identity. With thoughtful planning and open communication, living arrangements after 60 can support not just survival, but a meaningful and fulfilling life.

Doctors reveal that eating boiled eggs causes