Carb-Free Carnivore Pizza

Carb-Free Carnivore Pizza (Zero-Crust, High-Protein Comfort Food)

If you’re following a strict carnivore or very low-carb lifestyle, pizza cravings can hit hard. The good news? You don’t need flour, grains, or even vegetables to enjoy a satisfying slice. This carb-free carnivore pizza is rich, cheesy, protein-packed, and completely grain-free. It’s perfect for keto, carnivore, and anyone cutting carbs while still wanting comfort food.

This recipe uses a meat-based crust and simple animal-based toppings to create a hearty, flavorful pizza without hidden sugars or plant ingredients. Whether you’re meal-prepping for the week or hosting a low-carb dinner night, this carnivore pizza will impress.


Why You’ll Love This Carnivore Pizza

  • Zero grains and zero flour

  • No hidden carbs

  • High in protein and healthy fats

  • Simple ingredients

  • Customizable to your carnivore preferences

Unlike cauliflower crust or almond flour crust versions, this recipe stays true to the carnivore approach by using meat and cheese only.


Ingredients

For the Meat Crust:

  • 1 ½ pounds ground beef (80/20 works best for flavor)

  • 1 large egg

  • ½ cup grated parmesan cheese

  • ½ teaspoon sea salt

  • ½ teaspoon black pepper (optional if strict carnivore)

For the Toppings:

  • 1 cup shredded mozzarella cheese

  • 6–8 slices pepperoni (sugar-free)

  • ½ cup cooked and crumbled Italian sausage

  • Extra mozzarella for topping

  • Optional: cooked bacon pieces

Make sure your meats are free from added sugars or fillers if you’re staying strictly carnivore.


Step-by-Step Instructions

1. Prepare the Oven

Preheat your oven to 400°F (200°C). Line a pizza pan or baking sheet with parchment paper to prevent sticking.

2. Mix the Crust

In a large bowl, combine the ground beef, egg, parmesan cheese, salt, and pepper. Mix thoroughly until fully incorporated but don’t overwork the meat.

3. Shape the Crust

Place the mixture onto the parchment paper and flatten it into a round pizza shape about ¼ inch thick. Try to keep the thickness even to ensure proper cooking.

4. Pre-Bake the Crust

Bake the meat crust for 15–18 minutes, or until fully cooked and slightly browned around the edges. You’ll notice some grease released—this is normal.

Remove from the oven and carefully drain excess grease using paper towels.

5. Add the Toppings

Sprinkle mozzarella evenly over the crust. Add pepperoni, sausage, bacon, or any preferred carnivore-friendly toppings.

6. Final Bake

Return to the oven and bake for another 8–10 minutes, or until the cheese is melted and bubbly.

7. Rest and Slice

Let the pizza rest for 5 minutes before slicing. This helps the crust firm up and makes slicing easier.


Texture & Flavor Tips

  • For a crispier crust: Broil for 1–2 minutes at the end.

  • For thicker crust lovers: Double the crust mixture and bake slightly longer.

  • For extra richness: Add small cubes of cream cheese under the mozzarella.

The result is a juicy, savory crust with a cheesy top layer that satisfies pizza cravings without breaking your carb goals.


Nutritional Benefits

This carb-free carnivore pizza is:

  • High in complete protein

  • Rich in B vitamins from beef

  • Packed with calcium from cheese

  • Extremely low in carbohydrates

  • Naturally gluten-free

Depending on toppings, one serving can contain nearly zero carbs, making it ideal for ketosis and carnivore-focused eating.


Storage & Reheating

Refrigerator: Store leftovers in an airtight container for up to 4 days.

Freezer: Wrap slices individually and freeze for up to 2 months.

Reheating Tip: Reheat in an oven or air fryer at 350°F for 5–7 minutes to restore crispness. Avoid microwaving if you want to keep the crust firm.


Variations

Chicken Crust Version

Replace ground beef with ground chicken for a lighter flavor. Add extra parmesan for binding.

Dairy-Free Option

If you avoid dairy, skip cheese in the crust and use egg as the primary binder. The texture will be slightly softer but still delicious.

Extra-Meaty Supreme

Layer thin slices of steak on top after baking for a steakhouse-style carnivore pizza.


Common Questions

Is this truly zero-carb?
Most meats and cheeses contain negligible carbs. Always check labels to avoid hidden sugars.

Can I make this in a cast-iron skillet?
Yes! Pre-bake the crust in a well-seasoned cast-iron skillet for an even crispier bottom.

Will the crust hold together?
Yes, as long as you pre-bake and drain excess grease before adding toppings.


Final Thoughts

You don’t have to give up pizza to stay carb-free. This carnivore pizza delivers bold flavor, satisfying texture, and total comfort without the carbs. It’s simple, hearty, and packed with protein—everything you want from a meal when following a strict low-carb lifestyle.

Make it once, and it may become your new weekly favorite.
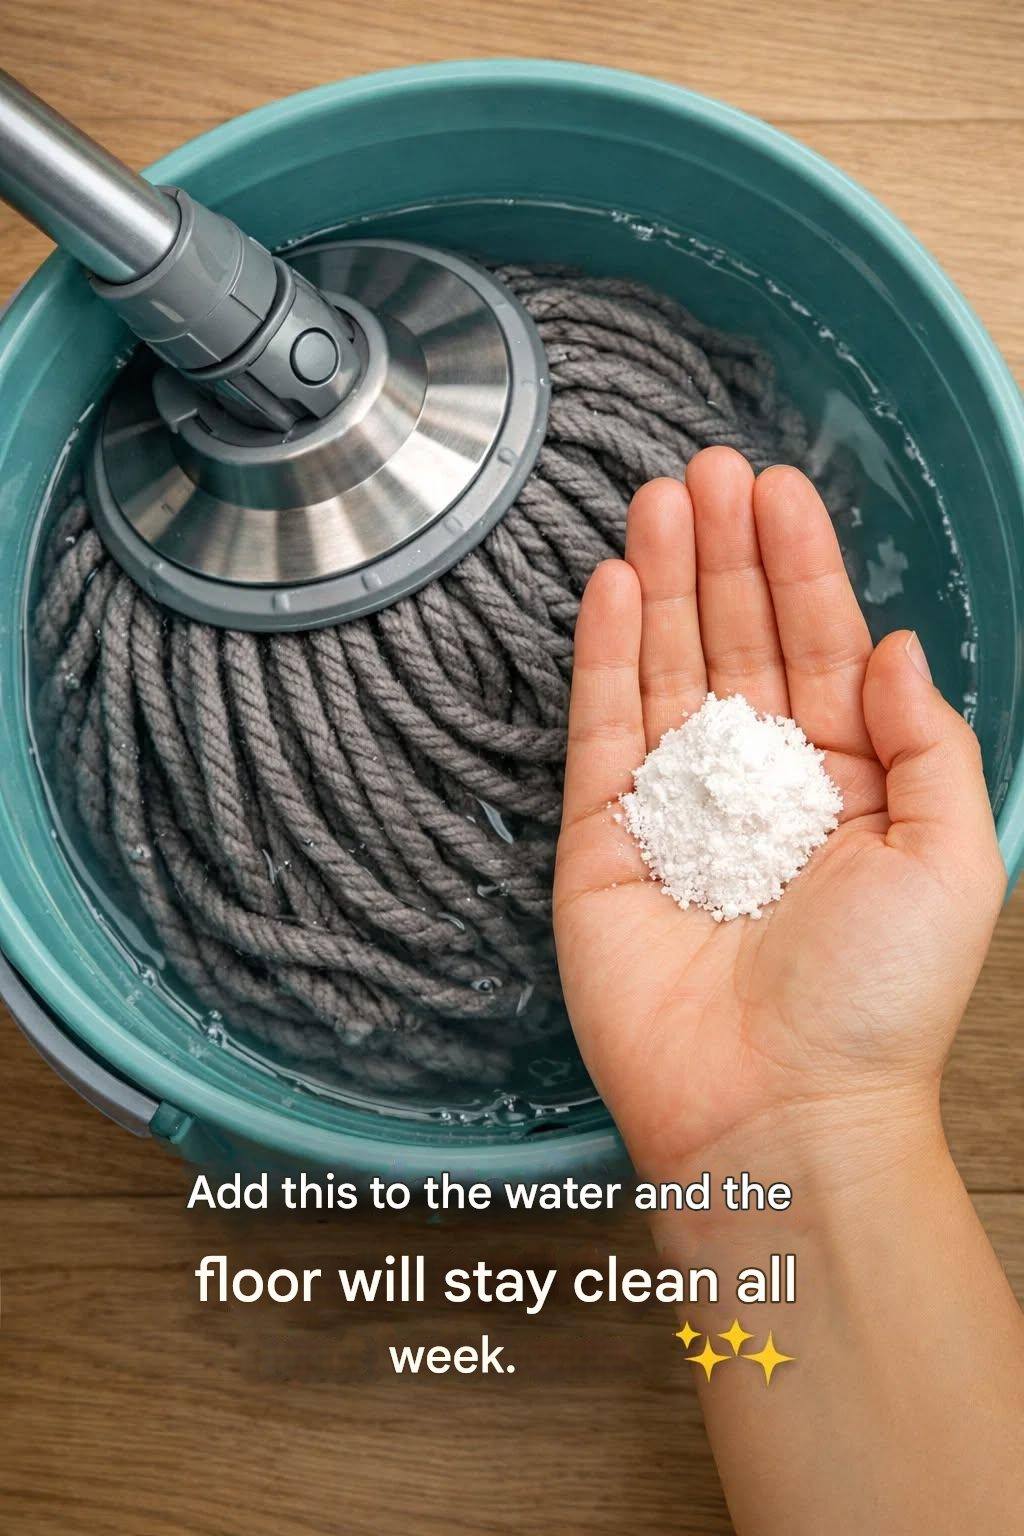
Put this ingredient in your bucket and your floor will stay clean

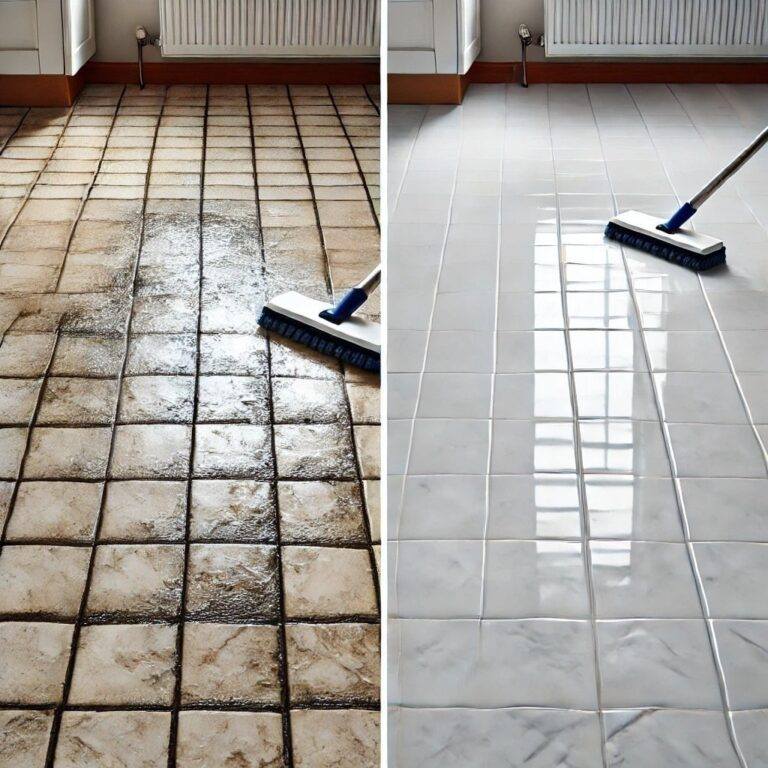
Keeping your floors clean can sometimes feel like an endless chore. No matter how often you mop, dust, footprints, stains, and dullness seem to return quickly. However, there is one simple ingredient that can transform your regular mop water into a powerful cleaning solution: white vinegar. This affordable, natural, and highly effective ingredient has been used for generations to clean and protect floors. When added to your cleaning bucket, vinegar not only removes dirt but also helps prevent buildup, leaving your floors cleaner for longer.

This simple cleaning method is safe, economical, and easy to prepare at home using ingredients you likely already have. With the right mixture and technique, you can maintain shiny, fresh floors without relying on harsh chemical cleaners.

Why Vinegar Works So Well

White vinegar contains acetic acid, which is excellent at breaking down grease, grime, mineral deposits, and bacteria. Unlike many commercial cleaners that leave behind sticky residue, vinegar evaporates cleanly, leaving floors smooth and streak-free.

Here are some of the main benefits of adding vinegar to your mop bucket:

  • Removes dirt and grease effectively

  • Eliminates odors naturally

  • Prevents residue buildup

  • Helps restore shine

  • Reduces bacteria on surfaces

  • Safe and non-toxic for most households

Because vinegar cleans deeply without leaving residue, your floors stay cleaner longer, meaning less frequent mopping is required.

Ingredients You Will Need

This simple floor-cleaning solution requires only a few basic ingredients:

  • 1 bucket of warm water (about 4–5 liters)

  • ½ cup white vinegar

  • 1 tablespoon mild dish soap (optional, for extra cleaning power)

  • 5–10 drops essential oil (optional, for fragrance such as lemon, lavender, or eucalyptus)

These ingredients work together to clean, disinfect, and refresh your floors naturally.

Step-by-Step Preparation

Step 1: Fill Your Bucket

Start by filling your cleaning bucket with warm water. Warm water helps loosen dirt and improves the effectiveness of vinegar.

Step 2: Add White Vinegar

Pour ½ cup of white vinegar into the water. This is the key ingredient that breaks down grime and keeps floors cleaner longer.

Step 3: Add Dish Soap (Optional)

If your floors are especially dirty or greasy, add 1 tablespoon of mild dish soap. This helps lift stubborn dirt without damaging surfaces.

Step 4: Add Essential Oil (Optional)

Add a few drops of essential oil to improve the scent. Vinegar smell disappears quickly, but essential oils provide a pleasant, fresh aroma.

Step 5: Mix Gently

Stir the solution gently with your mop or hand to combine all ingredients evenly.

How to Use the Solution Properly

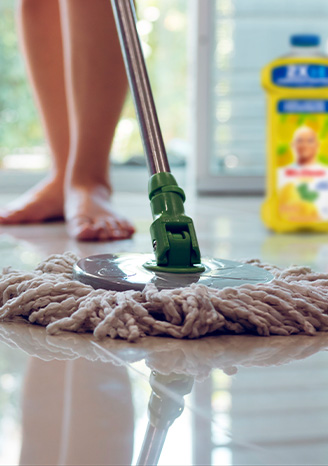
  1. Dip your mop into the solution.

  2. Wring out excess water to avoid soaking the floor.

  3. Mop in sections, moving from the farthest corner toward the exit.

  4. Allow the floor to air dry naturally.

  5. Avoid rinsing, as the vinegar continues working while drying.

This method ensures a streak-free, clean finish.

Suitable Floor Types

This vinegar solution works safely on many floor types, including:

  • Tile floors

  • Vinyl floors

  • Laminate floors

  • Sealed hardwood floors

  • Linoleum floors

However, avoid using vinegar on natural stone surfaces like marble or granite, as acid can damage them.

Why Floors Stay Cleaner Longer

The secret lies in vinegar’s ability to remove residue completely. Many commercial cleaners leave behind a thin film that attracts dust and dirt. Vinegar removes that film, leaving a smooth surface that resists buildup.

Additionally, vinegar neutralizes odor-causing bacteria, helping your home stay fresh longer.

Extra Tips for Best Results

To maximize the effectiveness of this cleaning method, follow these helpful tips:

  • Sweep or vacuum before mopping

  • Use warm, not hot, water

  • Change the solution if it becomes dirty

  • Mop regularly for maintenance

  • Use a microfiber mop for better cleaning

Consistency helps maintain long-lasting cleanliness.

Budget-Friendly and Eco-Friendly Solution

This cleaning method is not only effective but also affordable. White vinegar costs much less than most commercial cleaners and lasts longer. It also reduces chemical exposure, making it safer for families, children, and pets.

Using natural cleaning solutions helps protect indoor air quality and the environment.

Common Mistakes to Avoid

Avoid these common errors when using vinegar for floor cleaning:

  • Using too much vinegar

  • Not wringing out the mop properly

  • Skipping sweeping before mopping

  • Using on unsealed wood or natural stone

Following the correct steps ensures safe and effective cleaning.

Signs Your Floor Is Properly Cleaned

You will notice several improvements after using this solution:

  • Brighter, shinier surface

  • No sticky feeling

  • Fresh, clean smell

  • Reduced dust accumulation

  • Smooth finish without streaks

These signs indicate that the vinegar solution is working effectively.

Long-Term Benefits

Using vinegar regularly helps maintain your floors in excellent condition. Over time, you may notice:

  • Less need for deep cleaning

  • Improved floor appearance

  • Reduced cleaning effort

  • Longer lifespan of floor materials

This simple habit makes floor maintenance easier and more efficient.

Conclusion

Adding white vinegar to your mop bucket is one of the easiest and most effective ways to keep your floors clean and shiny. This simple ingredient removes dirt, eliminates odors, and prevents buildup, helping your floors stay cleaner for longer. It is affordable, safe, and easy to use, making it an excellent alternative to expensive commercial cleaners.

Angel Chicken with Italian Dressing Mix

Angel Chicken with Italian Dressing Mix is one of those magical recipes that turns simple pantry ingredients into a rich, creamy, and unforgettable meal. This dish is beloved for its tender, juicy chicken bathed in a velvety sauce infused with herbs, garlic, and tangy Italian seasoning. It gets its heavenly name from its delicate texture and comforting flavor that feels almost too good to be true. Whether you prepare it for a weeknight dinner or serve it to guests, Angel Chicken delivers restaurant-quality taste with minimal effort.

This recipe is especially popular because it uses Italian dressing mix as a seasoning shortcut. That one packet brings a perfect balance of herbs, spices, and tangy flavor, eliminating the need to measure multiple ingredients. Combined with cream cheese, butter, and a creamy soup base, the result is a luxurious sauce that coats every bite of chicken beautifully. Served over pasta, rice, or mashed potatoes, this dish becomes a complete and satisfying meal.

Ingredients

To prepare Angel Chicken with Italian Dressing Mix, you will need:

  • 4 boneless, skinless chicken breasts

  • 1 packet Italian dressing mix (dry seasoning packet)

  • 1 can (10.5 oz) cream of chicken soup

  • 4 oz cream cheese, softened

  • ½ cup chicken broth

  • ¼ cup unsalted butter

  • 3 cloves garlic, minced

  • ½ teaspoon black pepper

  • ½ teaspoon paprika (optional, for extra flavor)

  • 8 oz angel hair pasta (optional, for serving)

  • Fresh parsley for garnish (optional)

Instructions

Step 1: Prepare the Chicken

Start by patting the chicken breasts dry with paper towels. This helps the seasoning stick better and improves the texture. Season lightly with black pepper and paprika if using. You do not need salt because the Italian dressing mix already contains seasoning.

Step 2: Make the Creamy Sauce

In a medium bowl, combine the cream of chicken soup, softened cream cheese, chicken broth, minced garlic, and the packet of Italian dressing mix. Stir well until the mixture becomes smooth and evenly blended. The cream cheese should be fully incorporated to create a creamy consistency.

Step 3: Arrange in Cooking Dish

Place the chicken breasts in a baking dish or slow cooker. Pour the prepared sauce evenly over the chicken, ensuring each piece is fully coated. Cut the butter into small pieces and distribute them over the top. This adds richness and helps create a silky sauce as it melts.

Step 4: Cook the Chicken

Oven Method:
Preheat your oven to 180°C (350°F). Cover the baking dish with foil and bake for 35–45 minutes, or until the chicken is fully cooked and tender.

Slow Cooker Method:
Cook on low for 5–6 hours or on high for 3–4 hours. The slow cooking method produces extremely tender chicken that almost melts in your mouth.

Step 5: Prepare the Pasta

About 10 minutes before the chicken is done, cook the angel hair pasta according to package instructions. Drain and set aside.

Step 6: Serve

Place the cooked pasta on plates and top with the creamy Angel Chicken and sauce. Garnish with fresh parsley if desired. Serve hot and enjoy.

Why This Recipe Works So Well

The magic of Angel Chicken lies in the combination of creamy and tangy flavors. The Italian dressing mix adds herbs like oregano, basil, and garlic powder, while the cream cheese and butter balance the tanginess with smooth richness. The chicken absorbs the flavors during cooking, making every bite juicy and delicious.

Angel hair pasta is the traditional pairing because its light texture complements the creamy sauce perfectly. However, you can also serve this dish with rice, mashed potatoes, or even crusty bread to soak up the sauce.

Tips for Perfect Angel Chicken

Use softened cream cheese: This ensures smooth mixing and prevents lumps in the sauce.

Do not overcook the chicken: Overcooking can make chicken dry. Use a thermometer if possible; the internal temperature should reach 75°C (165°F).

Add mushrooms or spinach: For extra flavor and nutrition, you can add sliced mushrooms or fresh spinach to the sauce before cooking.

Use chicken thighs if preferred: Chicken thighs are naturally juicier and work very well in this recipe.

Variations

Spicy Version: Add red pepper flakes or chili powder for heat.

Garlic Lovers Version: Double the garlic for a stronger flavor.

Low-Carb Version: Serve over steamed vegetables like broccoli or cauliflower instead of pasta.

Extra Creamy Version: Add ¼ cup heavy cream to the sauce mixture.

Storage and Reheating

Angel Chicken stores very well, making it ideal for meal prep.

Refrigerator: Store in an airtight container for up to 3 days.

Freezer: Freeze for up to 2 months. Thaw overnight in the refrigerator before reheating.

Reheating: Warm gently on the stove or microwave. Add a splash of milk or broth if the sauce becomes too thick.

Serving Suggestions

This dish pairs wonderfully with:

  • Steamed vegetables like broccoli or green beans

  • Garlic bread or dinner rolls

  • Fresh salad with light vinaigrette

  • Roasted potatoes

The creamy sauce complements both simple and hearty side dishes.

Conclusion

Angel Chicken with Italian Dressing Mix is the perfect combination of convenience and comfort. With just a few ingredients and minimal preparation, you can create a rich, flavorful dish that tastes like it took hours to make. The creamy sauce, tender chicken, and aromatic herbs make it a favorite for families and dinner guests alike.

the most flavorful potatoes

If you think potatoes need a long list of spices and complicated steps to taste amazing, think again. These are hands down the most flavorful potatoes you’ll ever make — and they use just three simple ingredients. That’s it. No fancy techniques, no hard-to-find seasonings, and no hours in the kitchen.

Perfectly crispy on the outside, fluffy and tender on the inside, and coated with a savory, golden crust, this recipe is a game-changer for busy weeknights or impressive side dishes. Once you try them, you’ll never go back to plain roasted potatoes again.

Let’s dive in.


Why This Recipe Works

The magic of this recipe lies in the simplicity. When you focus on just three high-quality ingredients, each one shines. The potatoes roast to crispy perfection, the oil helps create that golden crust, and the final ingredient adds a rich, bold flavor that makes these potatoes unforgettable.

This recipe is:

  • Budget-friendly

  • Family-approved

  • Perfect for meal prep

  • Naturally vegetarian

  • Easy to customize

Whether you’re serving them alongside grilled chicken, steak, fish, or even eggs for breakfast, these potatoes fit any meal.


Ingredients (Serves 4)

You only need:

  • 2 pounds baby potatoes (or Yukon Gold potatoes)

  • 3 tablespoons olive oil

  • ¾ cup freshly grated Parmesan cheese

That’s it. Three ingredients. Simple but powerful.


Step-by-Step Instructions

1. Preheat the Oven

Preheat your oven to 400°F (200°C). A hot oven is essential for getting that crispy, golden exterior.

Line a large baking sheet with parchment paper for easy cleanup.

2. Prepare the Potatoes

Wash and scrub the potatoes thoroughly. If using baby potatoes, cut them in half. If using larger Yukon Gold potatoes, cut them into evenly sized chunks.

Uniform size is important so they cook evenly.

Pat the potatoes dry with a clean kitchen towel. Removing excess moisture helps them crisp up beautifully in the oven.

3. Toss with Olive Oil

Place the potatoes in a large bowl and drizzle with olive oil. Toss until every piece is evenly coated.

The oil helps the potatoes roast instead of steam and creates that irresistible crispy texture.

4. Add the Parmesan

Sprinkle the grated Parmesan cheese over the oiled potatoes. Toss again to coat.

The cheese will melt and form a savory crust while baking. As it roasts, it creates crispy edges packed with bold flavor.

5. Arrange and Roast

Spread the potatoes cut-side down on the prepared baking sheet. Make sure they’re in a single layer and not overcrowded. Overcrowding causes steaming instead of roasting.

Bake for 35–45 minutes, depending on size, flipping halfway through.

They’re done when:

  • The edges are deeply golden

  • The bottoms are crispy

  • The inside is fork-tender

Let them cool for a few minutes before serving.


Pro Tips for Maximum Flavor

Use freshly grated Parmesan. Pre-shredded cheese often contains anti-caking agents that prevent proper melting and crisping.

Don’t skip drying the potatoes. Moisture is the enemy of crispiness.

Flip halfway through baking. This ensures even browning on all sides.

Use a metal baking sheet. It helps conduct heat better for crispier results.


Optional Flavor Boosters (If You Want to Customize)

While the 3-ingredient version is incredible on its own, you can easily elevate the flavor with optional add-ins:

  • Garlic powder

  • Fresh rosemary

  • Smoked paprika

  • Cracked black pepper

  • Chili flakes

But remember — they’re amazing even without extras.


What Makes These Potatoes So Addictive?

The contrast in texture is what truly makes this dish special. The outside becomes crispy and slightly cheesy, while the inside stays soft and fluffy. The Parmesan adds a salty, nutty depth that pairs perfectly with the natural sweetness of roasted potatoes.

Unlike deep-fried potatoes, these are oven-roasted, which means less mess and less oil — but just as much crunch.


Serving Ideas

These flavorful potatoes pair well with almost anything:

  • Grilled meats

  • Baked salmon

  • Roasted vegetables

  • Fried or scrambled eggs

  • Burgers and sandwiches

They’re also fantastic served with a dipping sauce like garlic aioli, ranch, or spicy ketchup.


Storage and Reheating

If you have leftovers (which is rare!), store them in an airtight container in the refrigerator for up to 4 days.

To reheat:

  • Oven: 375°F for 10–15 minutes

  • Air fryer: 350°F for 5–7 minutes

  • Avoid microwaving if possible, as it softens the crispy edges

Reheating in the oven or air fryer helps restore that golden crunch.


Make-Ahead Tip

You can cut and toss the potatoes with oil and Parmesan up to 4 hours ahead of time. Keep them refrigerated and bake when ready.

This makes it perfect for dinner parties or holiday meals.


Why You’ll Keep Making This Recipe

Sometimes the simplest recipes become the most memorable. These potatoes prove that you don’t need a long list of ingredients to create bold, satisfying flavor.

They’re comforting, crispy, cheesy, and incredibly easy. Once you taste that golden crust and fluffy center, you’ll understand why this recipe wins over everyone who tries it.

If you’re looking for a side dish that’s effortless but tastes like you spent hours in the kitchen, this is it.

Make them once, and they’ll become a permanent part of your weekly rotation.

Add Mayo to Boiling Water and You Will Be Surprised by the Result

It may sound unusual at first, but adding mayonnaise to boiling water is a simple kitchen trick that can transform ordinary ingredients into something creamy, flavorful, and incredibly satisfying. While mayonnaise is typically used cold in sandwiches, salads, and dips, its unique composition of oil, eggs, and acid makes it surprisingly effective when introduced to heat in controlled ways. When stirred into boiling water—especially when cooking pasta, vegetables, or potatoes—mayonnaise creates a silky emulsion that enhances texture, depth, and richness without needing heavy cream or butter.

This method works because mayonnaise is already an emulsion of oil and egg yolk. When added to hot water, the fat disperses gently and coats whatever is being cooked. The result is a smoother mouthfeel and more luxurious flavor. This technique is especially useful if you want to create creamy dishes quickly with minimal ingredients.

Below is a unique and easy recipe that demonstrates how adding mayonnaise to boiling water can create a creamy, comforting dish using pasta. Once you try it, you may never look at mayonnaise the same way again.

Creamy Mayo-Boiled Pasta Recipe

Ingredients

  • 250 grams pasta (penne, fusilli, or spaghetti)

  • 1 tablespoon mayonnaise (full-fat works best)

  • 1 teaspoon salt

  • 1 clove garlic, minced

  • 1 tablespoon olive oil

  • ¼ teaspoon black pepper

  • ¼ teaspoon dried oregano (optional)

  • 2 tablespoons grated cheese (optional)

  • Fresh parsley for garnish (optional)

Instructions

Step 1: Bring Water to a Boil

Fill a medium pot with about 1.5 liters of water and place it on the stove over high heat. Add the salt and allow the water to reach a rolling boil. This ensures your pasta cooks evenly and absorbs flavor.

Step 2: Add the Mayonnaise

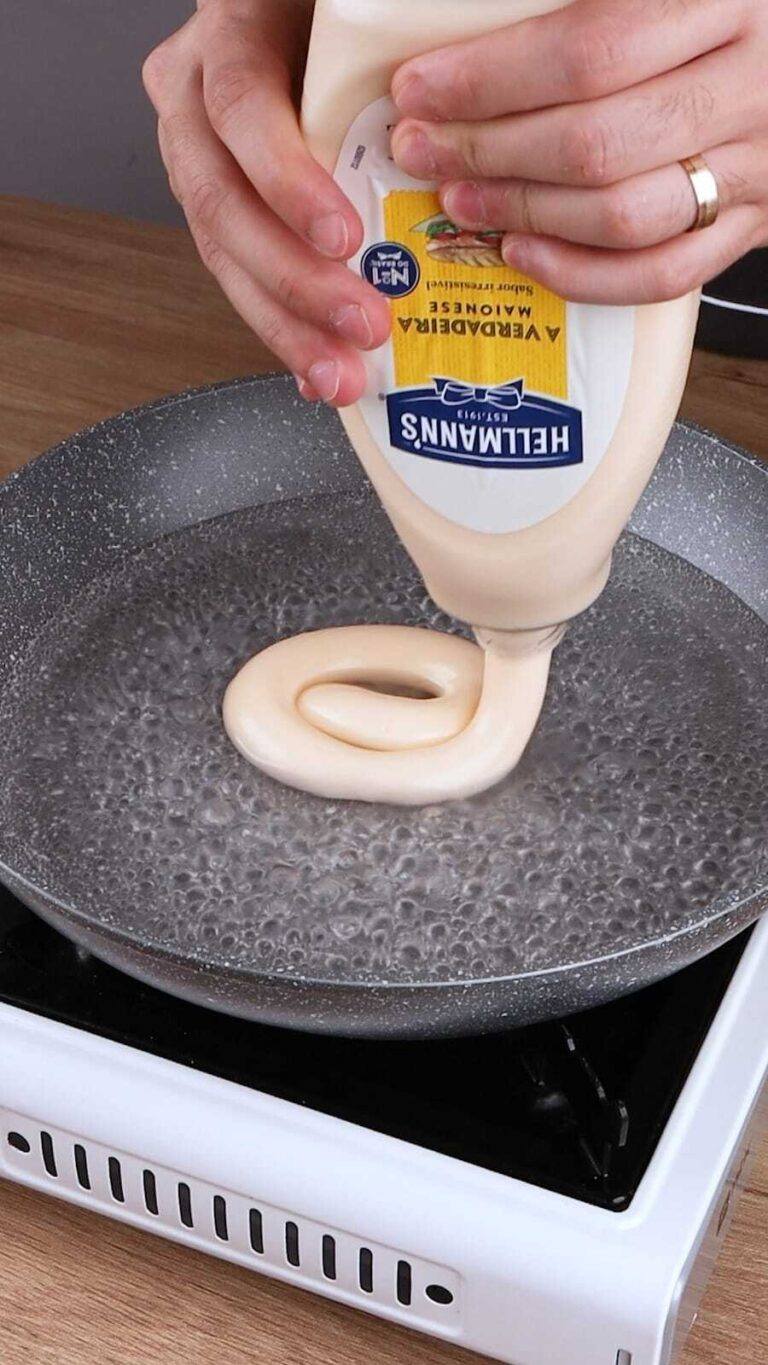
Once the water is boiling, add 1 tablespoon of mayonnaise directly into the pot. Stir gently until the mayonnaise dissolves into the water. You may notice the water becoming slightly cloudy or creamy in appearance. This is exactly what you want—the oils and egg in the mayonnaise are dispersing and creating a light emulsion.

Step 3: Cook the Pasta

Add the pasta to the boiling mayo-infused water. Stir occasionally to prevent sticking. Cook according to package instructions, usually 8 to 10 minutes. As the pasta cooks, it absorbs some of the emulsified fats, resulting in a smoother texture and richer taste.

Step 4: Prepare the Flavor Base

While the pasta cooks, heat olive oil in a small pan over medium heat. Add minced garlic and cook for about 30 seconds until fragrant. Do not let it burn. This step adds depth and aroma to the final dish.

Step 5: Drain and Combine

Once the pasta is cooked, drain it, but do not rinse. Immediately transfer the pasta into the pan with garlic oil. Toss gently to coat the pasta evenly. The slight coating from the mayonnaise-infused water will help the oil and flavors cling to the pasta.

Step 6: Season and Finish

Add black pepper, oregano, and cheese if using. Toss everything together until well combined. Garnish with fresh parsley for color and freshness.

Serve immediately while hot.

Why This Trick Works

Mayonnaise contains three essential components: oil, egg yolk, and acid (usually vinegar or lemon juice). These ingredients help create an emulsion—a stable mixture of fat and water. When added to boiling water, the oil disperses into tiny droplets, which can coat pasta or vegetables evenly.

This coating helps:

  • Improve texture, making food smoother and less dry

  • Enhance flavor, giving a richer mouthfeel

  • Help seasonings stick better

  • Reduce the need for heavy cream or excessive butter

Because the amount of mayonnaise is small, it does not make the dish taste like mayonnaise. Instead, it enhances the natural flavors.

Additional Uses for This Method

This technique is not limited to pasta. You can also use mayonnaise in boiling water for:

Boiled potatoes: The potatoes become creamier and perfect for mashed potatoes.

Vegetables: Broccoli, carrots, and green beans gain a smoother texture and better flavor.

Rice: Adding a small amount can make rice softer and slightly richer.

Instant noodles: This trick can make instant noodles taste more homemade and luxurious.

Tips for Best Results

Use full-fat mayonnaise for the richest texture. Low-fat versions may separate or provide less flavor.

Do not add too much mayonnaise. One tablespoon per pot is enough.

Stir well to ensure even distribution.

Add mayonnaise only after the water is fully boiling.

Avoid overheating after draining, as excessive heat can break the emulsion.

Flavor Variations

You can easily customize this dish:

Add cooked chicken for protein.

Mix in sautéed mushrooms for an earthy flavor.

Add chili flakes for heat.

Stir in spinach for added nutrition.

Use parmesan for a deeper, savory taste.

Final Thoughts

Adding mayonnaise to boiling water may seem unconventional, but it is a clever and effective kitchen technique that enhances texture and flavor without complicated steps. It works because mayonnaise is already a balanced mixture of fats and emulsifiers, allowing it to improve the mouthfeel of simple ingredients like pasta and vegetables.

The uses and benefits of petroleum jelly for skin, lips and hair

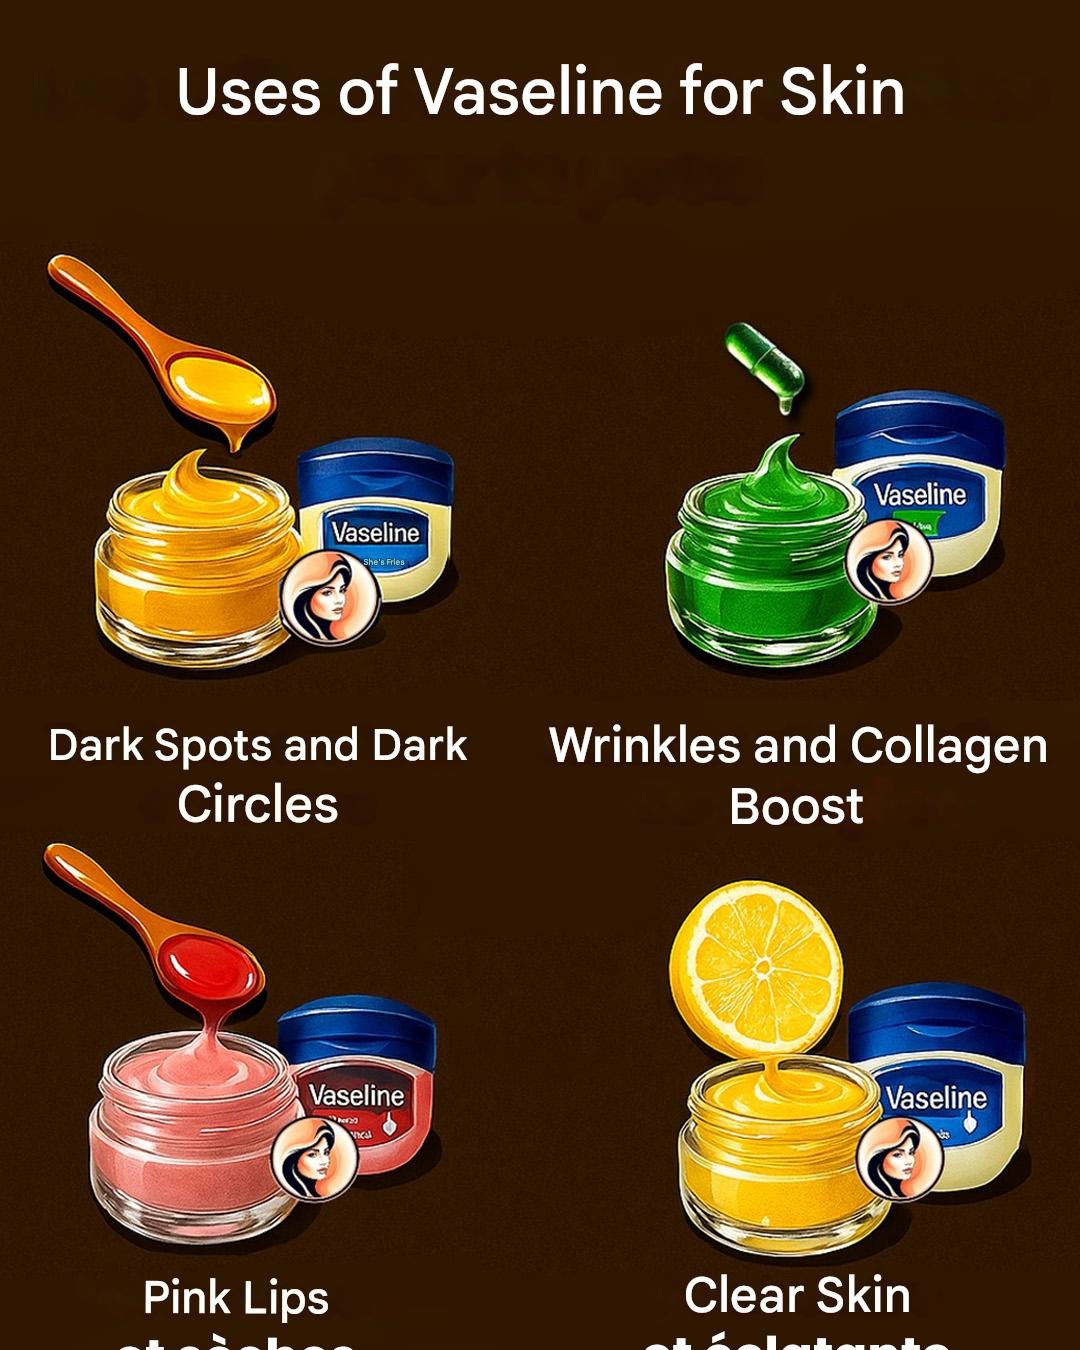
Petroleum jelly is one of the most versatile and affordable beauty products in the world. Known for its powerful moisturizing and protective properties, this simple, semi-solid substance has been trusted for over a century. Originally discovered by Robert Chesebrough and later marketed under the brand name Vaseline, which is now owned by Unilever, petroleum jelly has become a household essential. Its ability to lock in moisture, protect the skin barrier, and support healing makes it valuable for skin, lips, and hair care. Despite its simplicity, petroleum jelly offers numerous benefits when used correctly.

What Is Petroleum Jelly?

Petroleum jelly, also called petrolatum, is a purified mixture of mineral oils and waxes. It forms a protective barrier on the surface of the skin, preventing moisture loss. Unlike many modern skincare products filled with fragrances and chemicals, petroleum jelly is gentle, non-reactive, and suitable for most skin types, including sensitive skin.

Its main function is not to add moisture but to seal existing moisture into the skin. This makes it highly effective when applied after bathing, washing your face, or using a moisturizer.

Benefits of Petroleum Jelly for Skin

1. Deep Moisturization

Petroleum jelly is one of the most effective occlusive moisturizers. It prevents transepidermal water loss, which is the evaporation of moisture from the skin. When applied to dry areas such as elbows, knees, or heels, it softens rough skin and restores smoothness.

It is especially helpful during winter when cold air and indoor heating can dry out the skin. Applying a thin layer at night can leave your skin soft and hydrated by morning.

2. Supports Skin Healing

Petroleum jelly creates a protective barrier over minor cuts, burns, and scrapes. This barrier keeps the wound moist, which promotes faster healing and reduces the risk of scabbing and scarring.

It also protects damaged skin from bacteria, dirt, and environmental irritants.

3. Prevents Chafing and Irritation

Chafing often occurs due to friction, especially on thighs, underarms, or feet. Petroleum jelly reduces friction and protects the skin. Athletes and people with sensitive skin often use it to prevent irritation.

It can also soothe conditions like eczema and mild dermatitis by protecting the skin barrier.

4. Removes Makeup Gently

Petroleum jelly is excellent for removing makeup, including stubborn waterproof mascara. It dissolves makeup without irritating the skin or eyes. After use, simply wash your face with a gentle cleanser.

Benefits of Petroleum Jelly for Lips

1. Heals Dry and Cracked Lips

Lips lack oil glands, which makes them prone to dryness. Petroleum jelly locks in moisture and prevents further dehydration. Applying it regularly keeps lips soft, smooth, and healthy.

It is especially useful in dry weather or air-conditioned environments.

2. Protects Lips from Environmental Damage

Wind, cold air, and sun exposure can damage lips. Petroleum jelly forms a protective layer that shields lips from harsh conditions.

It can also be used overnight as a lip mask for deep hydration.

3. Improves Lip Appearance

Regular use makes lips look fuller, smoother, and shinier. It enhances the natural color of lips and reduces flaking.

You can also apply it before lipstick to prevent dryness and create a smooth base.

Benefits of Petroleum Jelly for Hair

1. Adds Shine and Smoothness

Petroleum jelly can tame frizz and add shine to dull hair. Applying a very small amount to the ends helps seal split ends and smooth rough strands.

It works especially well for dry or damaged hair.

2. Protects Hair from Breakage

By sealing moisture into the hair shaft, petroleum jelly strengthens hair and reduces breakage. It helps maintain hair softness and flexibility.

It is useful for people with dry, curly, or coarse hair types.

3. Soothes Dry Scalp

A dry scalp can cause itching and flaking. Petroleum jelly helps protect and soothe the scalp by locking in moisture. Apply a small amount to dry areas to reduce irritation.

However, it should be used sparingly to avoid buildup.

4. Helps Eyebrows and Eyelashes Look Healthier

Petroleum jelly can make eyebrows and eyelashes appear thicker and shinier. It conditions the hair and prevents dryness.

Apply a tiny amount at night for best results.

Additional Beauty Uses

Petroleum jelly has many other beauty applications, including:

  • Softening cuticles and strengthening nails

  • Protecting skin during hair dye application

  • Highlighting cheekbones for a natural glow

  • Preventing perfume from fading quickly when applied to pulse points

  • Protecting skin from windburn

Its versatility makes it a powerful multi-purpose product.

Is Petroleum Jelly Safe?

Yes, petroleum jelly is considered safe for external use. It is non-comedogenic, meaning it does not clog pores when used properly. It is also fragrance-free and suitable for sensitive skin.

However, it should be applied on clean skin to avoid trapping dirt or bacteria.

Avoid using excessive amounts on hair or oily skin, as it can feel heavy.

Tips for Best Results

To maximize the benefits of petroleum jelly:

  • Apply it on damp skin to lock in moisture

  • Use a thin layer to avoid heaviness

  • Apply overnight for deep hydration

  • Use regularly for consistent results

Consistency is key to seeing improvements in skin, lips, and hair health.

Conclusion

Petroleum jelly remains one of the most reliable and effective beauty products available. Its ability to seal in moisture, protect the skin barrier, and promote healing makes it invaluable for skincare, lip care, and hair care. Whether you want softer skin, smoother lips, or healthier hair, petroleum jelly provides simple and powerful results.

Recipe for Orange Slice Candies with Powdered Sugar and Pecans

Orange Slice Candies with Powdered Sugar and Pecans are a classic no-bake confection loved for their bright citrus flavor, soft chewy texture, and irresistible sweetness. These nostalgic treats have been enjoyed for generations, especially in the United States, where homemade candies are a holiday tradition. With just a handful of ingredients and minimal effort, you can create a delightful dessert that feels both elegant and comforting.

These candies combine soft orange slice candies with crunchy pecans and powdered sugar, forming a rich, creamy mixture that can be shaped into logs, balls, or slices. The sweetness of powdered sugar balances the tangy citrus flavor, while pecans add a nutty depth and satisfying crunch. Best of all, this recipe requires no baking, making it perfect for beginners or anyone looking for a quick homemade sweet.

Whether you prepare them for holidays, special occasions, or simply as a treat to share with family, these candies are guaranteed to impress.

Ingredients

To make about 30–40 candies, you will need:

  • 2 cups orange slice candies (chopped into small pieces)

  • 2 cups powdered sugar (plus extra for dusting)

  • 1 cup finely chopped pecans

  • 1 can (14 oz / 400 g) sweetened condensed milk

  • 1 teaspoon vanilla extract

  • ½ teaspoon salt

  • ½ cup shredded coconut (optional, for added texture)

Why These Ingredients Work

Orange slice candies provide the signature citrus flavor and chewy base. Powdered sugar helps bind everything together while creating a smooth, melt-in-your-mouth texture. Sweetened condensed milk adds richness and acts as a glue that holds the mixture together. Pecans bring a buttery crunch and enhance the overall flavor. Vanilla extract adds warmth, and salt balances the sweetness, preventing the candies from tasting overly sugary.

Optional coconut adds extra texture and subtle sweetness, but it can be omitted if you prefer a simpler version.

Step-by-Step InstructionsStep 1: Prepare the Orange Slice Candies

Start by chopping the orange slice candies into small pieces, about the size of raisins. This helps distribute the citrus flavor evenly throughout the mixture and makes shaping easier. If the candies are sticky, lightly dust your knife with powdered sugar.

Place the chopped candies into a large mixing bowl.

Step 2: Add the Pecans

Add the finely chopped pecans to the bowl with the orange slices. Stir gently to combine. The pecans will provide structure and help prevent the mixture from becoming overly sticky.

Step 3: Mix the Wet Ingredients

In a separate bowl, combine the sweetened condensed milk, vanilla extract, and salt. Stir until smooth and fully blended.

Pour this mixture into the bowl with the orange slices and pecans.

Step 4: Add Powdered Sugar Gradually

Begin adding powdered sugar one cup at a time, mixing well after each addition. The mixture will gradually thicken and become dough-like.

Once the mixture becomes too thick to stir, use your hands to knead it gently. Continue adding powdered sugar until the dough is firm but still slightly soft and pliable.

If using shredded coconut, knead it in at this stage.

Step 5: Shape the Candies

You can shape the candies in several ways:

Log Method:
Divide the dough into portions and roll each into a log about 1 inch thick. Wrap each log in plastic wrap and refrigerate for at least 2 hours. Once firm, slice into rounds.

Ball Method:
Roll small portions into bite-sized balls and coat lightly with powdered sugar.

Bar Method:
Press the dough into a lined pan and refrigerate. Once firm, cut into squares.

Step 6: Chill and Set

Place the shaped candies in the refrigerator for at least 2 hours. Chilling allows the mixture to firm up and makes the candies easier to handle.

Once set, dust lightly with additional powdered sugar if desired.

Texture and Flavor

These candies are soft, chewy, and slightly creamy. The orange slices provide bursts of citrus flavor, while pecans add crunch and balance. The powdered sugar creates a smooth sweetness that melts pleasantly in your mouth.

Each bite offers a perfect combination of tangy, sweet, and nutty flavors.

Storage Instructions

Store the candies in an airtight container in the refrigerator. They will stay fresh for up to 2 weeks.

For longer storage, freeze them in a sealed container for up to 3 months. Thaw in the refrigerator before serving.

Always separate layers with parchment paper to prevent sticking.

Tips for Best Results

Use fresh powdered sugar: Old powdered sugar can taste stale and affect flavor.

Chop ingredients evenly: Smaller pieces create better texture and easier shaping.

Don’t skip chilling: Refrigeration helps the candies firm up and develop proper consistency.

Adjust sweetness: If the mixture is too sweet, add more pecans to balance the flavor.

Work quickly: The mixture becomes stickier at room temperature, so shape it promptly.

Variations

You can customize this recipe in many ways:

Chocolate Version: Add mini chocolate chips for a chocolate-orange flavor combination.

Different Nuts: Substitute pecans with walnuts, almonds, or pistachios.

Coconut Coating: Roll finished candies in shredded coconut instead of powdered sugar.

Spiced Version: Add a pinch of cinnamon or nutmeg for warmth.

Mixed Citrus: Use lemon and orange slice candies together for a more complex flavor.

Serving Suggestions

These candies are perfect for:

  • Holiday dessert trays

  • Tea or coffee time

  • Homemade gift boxes

  • Party treats

  • Family gatherings

Their bright orange color and beautiful appearance make them especially appealing for celebrations.

Why You’ll Love This Recipe

This recipe is simple, affordable, and requires no baking. The ingredients are easy to find, and the process is beginner-friendly. The result is a delicious homemade candy that looks impressive but takes minimal effort.

The combination of citrus, sweetness, and nuts creates a balanced treat that appeals to both adults and children.

Final Thoughts

Orange Slice Candies with Powdered Sugar and Pecans are a timeless homemade treat that brings joy with every bite. Their bright flavor, soft texture, and rich sweetness make them perfect for any occasion. Whether you prepare them as a holiday tradition or a simple everyday dessert, they are sure to become a favorite in your kitchen.

My best friend couldn’t believe how easy this was. Only 3 ingredients for the most flavorful potatoes ever

My best friend couldn’t believe how easy this was. When I told her the most flavorful potatoes she’d ever taste required only three simple ingredients, she thought I was exaggerating. But after one bite—crispy on the outside, soft and fluffy inside, coated in savory goodness—she immediately asked for the recipe.

The secret? You don’t need a long list of spices or complicated steps. With the right technique and a few quality ingredients, potatoes transform into a golden, irresistible side dish that pairs with almost anything.

Let’s get started.


Why This Recipe Works

Potatoes are naturally rich, creamy, and comforting. When roasted at high heat, their edges caramelize and crisp up beautifully. By keeping the ingredient list minimal, we allow their natural flavor to shine while enhancing it with bold, complementary notes.

This recipe is perfect for:

  • Busy weeknights

  • Family dinners

  • Potlucks

  • Holiday spreads

  • Quick side dishes for grilled meats or vegetarian meals

And best of all? You probably already have everything in your kitchen.


The 3 Simple Ingredients

  1. Potatoes – Yukon Gold or baby potatoes work best

  2. Olive Oil – For crispiness and richness

  3. Parmesan Cheese – For bold, savory flavor

That’s it. No fancy seasoning blends required.


Ingredients

  • 2 pounds baby potatoes (or Yukon Gold potatoes, cut into chunks)

  • 3 tablespoons olive oil

  • ¾ cup freshly grated Parmesan cheese

Optional (but not required for the 3-ingredient magic): a pinch of salt or black pepper.


Step-by-Step Instructions

1. Preheat the Oven

Preheat your oven to 400°F (200°C). A hot oven is key to getting crispy edges.

Line a baking sheet with parchment paper or lightly grease it.


2. Prepare the Potatoes

Wash and dry the potatoes thoroughly. If using baby potatoes, cut them in halves. If using larger Yukon Gold potatoes, cut them into evenly sized chunks. Keeping them uniform ensures even cooking.

Pat them dry with a paper towel—this step helps achieve maximum crispiness.


3. Coat with Olive Oil

Place the potatoes in a large mixing bowl. Drizzle with olive oil and toss until every piece is well coated. The oil helps the potatoes roast evenly and develop that golden exterior.


4. Add Parmesan

Sprinkle the grated Parmesan over the potatoes and toss again until coated. The cheese will cling to the oil and create a crispy, savory crust during roasting.

For extra flavor, you can press a little extra Parmesan onto the cut sides of the potatoes before placing them on the tray.


5. Roast to Perfection

Spread the potatoes in a single layer on the baking sheet, cut side down. This positioning helps them crisp beautifully.

Roast for 30–40 minutes, flipping once halfway through. They’re ready when:

  • The edges are deep golden brown

  • The bottoms are crispy

  • The centers are fork-tender

Let them cool for 5 minutes before serving to allow the crust to firm up.


Why Parmesan Makes the Difference

Parmesan isn’t just cheese—it’s flavor magic. When exposed to high heat, it melts, browns, and creates a crispy layer that locks in flavor. It adds:

  • Saltiness

  • Nutty richness

  • Umami depth

That’s why even without extra spices, these potatoes taste incredibly seasoned.


Tips for the Best Results

Use Freshly Grated Parmesan

Pre-shredded cheese doesn’t melt or crisp the same way. Freshly grated works best.

Don’t Crowd the Pan

If the potatoes overlap, they’ll steam instead of roast. Use two trays if necessary.

High Heat Is Key

Roasting below 400°F may prevent proper browning.

Cut Side Down

This simple trick creates a golden crust on the flat surface.


Delicious Variations (Still Simple!)

While the base recipe is perfect as-is, you can customize it:

  • Add minced garlic before roasting

  • Sprinkle fresh parsley after baking

  • Add chili flakes for heat

  • Squeeze lemon juice before serving

But trust me—the original three-ingredient version already steals the show.


What to Serve with These Potatoes

These crispy Parmesan potatoes pair beautifully with:

  • Grilled chicken

  • Baked salmon

  • Steak

  • Roasted vegetables

  • Fried eggs for brunch

They’re versatile enough to complement nearly any main dish.


Storage and Reheating

To Store:

Place leftovers in an airtight container in the refrigerator for up to 4 days.

To Reheat:

For best crispiness, reheat in the oven at 375°F for 10–12 minutes or in an air fryer for 5–7 minutes. Avoid microwaving if you want to keep them crispy.


Why Everyone Loves This Recipe

There’s something magical about simple food done right. These potatoes are:

  • Crispy

  • Cheesy

  • Buttery (without butter!)

  • Comforting

  • Crowd-pleasing

When my best friend tasted them, she kept saying, “There’s no way this is only three ingredients!” But sometimes, less truly is more.

The beauty of this dish lies in its simplicity. No complicated prep. No expensive ingredients. Just wholesome, delicious food that feels special.


Final Thoughts

If you’re looking for a foolproof side dish that tastes like you spent hours in the kitchen—but only took minutes to prepare—this is it.

Three ingredients. One baking sheet. Endless compliments.

Try it once, and it just might become your go-to potato recipe forever.

How to clean the floors in your home with just 3 ingredients

How to Clean the Floors in Your Home with Just 3 Ingredients

Keeping your floors spotless doesn’t require expensive commercial cleaners filled with harsh chemicals. In fact, you can achieve sparkling, fresh-smelling floors using just three simple ingredients that are probably already in your kitchen. This natural cleaning method is budget-friendly, eco-friendly, and safe for most households — including homes with children and pets.

Let’s explore how you can deep clean your floors using this powerful 3-ingredient solution.

  1. White Vinegar

  2. Baking Soda

  3. Fresh Lemon Juice

That’s it! These three ingredients work together to cut grease, remove stains, eliminate odors, and disinfect naturally.


Why These Ingredients Work So Well

1. White Vinegar: The Natural Disinfectant

White vinegar is acidic, which makes it excellent for breaking down dirt, grime, and bacteria. It dissolves sticky residue and leaves floors looking shiny. It also neutralizes odors rather than masking them.

2. Baking Soda: The Gentle Scrubber

Baking soda is mildly abrasive, making it perfect for loosening tough dirt without scratching most surfaces. It also absorbs unpleasant smells and helps brighten dull flooring.

3. Lemon Juice: The Fresh Finisher

Lemon juice adds extra antibacterial power while leaving behind a clean, refreshing scent. Its natural acidity enhances the cleaning strength of vinegar.


How to Make the 3-Ingredient Floor Cleaner

Here’s the simple recipe:

Ingredients:

  • 1 bucket of warm water (about 1 gallon)

  • 1 cup white vinegar

  • 2 tablespoons baking soda

  • Juice of 1 fresh lemon

Instructions:

  1. Fill a bucket with warm water.

  2. Slowly add the baking soda.

  3. Pour in the vinegar (it will fizz — this is normal).

  4. Add freshly squeezed lemon juice.

  5. Stir gently until mixed.

Your natural floor cleaner is ready to use!


How to Clean Different Floor Types

https://www.marthastewart.com/thmb/c_7yb2wFY4sXQ1BwocaeEpqDT5Y%3D/1500x0/filters%3Ano_upscale%28%29%3Amax_bytes%28150000%29%3Astrip_icc%28%29/mopping-wood-floors-getty-0123-2000-5479e90420a8494bb3317e611892bbf0.jpg
https://images.ctfassets.net/xk6to2owan57/6ZTDec6YcSmYB9XjFLFrLI/26d3ce03d3609dc1321f2f109a2bdc22/MrC_art_SP_12_TileFloors.jpg
Hardwood Floors
  • Lightly dampen your mop — do not oversaturate.

  • Mop gently following the wood grain.

  • Immediately dry with a microfiber cloth.

Tip: Always test a small area first, as vinegar can dull certain wood finishes.

Tile Floors

  • Use a regular mop and apply the solution generously.

  • Let it sit for 3–5 minutes on tough spots.

  • Rinse with clean water if needed.

This method works especially well for kitchen and bathroom tiles.

Laminate Floors

  • Use a well-wrung mop.

  • Avoid excess water to prevent warping.

  • No need to rinse unless residue remains.


Benefits of Using This Natural Method

1. Saves Money

Store-bought cleaners can be expensive. This DIY solution costs only a fraction of the price.

2. Chemical-Free Cleaning

No artificial fragrances, bleach, or harmful chemicals. It’s safer for families and pets.

3. Eco-Friendly

You reduce plastic waste and minimize environmental impact.

4. Multi-Purpose

This solution can also clean:

  • Kitchen countertops

  • Bathroom sinks

  • Entryway floors

  • Even some walls


How Often Should You Use It?

  • High-traffic areas: 2–3 times per week

  • Low-traffic rooms: Once per week

  • Deep cleaning: Once every two weeks with a more concentrated solution

Regular use prevents buildup and keeps your home smelling fresh.


Extra Tips for Even Better Results

  • Sweep or vacuum before mopping to remove dust and debris.

  • Use a microfiber mop for better dirt capture.

  • Open windows for ventilation.

  • For stubborn stains, sprinkle baking soda directly on the spot before mopping.


Common Mistakes to Avoid

  1. Using too much vinegar – It can dull natural stone or certain hardwood finishes.

  2. Skipping the sweep step – Dirt particles can scratch floors.

  3. Over-wetting wood floors – Moisture can cause warping.


When Not to Use This Mixture

Avoid using vinegar-based cleaners on:

  • Natural stone (marble, granite, travertine)

  • Waxed wood floors

  • Unsealed grout

For these surfaces, use a pH-neutral cleaner instead.


Final Thoughts

Cleaning your floors doesn’t have to be complicated or expensive. With just white vinegar, baking soda, and lemon juice, you can create a powerful, natural cleaning solution that keeps your home sparkling clean.

This 3-ingredient method proves that sometimes the simplest solutions are the most effective. Not only will your floors look amazing, but your home will feel fresher and healthier too.

Try it once, and you might never go back to commercial floor cleaners again!

The miracle plant that people ingest its power is called

The Miracle Plant That People Call “Natural Morphine”

Nature often surprises us with remedies that rival modern medicine, and one such remarkable plant is rosemary. Known for its aromatic leaves and culinary uses, rosemary has been treasured for centuries not just as a flavoring herb, but as a natural healer. People have long referred to it as “natural morphine” because of its ability to alleviate muscle aches, joint pain, rheumatic conditions, and even gout. Let’s dive deep into why this humble herb has earned such a powerful nickname.

What Is Rosemary?

Rosemary (Rosmarinus officinalis) is a fragrant evergreen herb native to the Mediterranean region. Its needle-like leaves and woody stems are commonly used in cooking, but they also contain a wealth of medicinal compounds. Rosemary belongs to the mint family and has been used historically in traditional medicine for thousands of years. Ancient Egyptians, Greeks, and Romans prized it not only for its flavor but also for its healing properties.

Why It’s Called “Natural Morphine”

The nickname “natural morphine” comes from rosemary’s remarkable ability to reduce pain and inflammation. Researchers have identified several bioactive compounds in rosemary, such as rosmarinic acid, carnosic acid, and essential oils like cineole. These compounds interact with the body in ways similar to pain-relieving medications:

  • Muscle and Joint Pain Relief: Rosemary helps improve blood circulation and reduce inflammation, making it highly effective for sore muscles and stiff joints. People often apply rosemary oil topically or use it in warm baths to soothe aching muscles.

  • Rheumatic Pain: Conditions like rheumatoid arthritis and osteoarthritis involve chronic inflammation and pain. Studies suggest that rosemary’s anti-inflammatory properties can ease swelling and discomfort, offering a natural complement to conventional treatments.

  • Gout Management: Gout occurs when uric acid crystals accumulate in joints, causing sudden pain and swelling. Rosemary contains antioxidants and compounds that can help reduce uric acid levels, potentially preventing flare-ups and promoting joint health.

How Rosemary Works in the Body

The effectiveness of rosemary comes from its ability to influence multiple biological pathways. Its compounds act as antioxidants, neutralizing harmful free radicals that contribute to inflammation and pain. Additionally, rosemary stimulates circulation, which helps deliver oxygen and nutrients to affected areas. Its essential oils also have a mild analgesic effect, reducing the perception of pain naturally.

Ways to Use Rosemary for Health

There are several practical ways to incorporate rosemary into your daily routine for its healing benefits:

  1. Rosemary Tea: Steeping fresh or dried rosemary leaves in hot water creates a soothing tea that can relieve minor aches and improve digestion. Drinking it regularly can provide mild anti-inflammatory effects.

  2. Essential Oil Massage: Diluting rosemary essential oil in a carrier oil like coconut or olive oil and massaging it into sore muscles or joints can help reduce pain and stiffness. This method is especially useful for chronic conditions like arthritis.

  3. Bath Infusion: Adding rosemary sprigs or a few drops of rosemary oil to warm bathwater creates a relaxing experience that soothes tired muscles and joints. The aromatic compounds also help relieve stress, which can indirectly reduce pain perception.

  4. Culinary Uses: Incorporating rosemary into meals isn’t just about taste—it’s also a subtle way to gain its health benefits. Roasted vegetables, soups, and meat dishes seasoned with rosemary can provide antioxidants and anti-inflammatory compounds.

  5. Aromatherapy: Inhaling the scent of rosemary essential oil has been linked to improved mood, mental clarity, and even reduced perception of pain. Simply placing a few drops on a diffuser or pillow can be beneficial.

Precautions and Considerations

While rosemary is generally safe for most people, it’s important to use it wisely:

  • Essential Oils: Always dilute rosemary oil before applying it to the skin to prevent irritation.

  • Pregnancy: Pregnant women should consult a doctor before using rosemary medicinally, as high doses may stimulate uterine contractions.

  • Allergies: Rarely, individuals may be allergic to rosemary. If you experience skin redness, itching, or digestive upset, discontinue use.

  • Medical Interactions: Rosemary may interact with certain medications, including blood thinners and diuretics. Always check with a healthcare professional before using it as a supplement.

The Modern Science Behind Rosemary

Recent studies continue to confirm rosemary’s medicinal potential. Research has shown that rosmarinic acid and carnosic acid inhibit inflammatory pathways, reduce oxidative stress, and even offer neuroprotective benefits. In some studies, rosemary extract has demonstrated effectiveness comparable to mild pain-relief medications, earning its title as “natural morphine.”