How to get rid of nighttime leg cramps: Simple solutions that really work

Nighttime leg cramps are a common and frustrating problem. Many people suddenly wake up in the middle of the night with intense pain in their calves, feet, or thighs. The muscle tightens and becomes hard, making it difficult to move the leg for several seconds or even minutes. Although these cramps are usually harmless, they can disturb sleep and affect overall well-being. The good news is that simple lifestyle changes and natural solutions can significantly reduce or even eliminate nighttime leg cramps.

One of the most common causes of nighttime leg cramps is dehydration. Muscles need enough fluids to function properly. When the body is dehydrated, muscle fibers become more prone to tightening and spasms. Drinking enough water throughout the day can make a big difference. Most adults should aim for about 6–8 glasses of water daily, though the amount may vary depending on climate and activity level. If you exercise, sweat heavily, or live in a warm environment, your body may require even more fluids.

Another major factor behind nighttime leg cramps is a lack of essential minerals. Minerals such as magnesium, potassium, and calcium play a crucial role in muscle contraction and relaxation. When the body lacks these nutrients, muscles may contract unexpectedly. Adding mineral-rich foods to your daily diet can help prevent this problem. Bananas, avocados, leafy greens, yogurt, nuts, and seeds are excellent choices. Magnesium in particular is well known for helping muscles relax, and many people notice improvement in cramps when they increase their magnesium intake.

Stretching before bed is one of the simplest and most effective ways to prevent nighttime leg cramps. Gentle stretching relaxes the muscles and improves flexibility, which helps reduce sudden spasms during sleep. A simple calf stretch can work wonders. Stand facing a wall, place your hands on the wall, and step one foot back while keeping the heel on the floor. Lean forward slowly until you feel a gentle stretch in the calf. Hold for 20–30 seconds and repeat on the other leg. Performing a few stretches before bedtime prepares your muscles for a more relaxed night.

Regular physical activity also plays an important role. People who sit for long periods or lead a very sedentary lifestyle are more likely to experience muscle cramps. Muscles need regular movement to maintain proper circulation and strength. Activities such as walking, cycling, or light exercise during the day can improve blood flow and reduce the risk of nighttime cramps. However, intense exercise right before bed may sometimes trigger cramps, so it is best to finish workouts at least a few hours before sleeping.

Another helpful solution is adjusting your sleeping position. Sometimes cramps occur because the feet point downward during sleep, which shortens the calf muscles. This position can increase the chance of cramping. Keeping your feet in a more neutral position may help. Some people find relief by placing a pillow under their legs or allowing their feet to hang slightly off the edge of the bed so the calf muscles stay relaxed.

Warmth and relaxation techniques can also help prevent cramps. Taking a warm bath or shower before bed relaxes muscles and improves circulation. Warmth helps muscles loosen and reduces tension that might otherwise lead to spasms during the night. Massaging the legs before sleeping can also be beneficial. A gentle massage improves blood flow and helps release tight muscles, preparing the body for restful sleep.

If a cramp suddenly occurs during the night, there are a few quick methods to relieve the pain. Straightening the leg and gently pulling the toes toward the shin can stretch the calf muscle and stop the cramp. Standing up and putting weight on the leg may also help the muscle relax. Some people find relief by massaging the cramped muscle or applying a warm compress. Moving the leg slowly instead of keeping it still usually helps the muscle recover faster.

Diet and overall health habits also influence muscle function. Excess caffeine or alcohol may contribute to dehydration and increase the likelihood of cramps in some individuals. Maintaining a balanced diet, staying hydrated, and avoiding excessive stimulants before bedtime can improve sleep quality and muscle health.

For older adults, nighttime leg cramps may become more common due to natural changes in muscle tone and circulation. Pregnancy can also increase the risk because the body’s mineral needs change. In these cases, proper nutrition, hydration, and gentle stretching become even more important.

While occasional leg cramps are usually harmless, frequent or severe cramps may sometimes indicate an underlying issue such as nerve problems, circulation disorders, or medication side effects. If cramps happen regularly, last for a long time, or are accompanied by swelling or weakness, it may be wise to consult a healthcare professional.

In many cases, however, nighttime leg cramps can be managed with simple daily habits. Drinking enough water, eating mineral-rich foods, stretching before bed, staying active, and relaxing the muscles at night can greatly reduce the chances of painful cramps interrupting sleep.


Doctors reveal that eating beets causes

Beets, also known as beetroot, have long been recognized as one of the most nutritious vegetables available. In recent years, many doctors and nutrition experts have highlighted the powerful health benefits of adding beets to a regular diet. From improving heart health to boosting stamina and supporting digestion, this vibrant red vegetable is gaining renewed attention in the medical and culinary worlds.

One of the main reasons doctors recommend beets is their high concentration of natural nitrates. When consumed, these nitrates convert into nitric oxide in the body. Nitric oxide helps relax and widen blood vessels, which improves blood circulation and lowers blood pressure. Because of this effect, beets are often suggested as part of a heart-healthy diet. Several health professionals note that regular beet consumption may reduce the risk of cardiovascular diseases when combined with other healthy lifestyle habits.

Another benefit doctors frequently mention is improved athletic performance. Studies have shown that beetroot juice can enhance endurance during exercise. This is again related to nitric oxide, which allows muscles to use oxygen more efficiently. As a result, athletes and fitness enthusiasts sometimes drink beet juice before workouts to increase stamina and reduce fatigue.

Beets are also rich in important nutrients such as folate, fiber, potassium, vitamin C, and antioxidants. Folate supports healthy cell growth and is particularly important for pregnant women. Fiber aids digestion and supports gut health by feeding beneficial bacteria in the digestive system. Meanwhile, antioxidants help protect the body’s cells from damage caused by free radicals, which are linked to aging and many chronic diseases.

Doctors also point out that beets may help support brain health. Improved blood flow from nitric oxide can enhance circulation to the brain, which may support cognitive function. Some research suggests that diets rich in nitrate-containing vegetables like beets could help slow age-related mental decline.

Another interesting benefit involves detoxification. Beets contain compounds called betalains, which support the body’s natural detox processes, particularly in the liver. These compounds help the body break down and eliminate toxins more efficiently. Because of this, nutritionists often include beets in detox or cleansing meal plans.

Despite all these benefits, many people still struggle with how to include beets in their daily meals. While roasted beets and beet salads are common options, there are also creative and delicious ways to prepare them. One unique recipe that combines flavor, nutrition, and simplicity is Roasted Beet and Yogurt Garlic Bowl. This dish blends earthy roasted beets with creamy yogurt, herbs, and spices for a satisfying and healthy meal.

Unique Recipe: Roasted Beet and Yogurt Garlic Bowl

Ingredients

  • 3 medium fresh beets

  • 1 cup plain Greek yogurt

  • 2 cloves garlic, finely minced

  • 1 tablespoon olive oil

  • 1 teaspoon lemon juice

  • 1 tablespoon chopped fresh parsley or cilantro

  • Salt and black pepper to taste

  • 1 tablespoon toasted sesame seeds or crushed walnuts (optional)

  • A pinch of chili flakes for mild heat

Instructions

  1. Preheat your oven to 200°C (about 400°F). Wash the beets thoroughly and trim the ends. Wrap them loosely in foil and place them on a baking tray.

  2. Roast the beets for about 40 to 50 minutes, or until they become tender when pierced with a fork. Roasting enhances the natural sweetness of the beets and softens their texture.

  3. Once cooked, allow the beets to cool slightly. Peel off the skin, which should slide off easily, and cut the beets into small cubes or wedges.

  4. In a mixing bowl, combine the Greek yogurt, minced garlic, olive oil, lemon juice, salt, and black pepper. Stir well until the mixture becomes smooth and creamy.

  5. Add the roasted beet cubes into the yogurt mixture and gently fold them together so the beets are coated without breaking apart.

  6. Transfer the mixture into a serving bowl. Sprinkle chopped parsley or cilantro on top, followed by sesame seeds or crushed walnuts for extra crunch.

  7. Finish with a light sprinkle of chili flakes if you enjoy a bit of spice.

This dish can be served as a healthy side, a light lunch, or even a colorful appetizer. It pairs well with whole-grain bread, grilled chicken, or roasted vegetables. The creamy yogurt balances the earthy flavor of the beets, while garlic and lemon add brightness and depth.

Adding beets to your diet doesn’t have to be complicated. With their impressive nutritional profile and versatility in the kitchen, they can easily become part of a balanced meal plan. As doctors continue to emphasize the importance of nutrient-rich vegetables, beetroot stands out as a simple yet powerful addition to everyday cooking.

Say goodbye to flies, mosquitoes and cockroaches boiling these leaves

Keeping your home free from flies, mosquitoes, and cockroaches can sometimes feel like an endless battle. These pests not only create discomfort but can also spread germs and contaminate food. While chemical sprays and pesticides are widely available, many people prefer natural alternatives that are safer for families, pets, and the environment. One surprisingly effective method is using boiled aromatic leaves to create a natural pest-repelling solution.

This simple home remedy has been used in traditional households for generations. Certain leaves contain natural oils and compounds that insects strongly dislike. When these leaves are boiled, their essential oils are released into the water and air, creating a powerful scent that repels unwanted insects.

One of the most effective leaves for this method is the Bay Leaf. Bay leaves are commonly used in cooking, but they also contain compounds like eugenol and cineole that insects find unpleasant. Another powerful leaf is the Neem leaf, which has been used for centuries in natural pest control due to its strong antibacterial and insect-repelling properties. You can also combine these with Mint leaves, whose refreshing aroma is loved by humans but disliked by many insects.

This natural remedy is easy to prepare and requires only a few simple ingredients that you may already have at home.

Ingredients

  • 10–15 dried Bay Leaf leaves

  • 10 fresh Neem leaves (optional but very effective)

  • A handful of fresh Mint leaves

  • 2 cups of water

  • 1 tablespoon lemon juice (optional)

  • 1 small spray bottle or bowl

Instructions

Start by placing two cups of water into a small saucepan and bringing it to a gentle boil. Once the water begins to boil, add the bay leaves, neem leaves, and mint leaves. Reduce the heat and allow the mixture to simmer for about 10–15 minutes. During this time, the leaves release their natural oils and strong aroma into the water.

As the mixture simmers, you will notice a strong herbal fragrance filling the air. This scent is pleasant for people but very irritating to flies, mosquitoes, and cockroaches. After simmering, turn off the heat and allow the liquid to cool completely.

Once cooled, strain the mixture to remove the leaves and pour the liquid into a spray bottle. If you like, you can add a tablespoon of lemon juice to enhance the scent and provide additional antibacterial properties.

How to Use

Spray the liquid around windows, doorways, kitchen corners, and areas where insects tend to gather. You can also lightly spray under sinks, behind trash bins, and near drains where cockroaches are often found.

Another method is to place a small bowl of the warm boiled mixture in rooms where mosquitoes or flies are common. The steam will slowly release the scent into the air, acting as a natural insect repellent.

For outdoor areas such as balconies or patios, you can boil the leaves and simply place the pot nearby for a few minutes so the steam spreads through the area.

Why This Works

Many insects rely heavily on their sense of smell to locate food and safe nesting areas. Strong aromatic compounds from plants like bay leaves, neem, and mint interfere with these scent signals. As a result, pests become disoriented and avoid the area entirely.

Neem leaves, in particular, contain natural compounds that act as both insect repellents and growth inhibitors for certain pests. Mint leaves release menthol-based oils that are known to repel mosquitoes and flies, while bay leaves contain essential oils that cockroaches find extremely unpleasant.

Additional Tips for Best Results

For the best results, combine this natural solution with good household habits. Always keep food sealed and clean up crumbs immediately, since leftover food attracts insects. Empty trash regularly and avoid leaving standing water in sinks or containers, as this can attract mosquitoes.

You can also place dried bay leaves inside cabinets, pantry shelves, or near food storage areas to discourage cockroaches from entering. Refresh the spray every few days to maintain its effectiveness, as natural solutions tend to lose strength over time.

A Safer Natural Alternative

Unlike chemical pesticides that may release harmful fumes, this natural boiled leaf remedy is gentle, affordable, and eco-friendly. It allows you to maintain a fresh-smelling home while discouraging pests from invading your living space.

While it may not eliminate severe infestations on its own, it works very well as a preventive method and can significantly reduce the number of flies, mosquitoes, and cockroaches in your home.

What to Eat to Reduce Nail Ridges: A Nutrition Guide for Healthier Nails

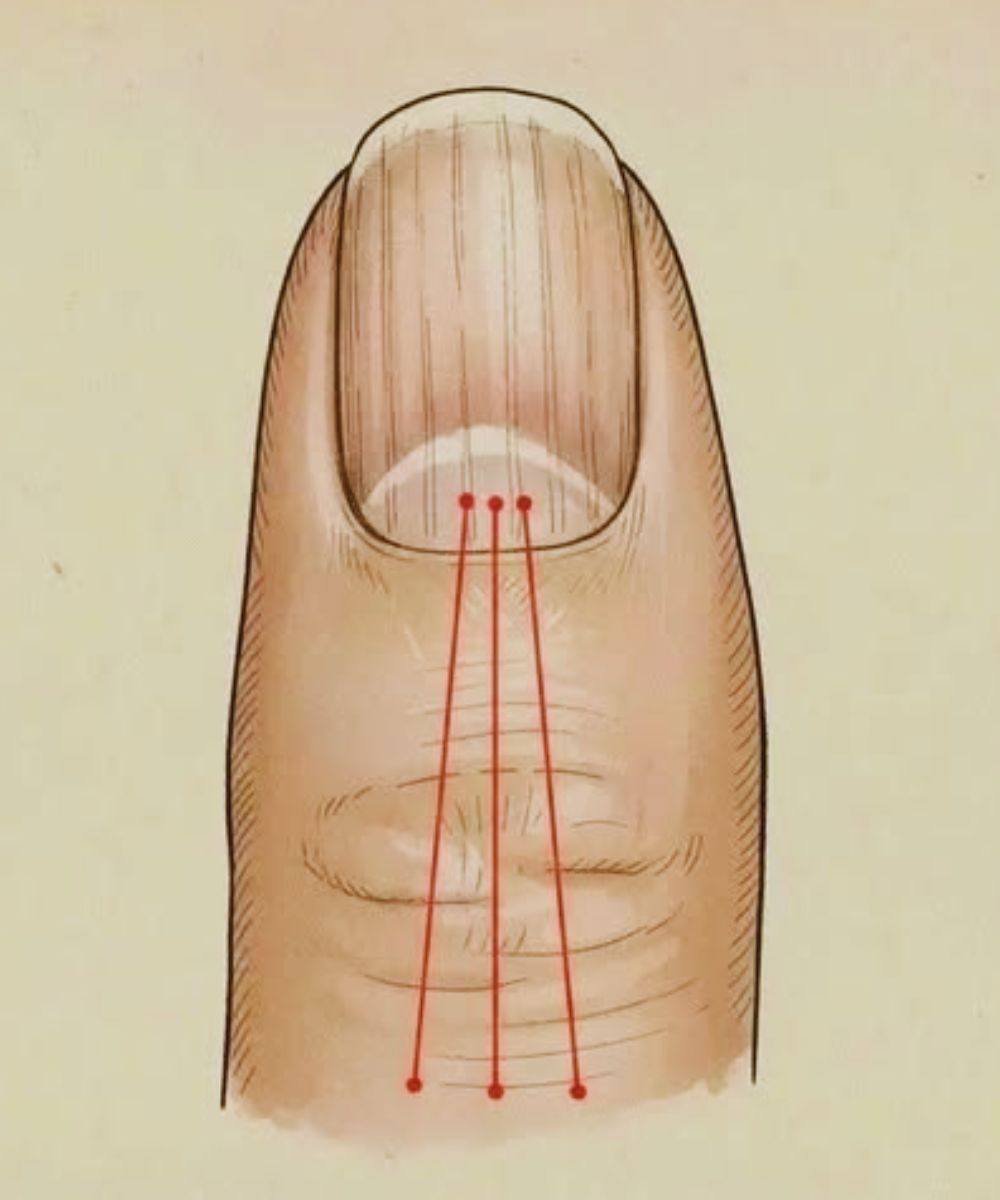
Healthy nails are more than just a cosmetic feature—they can be a reflection of your overall health. If you have ever noticed ridges running across or along your nails, you may have wondered what they mean. Nail ridges are quite common and can appear as vertical lines (from the cuticle to the tip) or horizontal lines across the nail. While some ridges are simply a natural part of aging, others may indicate nutritional deficiencies or underlying health issues. One of the most effective ways to support smoother, stronger nails is through proper nutrition. The foods you eat can provide the vitamins and minerals your body needs to keep your nails healthy and reduce the appearance of ridges.

Understanding Nail Ridges

Before discussing what to eat, it is helpful to understand why nail ridges occur. Vertical ridges are usually harmless and often develop as people age because nail growth slows down and the body produces less natural oils. However, if ridges suddenly appear or become more noticeable, they may be linked to deficiencies in important nutrients such as iron, biotin, magnesium, or protein. Horizontal ridges, sometimes called Beau’s lines, may be associated with illness, stress, or trauma to the nail.

Although ridges themselves are rarely dangerous, they can signal that your body needs better nourishment. Eating a balanced diet rich in vitamins and minerals can improve nail health over time and help reduce these ridges.

Protein: The Foundation of Healthy Nails

Nails are made primarily of keratin, a strong structural protein. If your diet lacks enough protein, your nails may become weak, brittle, and more prone to ridges.

To support healthy nail growth, include protein-rich foods in your daily meals. Good sources include eggs, chicken, fish, beans, lentils, and Greek yogurt. Eggs are particularly beneficial because they also contain biotin, a nutrient known for strengthening nails and hair.

Eating adequate protein helps the body produce keratin more effectively, leading to stronger and smoother nails over time.

Biotin: The Nail-Strengthening Vitamin

Biotin, also known as vitamin B7, plays a key role in maintaining strong nails. A deficiency in biotin can lead to brittle nails and visible ridges. Increasing your intake of biotin-rich foods may help improve nail thickness and reduce breakage.

Some excellent sources of biotin include almonds, walnuts, sweet potatoes, bananas, spinach, and whole grains. Eggs are another great option, especially when cooked, as cooking makes the biotin easier for the body to absorb.

Consistently including these foods in your diet can gradually improve nail texture and overall appearance.

Iron: Preventing Weak and Ridged Nails

Iron deficiency is one of the most common nutritional causes of nail problems. Low iron levels can lead to brittle nails, ridges, and even spoon-shaped nails in more severe cases.

To boost iron intake, focus on foods such as lean red meat, spinach, lentils, chickpeas, and fortified cereals. Pairing iron-rich foods with vitamin C sources like oranges, tomatoes, or bell peppers can help your body absorb iron more effectively.

Maintaining healthy iron levels supports proper oxygen circulation in the body, which helps nourish nail cells and promote smooth nail growth.

Magnesium: Supporting Nail Structure

Magnesium is involved in hundreds of processes in the body, including protein synthesis and nail formation. A lack of magnesium may contribute to vertical nail ridges.

Foods rich in magnesium include pumpkin seeds, almonds, cashews, dark leafy greens, and avocados. Whole grains such as brown rice and oats are also excellent sources.

Including these foods regularly can help maintain healthy nail structure and may gradually reduce ridging.

Zinc: Encouraging Healthy Nail Growth

Zinc is another mineral that plays an important role in nail health. It helps with cell growth and tissue repair, which are essential for strong nails. A deficiency in zinc may lead to white spots, ridges, or slow nail growth.

To increase zinc intake, consider eating foods like pumpkin seeds, chickpeas, cashews, eggs, and seafood. Even small improvements in zinc intake can have noticeable effects on nail strength over time.

Omega-3 Fatty Acids: Keeping Nails Hydrated

Dry nails are more likely to develop ridges and break easily. Omega-3 fatty acids help keep the nail bed moisturized and healthy by supporting natural oil production in the body.

Good sources of omega-3 fatty acids include salmon, sardines, walnuts, flaxseeds, and chia seeds. These foods also benefit skin and hair health, making them an excellent addition to a balanced diet.

Regularly consuming omega-3-rich foods can help nails appear smoother and healthier.

Hydration Matters Too

While nutrition is essential, hydration also plays an important role in nail health. Drinking enough water helps maintain moisture in the nails and prevents them from becoming dry and brittle.

Try to drink sufficient water throughout the day and include hydrating foods such as cucumbers, watermelon, and oranges in your meals.

A Sample Nail-Healthy Meal Idea

A simple meal that supports nail health might include grilled salmon with quinoa and steamed spinach, followed by a handful of almonds or walnuts for a snack. This combination provides protein, omega-3 fatty acids, magnesium, iron, and biotin—all nutrients that help strengthen nails and reduce ridges.

Final Thoughts

Nail ridges are often harmless, but they can be a sign that your body needs better nutrition. By focusing on a balanced diet rich in protein, biotin, iron, magnesium, zinc, and healthy fats, you can support stronger, smoother nails from the inside out.

Doctors reveal that eating boiled eggs in the morning causes

For many people, breakfast is the most important meal of the day. It sets the tone for energy levels, concentration, and metabolism throughout the morning. Among the many breakfast choices available, boiled eggs stand out as one of the simplest, most nutritious, and most satisfying foods you can eat. Doctors and nutrition experts often recommend eggs as part of a balanced diet because they contain a wide range of nutrients that support overall health.

Eating boiled eggs in the morning may cause several positive effects in your body. From improving brain function to helping maintain a healthy weight, this small food carries big benefits. Let’s explore what doctors say happens when you start your day with boiled eggs and how you can include them in your daily routine.

1. Boosts Energy and Keeps You Full Longer

One of the most noticeable effects of eating boiled eggs in the morning is how satisfied and energized you feel afterward. Eggs are rich in high-quality protein, which helps stabilize blood sugar levels and prevents sudden hunger spikes.

Unlike sugary cereals or pastries that can cause a quick rise and crash in energy, boiled eggs release energy slowly. This means you stay full for longer periods and avoid unhealthy snacking before lunch. Doctors often recommend protein-rich breakfasts for people who want to improve their daily energy and productivity.

2. Supports Brain Health and Memory

Eggs contain an important nutrient called choline, which plays a vital role in brain function. Choline helps produce neurotransmitters that are involved in memory, mood, and cognitive performance.

When you eat boiled eggs in the morning, your brain receives essential nutrients needed for focus and concentration. This can be particularly helpful for students, professionals, or anyone who needs mental clarity early in the day.

Nutritionists often emphasize that starting the day with brain-supporting foods may improve overall mental performance throughout the morning.

3. Helps With Healthy Weight Management

Many doctors say that eating boiled eggs at breakfast may help with weight management. The combination of protein and healthy fats helps control appetite and reduces cravings.

Research has shown that people who eat eggs in the morning often consume fewer calories later in the day compared to those who eat carbohydrate-heavy breakfasts. Because eggs help you feel full longer, you are less likely to reach for high-calorie snacks.

This makes boiled eggs a popular choice for individuals who are trying to maintain or lose weight while still feeling satisfied after meals.

4. Provides Important Vitamins and Minerals

Boiled eggs are packed with essential nutrients that your body needs every day. A single egg contains:

  • Vitamin A for healthy vision

  • Vitamin D for bone health

  • Vitamin B12 for nerve function

  • Selenium for immune support

  • Iron for oxygen transport in the blood

These nutrients work together to support overall health and well-being. Eating eggs regularly can help fill nutritional gaps that might occur in other parts of the diet.

Doctors often point out that eggs provide many nutrients in a compact, affordable food, making them a convenient breakfast option.

5. Supports Eye Health

Egg yolks contain powerful antioxidants called lutein and zeaxanthin. These compounds are known to support eye health and help protect the eyes from age-related damage.

Starting your day with boiled eggs may contribute to better long-term vision health. These antioxidants help reduce oxidative stress in the eyes and may lower the risk of certain eye conditions.

Because modern lifestyles often involve long hours in front of screens, foods that support eye health have become increasingly important.

6. Promotes Muscle Strength and Repair

Protein is essential for maintaining strong muscles and supporting tissue repair. Boiled eggs provide a complete protein source containing all nine essential amino acids.

Eating eggs in the morning helps your body start the day with the building blocks it needs for muscle maintenance. This is especially beneficial for people who exercise regularly or want to maintain strength as they age.

Doctors frequently recommend protein-rich breakfasts to support muscle health and prevent fatigue during the day.

Simple Morning Boiled Egg Idea

If you want a quick and nutritious breakfast, try this simple boiled egg plate:

Ingredients

  • 2 boiled eggs

  • 1 slice whole grain toast

  • A few slices of avocado

  • A pinch of salt and black pepper

Instructions

  1. Boil eggs for about 8–10 minutes until fully cooked.

  2. Peel and slice the eggs in half.

  3. Toast the bread and top with avocado slices.

  4. Sprinkle salt and pepper over the eggs.

  5. Serve everything together for a balanced breakfast.

This meal combines protein, healthy fats, and fiber to keep you energized for hours.

Final Thoughts

Doctors agree that boiled eggs can be a powerful addition to your morning routine. Eating them for breakfast may help increase energy, improve brain function, support eye health, and promote a feeling of fullness that lasts for hours.

Of course, balance is key. Eggs work best as part of a healthy diet that includes fruits, vegetables, whole grains, and other nutritious foods. If you enjoy eggs and tolerate them well, adding boiled eggs to your breakfast can be a simple way to nourish your body and start the day strong.

Dump Canned Cranberry Sauce on Top of Chicken Breasts – A Surprisingly Delicious Easy Dinner

If you are looking for a simple yet flavorful dinner that requires minimal effort, this cranberry chicken recipe might become one of your favorites. It’s the kind of meal that feels a little fancy but is incredibly easy to prepare. By simply dumping canned cranberry sauce over chicken breasts and baking it in the oven, you create a sweet, tangy, and savory dish that tastes like it took hours to make.

This recipe is perfect for busy weeknights, family dinners, or even casual holiday meals. The cranberry sauce melts into a rich glaze as it cooks, infusing the chicken with a balance of sweetness and gentle acidity. The result is tender, juicy chicken coated in a glossy sauce that pairs beautifully with rice, roasted vegetables, or mashed potatoes.

Another reason people love this dish is its simplicity. With only a handful of pantry ingredients and almost no prep time, you can have dinner in the oven within minutes. Even beginner cooks can master this recipe easily, making it ideal for anyone who wants a stress-free meal that still tastes special.

The natural sweetness of cranberry sauce complements the mild flavor of chicken breasts, while optional ingredients like onion soup mix or garlic add extra depth and richness. As the chicken bakes, the sauce thickens and caramelizes slightly, creating a comforting aroma that fills your kitchen.

Whether you are cooking for your family, hosting guests, or simply want a cozy homemade dinner, this cranberry chicken recipe proves that sometimes the easiest recipes are the most satisfying.


Why This Recipe Works So Well

This dish is popular because it uses simple ingredients that transform into something truly delicious. The cranberry sauce acts as both a marinade and a glaze. As the chicken cooks, the sauce breaks down and mixes with the natural juices of the meat.

The result is tender chicken with a perfectly balanced sauce that is sweet, slightly tart, and savory at the same time. The acidity from the cranberries also helps keep the chicken moist while baking.

Another advantage is how versatile the recipe is. You can easily customize it by adding spices, herbs, or sauces depending on your taste preferences.


Ingredients

  • 4 boneless, skinless chicken breasts

  • 1 can (14 oz) whole or jellied cranberry sauce

  • 1 packet onion soup mix

  • 1 tablespoon olive oil

  • 2 cloves garlic, minced (optional)

  • ½ teaspoon black pepper

  • ½ teaspoon paprika

  • 1 tablespoon honey or brown sugar (optional for extra sweetness)

  • 1 tablespoon soy sauce (optional for deeper flavor)

  • Fresh parsley for garnish


Instructions

1. Preheat the Oven

Preheat your oven to 375°F (190°C). Lightly grease a baking dish with olive oil or cooking spray to prevent the chicken from sticking.

2. Prepare the Chicken

Place the chicken breasts in the baking dish in a single layer. Pat them dry with paper towels. This helps the sauce stick better and improves the texture while baking.

Season the chicken lightly with black pepper and paprika.

3. Prepare the Cranberry Sauce Mixture

In a medium bowl, combine the canned cranberry sauce and onion soup mix. Stir well until the mixture becomes smooth.

If you want extra flavor, add minced garlic, soy sauce, or honey at this stage. These ingredients are optional but add a deeper savory-sweet balance.

4. Dump the Sauce Over the Chicken

Pour the cranberry mixture evenly over the chicken breasts. Use a spoon or spatula to spread it so the chicken is fully coated.

This is the easiest step and the reason the recipe is often called a “dump-and-bake” meal.

5. Bake the Chicken

Place the dish in the oven and bake for 30–40 minutes, depending on the thickness of the chicken breasts.

Halfway through cooking, spoon some of the sauce from the dish over the top of the chicken to keep it moist and flavorful.

6. Check for Doneness

The chicken is ready when the internal temperature reaches 165°F (74°C) and the meat is tender and juicy.

The sauce should be bubbling and slightly thickened.

7. Garnish and Serve

Remove the dish from the oven and let it rest for about 5 minutes before serving.

Sprinkle chopped fresh parsley on top for color and freshness.


Serving Suggestions

This cranberry chicken pairs well with many side dishes. Some delicious options include:

  • Steamed white rice

  • Garlic mashed potatoes

  • Roasted carrots or green beans

  • Buttered noodles

  • Quinoa or wild rice

The sweet cranberry glaze works especially well with neutral sides that absorb the sauce.


Tips for the Best Cranberry Chicken

Use whole cranberry sauce if possible.
Whole berries add a better texture and a richer flavor compared to the smooth jellied version.

Don’t overcook the chicken.
Chicken breasts can dry out if baked too long, so check the internal temperature carefully.

Add vegetables to the baking dish.
Carrots, onions, or sweet potatoes can cook alongside the chicken and absorb the delicious sauce.

Make it in the slow cooker.
You can also cook this dish in a slow cooker on low for 4–5 hours for an even more tender result.


Variations

Cranberry BBQ Chicken

Mix cranberry sauce with your favorite barbecue sauce for a smoky-sweet glaze.

Cranberry Orange Chicken

Add orange juice and orange zest to the sauce for a bright citrus flavor.

Cranberry Mustard Chicken

Stir in Dijon mustard for a tangy twist that balances the sweetness.


Storage and Leftovers

Leftover cranberry chicken stores very well. Place it in an airtight container and refrigerate for up to 3–4 days.

To reheat, warm it gently in the microwave or in a covered dish in the oven at 325°F (160°C) until heated through.

You can also shred the leftover chicken and use it in sandwiches, wraps, or salads.


Final Thoughts

This dump-and-bake cranberry chicken recipe proves that delicious meals don’t need complicated ingredients or hours in the kitchen. With just a can of cranberry sauce and a few simple pantry staples, you can transform plain chicken breasts into a flavorful, comforting dinner.

Psychology Says These Signs Reveal When a Friend Is Distancing Themselves From You

Friendships are among the most meaningful relationships in our lives. They offer support, joy, and a sense of belonging. However, like any relationship, friendships can change over time. Sometimes a friend may slowly begin to distance themselves, and the shift can be subtle enough that you may not notice it right away. Psychology suggests that people often show certain behavioral patterns when they are emotionally withdrawing from a friendship. Recognizing these signs early can help you understand what’s happening and decide how to respond.

1. Communication Becomes Infrequent

One of the earliest signs that a friend may be distancing themselves is a noticeable drop in communication. Messages that were once answered quickly may now take hours or days to receive a response. Conversations that used to flow easily might feel forced or short. Psychologists explain that when people emotionally detach from someone, they often reduce contact as a natural way to create space.

2. They Seem Less Interested in Your Life

A strong friendship usually includes genuine curiosity about each other’s lives. If your friend used to ask about your day, your goals, or your feelings but suddenly stops showing interest, it could indicate emotional distance. People who are disengaging from a relationship often stop investing energy in learning about the other person.

3. Plans Are Frequently Cancelled

Another common sign is when your friend repeatedly cancels plans or avoids making them altogether. While occasional schedule conflicts are normal, consistent cancellations may suggest that spending time together is no longer a priority. Psychology research suggests that when people begin withdrawing from a relationship, they often limit face-to-face interactions.

4. Conversations Feel Surface-Level

You may notice that conversations with your friend no longer carry the same depth. Instead of discussing personal thoughts or meaningful experiences, discussions remain casual or brief. Emotional distance often shows up as a reluctance to engage in deeper conversations that once strengthened the bond.

5. They Are Less Supportive During Difficult Times

Friendships are often tested during moments of stress or hardship. If your friend used to be supportive but now seems unavailable or uninterested when you are struggling, this could be a signal of distancing. Emotional investment typically decreases when someone begins pulling away from a relationship.

6. Their Body Language Changes

Psychology emphasizes that body language can reveal hidden emotions. If you meet your friend in person, you might notice subtle changes such as reduced eye contact, distracted behavior, or closed body posture. These signals can reflect discomfort or a desire to maintain emotional distance.

7. They Prioritize Others Over You

It’s natural for friends to have multiple relationships, but if your friend consistently prioritizes others while neglecting time with you, it may suggest a shift in the friendship. When someone begins to distance themselves, they may gradually redirect their energy toward new social circles or interests.

8. They Stop Sharing Personal Information

In close friendships, people often share personal experiences, feelings, and challenges. If your friend suddenly becomes private and stops opening up, it may indicate that they no longer feel the same emotional closeness. Psychologists note that reduced self-disclosure is a common sign of weakening relationships.

9. You Feel the Emotional Gap

Sometimes the strongest signal comes from your own intuition. Humans are highly sensitive to changes in social dynamics. If you feel a growing emotional gap between you and your friend, there may be subtle cues influencing that perception. While intuition is not always perfect, it can reflect patterns your mind has already noticed.

How to Respond When You Notice These Signs

Recognizing these behaviors does not always mean the friendship is ending. People sometimes withdraw because they are dealing with personal stress, mental health challenges, or life changes. Before assuming the worst, consider approaching the situation with empathy and open communication.

Start by having a calm and honest conversation. Express your feelings without blaming or accusing. For example, you might say that you’ve noticed you haven’t been talking as much and that you value the friendship. This approach allows your friend to share what they may be experiencing.

It’s also important to respect boundaries. If your friend needs space, giving them time can sometimes strengthen the relationship in the long run. Healthy friendships evolve, and temporary distance does not always mean permanent separation.

Final Thoughts

Friendships naturally change as people grow and their lives evolve. Recognizing the psychological signs of distancing can help you understand the dynamics of your relationships and respond thoughtfully. Rather than reacting with frustration or fear, approaching the situation with empathy, communication, and self-respect can help you navigate the uncertainty.

Ti svegli con il cuscino bagnato? Scopri perché sbavi mentre dormi

Molte persone si svegliano al mattino e trovano il cuscino leggermente bagnato. Questo fenomeno, comunemente chiamato sbavare durante il sonno, può sembrare imbarazzante o insolito, ma in realtà è molto più comune di quanto si pensi. La saliva svolge un ruolo fondamentale nel nostro organismo: aiuta la digestione, mantiene la bocca umida e protegge i denti dai batteri. Tuttavia, durante la notte, il controllo dei muscoli del viso e della bocca cambia, e questo può causare la fuoriuscita di saliva.

In questo articolo scoprirai perché succede, quando è normale e cosa puoi fare per ridurre questo fenomeno. 🌙

1. Posizione in cui dormi

Uno dei motivi più comuni per cui si sbava mentre si dorme è semplicemente la posizione del corpo. Quando dormiamo su un fianco o a pancia in giù, la gravità fa sì che la saliva scorra verso l’esterno della bocca invece di essere deglutita.

Durante il giorno, infatti, il nostro cervello controlla continuamente la deglutizione. Di notte, però, il corpo entra in uno stato di rilassamento profondo e questi riflessi diventano meno attivi.

Cosa puoi fare:

  • Provare a dormire sulla schiena

  • Usare un cuscino ergonomico che mantenga la testa in posizione corretta

  • Evitare posizioni troppo inclinate del viso

Questi piccoli cambiamenti possono già ridurre molto il problema.

2. Congestione nasale

Quando il naso è chiuso, tendiamo a respirare attraverso la bocca durante il sonno. Questo aumenta la probabilità che la saliva fuoriesca.

La congestione nasale può essere causata da:

  • raffreddore 🤧

  • allergie stagionali

  • sinusite

  • deviazione del setto nasale

Quando la respirazione avviene dalla bocca, i muscoli della mandibola restano più rilassati e la saliva può uscire facilmente.

Possibili soluzioni:

  • lavaggi nasali con soluzione salina

  • umidificatore nella stanza

  • trattare eventuali allergie

3. Produzione eccessiva di saliva

In alcuni casi il corpo produce più saliva del normale, condizione chiamata ipersalivazione. Questo può succedere per diversi motivi.

Tra le cause più comuni ci sono:

  • problemi digestivi

  • reflusso gastrico

  • infezioni della bocca o delle gengive

  • alcuni farmaci

Quando la produzione di saliva aumenta, il corpo potrebbe non riuscire a deglutirla tutta durante il sonno.

Se il problema è frequente o improvviso, potrebbe essere utile consultare un medico o un dentista per capire la causa.

4. Disturbi del sonno

In alcuni casi, sbavare mentre si dorme può essere collegato a disturbi del sonno, come l’apnea notturna. Questa condizione causa pause temporanee nella respirazione durante il sonno e spesso porta a respirare con la bocca aperta.

I segnali più comuni includono:

  • russare forte 😴

  • sensazione di stanchezza al risveglio

  • mal di testa mattutino

  • sonno agitato

Se questi sintomi sono presenti insieme alla salivazione notturna, potrebbe essere utile parlarne con uno specialista del sonno.

5. Effetto dei farmaci

Alcuni farmaci possono aumentare la produzione di saliva oppure rilassare eccessivamente i muscoli della bocca. Tra questi ci sono:

  • alcuni antidepressivi

  • sedativi

  • farmaci neurologici

Se hai iniziato un nuovo trattamento e hai notato questo cambiamento, potresti discuterne con il tuo medico per valutare eventuali alternative.

6. Quando preoccuparsi

Nella maggior parte dei casi, sbavare mentre si dorme non è pericoloso. È semplicemente una risposta naturale del corpo durante il riposo.

Tuttavia, potrebbe essere utile fare un controllo medico se il problema è accompagnato da:

  • difficoltà a deglutire

  • dolore alla mascella

  • russamento molto forte

  • salivazione eccessiva anche durante il giorno

Questi segnali potrebbero indicare condizioni che meritano una valutazione professionale.

7. Consigli pratici per ridurre la sbavatura notturna

Se vuoi ridurre questo fenomeno, puoi provare alcune semplici abitudini quotidiane:

✔ Dormire con la testa leggermente sollevata
✔ Evitare pasti molto pesanti prima di andare a letto
✔ Mantenere una buona igiene orale 🪥
✔ Bere abbastanza acqua durante il giorno
✔ Ridurre alcol e sedativi prima del sonno

Anche migliorare la qualità del sonno può aiutare il corpo a mantenere un migliore controllo dei riflessi durante la notte.

Conclusione

Svegliarsi con il cuscino bagnato può sembrare strano o fastidioso, ma nella maggior parte dei casi è semplicemente il risultato di fattori normali come la posizione del sonno, la respirazione dalla bocca o il rilassamento muscolare.

Brittle Nails? 10 Hidden Causes Your Body Is Desperately Trying to Tell You About – And How to Fix Them Fast

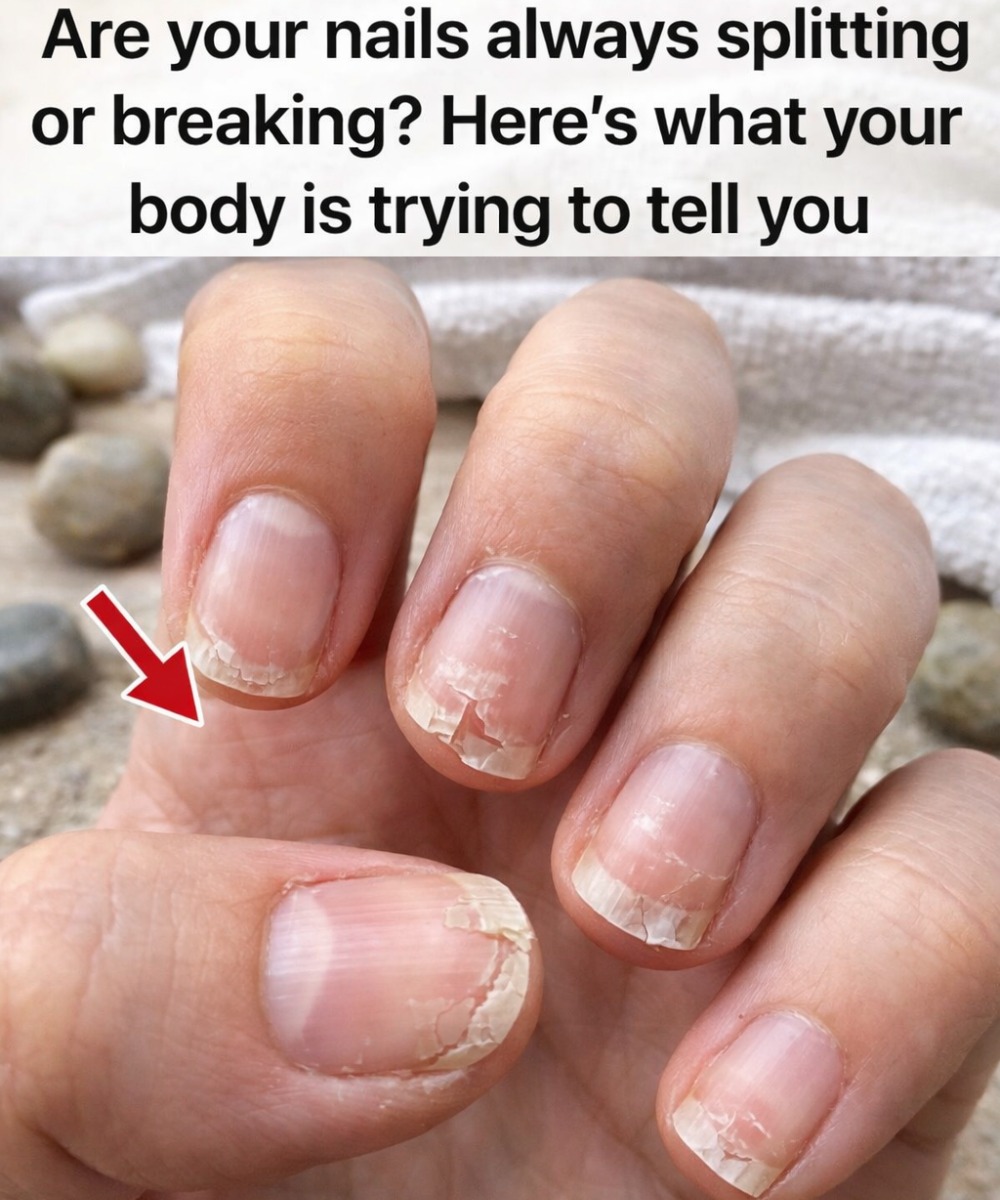
Brittle nails are more than just a cosmetic issue. When your nails crack, split, peel, or break easily, your body may be sending important signals about your health. Healthy nails should be smooth, strong, and slightly flexible. When they become weak or fragile, it often points to underlying problems such as nutritional deficiencies, dehydration, lifestyle habits, or even medical conditions.

Many people try to fix brittle nails using nail polish or strengthening treatments, but these solutions only address the surface of the problem. To truly improve nail health, it’s important to understand the root causes. Here are ten hidden reasons why your nails may be brittle—and what you can do to restore their strength quickly.

1. Lack of Biotin (Vitamin B7)

Biotin is one of the most important vitamins for nail strength. A deficiency in this vitamin can cause nails to become thin, fragile, and prone to splitting.

How to fix it:
Increase foods rich in biotin such as eggs, almonds, sweet potatoes, bananas, and whole grains. Many people also benefit from a daily biotin supplement after consulting with a healthcare professional.

2. Iron Deficiency

Iron deficiency is a common cause of weak nails. When your body lacks iron, your nails may become brittle or even develop a spoon-like shape known as Koilonychia.

How to fix it:
Eat iron-rich foods such as spinach, red meat, lentils, beans, and pumpkin seeds. Pair iron sources with vitamin C foods like oranges or bell peppers to improve absorption.

3. Dehydration

Just like your skin and hair, nails require proper hydration. When your body lacks enough water, nails lose their natural flexibility and become dry and brittle.

How to fix it:
Drink enough water throughout the day and moisturize your hands and nails regularly using natural oils such as coconut oil or olive oil.

4. Frequent Exposure to Water and Chemicals

Constant hand washing, dishwashing, and exposure to cleaning chemicals can strip moisture from your nails, causing them to weaken over time.

How to fix it:
Wear gloves when cleaning or washing dishes. Apply a nourishing hand cream or cuticle oil daily to restore moisture.

5. Protein Deficiency

Nails are made primarily of keratin, a protein. If your diet lacks sufficient protein, your body may struggle to produce strong nails.

How to fix it:
Include protein-rich foods in your meals such as chicken, fish, eggs, beans, tofu, and dairy products.

6. Thyroid Problems

Hormonal imbalances can also affect nail health. Conditions such as Hypothyroidism can cause dry, brittle nails along with fatigue, weight gain, and cold sensitivity.

How to fix it:
If brittle nails are combined with other symptoms, consult a healthcare professional for proper testing and treatment.

7. Aging

As people age, nails naturally become drier and more fragile. Reduced oil production and slower nail growth contribute to this change.

How to fix it:
Regularly moisturize nails and maintain a balanced diet rich in vitamins and minerals to support healthy nail growth.

8. Nail Trauma and Over-Manicuring

Frequent manicures, aggressive filing, and using harsh nail polish removers can weaken the nail structure.

How to fix it:
Give your nails regular breaks from polish and artificial nails. Use gentle nail care tools and avoid excessive buffing or filing.

9. Vitamin Deficiencies

Deficiencies in several vitamins—including Vitamin A, Vitamin C, and Vitamin D—can affect nail strength and growth.

How to fix it:
Eat a colorful, nutrient-dense diet that includes fruits, vegetables, nuts, seeds, and healthy fats.

10. Fungal Nail Infections

Sometimes brittle nails are caused by fungal infections such as Onychomycosis, which can cause thickening, discoloration, and crumbling.

How to fix it:
Keep nails clean and dry. In more serious cases, antifungal treatments prescribed by a doctor may be necessary.

Simple Daily Habits to Strengthen Nails

Beyond addressing the root causes, a few simple habits can dramatically improve nail health:

• Keep nails trimmed and filed to prevent splitting
• Use moisturizing hand creams regularly
• Avoid biting your nails
• Eat a balanced diet rich in vitamins and minerals
• Limit exposure to harsh chemicals
• Massage natural oils into your nails and cuticles

These small daily steps can make a big difference over time.

Final Thoughts

Your nails can reveal a surprising amount about your overall health. Brittle nails often act as early warning signs that your body may be missing key nutrients or experiencing internal imbalances. By paying attention to these signals and making small lifestyle adjustments, you can restore nail strength and improve your overall well-being.

Every Night for 3 Days: The Simple Homemade Drink That Helped Flatten My Belly Naturally

For many people, stubborn belly fat is one of the most frustrating problems when trying to feel healthier and more confident. Busy schedules, irregular eating habits, and lack of sleep can all contribute to bloating and excess fat around the stomach. While there is no magical drink that instantly melts fat, some natural homemade drinks can support digestion, reduce bloating, and help your body feel lighter.

Recently, I tried a simple homemade drink every night for three days, and the results were surprisingly refreshing. My stomach felt less bloated, my digestion improved, and my belly appeared flatter. The best part is that the ingredients are affordable, natural, and easy to find in almost every kitchen.

Why Nighttime Drinks Can Help

Drinking the right combination of natural ingredients at night can support the body’s overnight recovery process. During sleep, the body repairs cells, balances hormones, and processes food consumed throughout the day. A light, natural drink can assist digestion, reduce water retention, and promote a calmer stomach before bed.

This drink focuses on ingredients known for supporting metabolism, reducing inflammation, and improving digestion.

Ingredients You’ll Need

To prepare this drink, you only need a few simple ingredients:

  • 1 glass of warm water

  • 1 tablespoon fresh lemon juice

  • ½ teaspoon grated ginger

  • 1 teaspoon honey (optional)

  • A small pinch of cinnamon

These ingredients are commonly used in traditional wellness drinks and have natural properties that help the body feel lighter and less bloated.

How to Prepare the Drink

Preparing this nighttime drink takes less than five minutes.

  1. Warm one glass of water until it is comfortably warm but not boiling.

  2. Add the fresh lemon juice to the water.

  3. Mix in the grated ginger and the pinch of cinnamon.

  4. Stir well and let it sit for about one minute.

  5. Add honey if you prefer a slightly sweeter taste.

  6. Drink it slowly about 30 minutes before going to bed.

What Happened After 3 Nights

After drinking this mixture each night for three days, I noticed a few subtle but encouraging changes.

Less bloating: My stomach felt calmer and less heavy in the mornings. Many people mistake bloating for fat, but improved digestion can reduce that swollen feeling.

Better digestion: Ginger and warm water helped my stomach feel more comfortable after meals. It seemed easier for my body to process food overnight.

More hydration: Drinking warm water before bed ensured that my body stayed hydrated, which can support metabolism and reduce unnecessary cravings.

A flatter appearance: While the drink did not magically remove body fat, the reduced bloating and improved digestion made my stomach appear flatter.

Why These Ingredients Work

Each ingredient plays a small but helpful role.

Lemon contains vitamin C and may support digestion by stimulating digestive juices.

Ginger is widely known for its anti-inflammatory properties and its ability to soothe the stomach and reduce bloating.

Cinnamon may help regulate blood sugar levels, which can prevent late-night cravings.

Honey provides a natural sweetness and contains antioxidants, although it can be skipped if you prefer fewer calories.

When combined, these ingredients create a warm, soothing drink that helps the body relax and digest food more comfortably.

Important Tips for Best Results

Although this drink can support a flatter stomach feeling, it works best when combined with healthy habits.

Try these tips alongside the drink:

  • Avoid heavy or greasy meals late at night

  • Walk for 10–15 minutes after dinner

  • Drink enough water during the day

  • Sleep at least 7 hours each night

  • Reduce sugary snacks before bed

Even small lifestyle improvements can make a noticeable difference in how your stomach feels.

A Natural Habit Worth Trying

This simple nighttime drink is not a miracle weight-loss solution, but it can be a gentle and natural way to support digestion and reduce bloating. Many people find that small routines like this help them stay mindful about their health.

If you’re looking for an easy wellness habit, trying this drink for three nights could be a good start. It takes only a few minutes to prepare, uses natural ingredients, and may help your body feel lighter and more comfortable.