If you’ve ever admired a plant with vibrant green leaves on top and deep purple underneath, you’ve likely encountered Tradescantia spathacea, commonly known as Moses-in-the-Cradle, Oyster Plant, or Boat Lily. While many people grow it for its striking appearance, few realize that this tropical beauty has been valued in traditional medicine for generations.
Native to Central America and parts of Mexico, Moses-in-the-Cradle has quietly earned a reputation as a plant with surprising healing properties. Let’s explore the hidden benefits of this colorful medicinal plant and why it deserves more recognition.
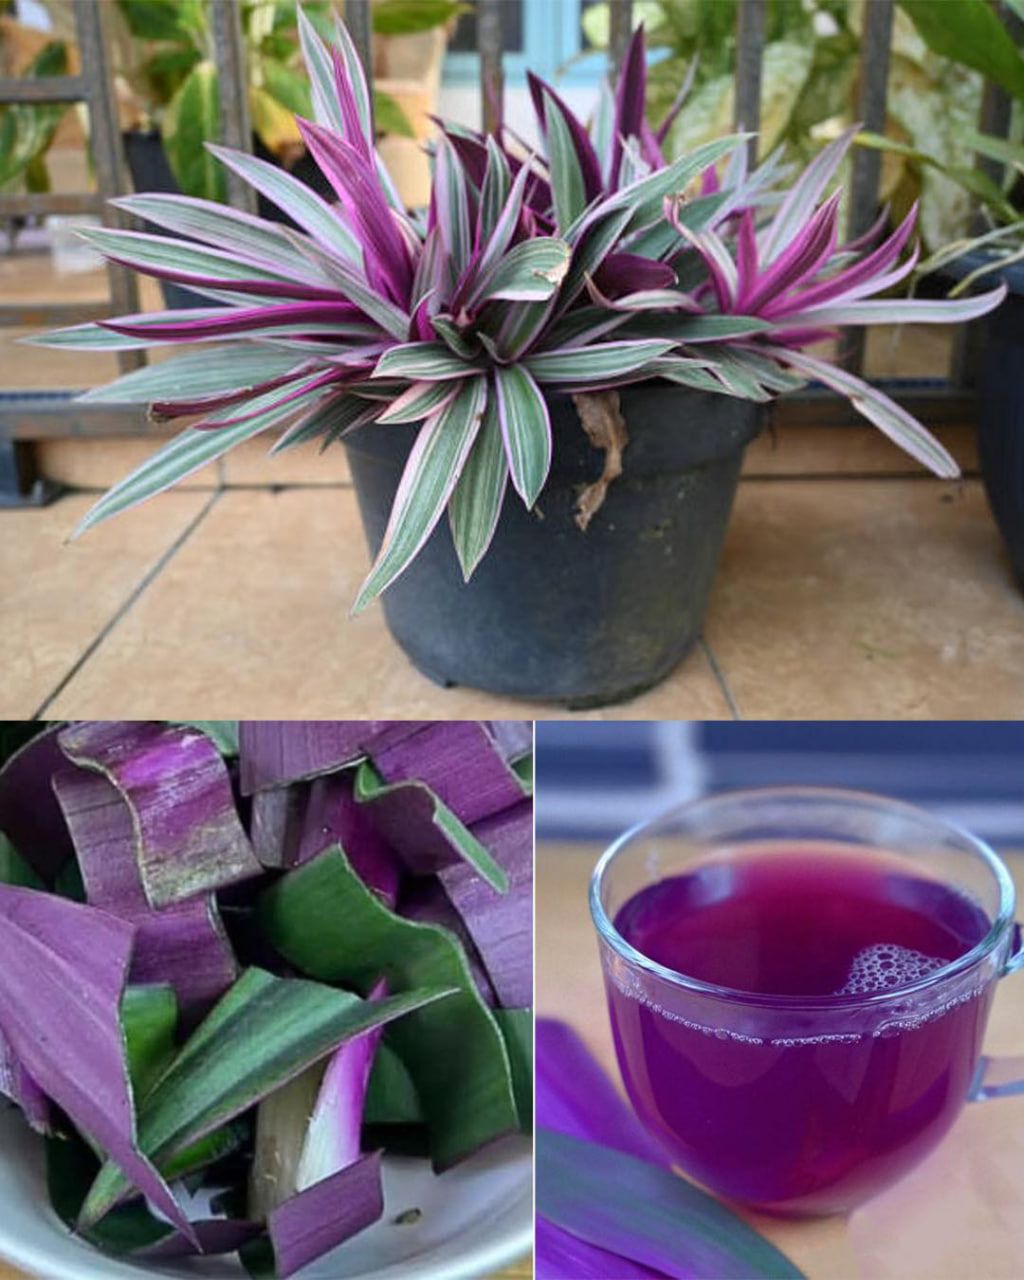
A Brief Introduction to Moses-in-the-Cradle
Moses-in-the-Cradle gets its name from its unique flowers, which appear nestled in boat-shaped bracts—resembling baby Moses in a cradle. Its sword-shaped leaves and rich purple undersides make it a popular ornamental houseplant and landscaping favorite in tropical and subtropical regions.
Beyond its decorative charm, traditional herbal practices have used its leaves and sap to address various minor ailments.
1. Natural Anti-Inflammatory Properties
One of the most commonly cited benefits of Tradescantia spathacea is its potential anti-inflammatory effect. In folk medicine, crushed leaves are sometimes applied externally to soothe:
-
Minor skin irritations
-
Swelling
-
Insect bites
-
Mild rashes
The plant contains bioactive compounds believed to help calm localized inflammation. While modern scientific research is still developing, traditional use suggests it may offer gentle support for irritated skin when applied carefully.
2. Antimicrobial and Antibacterial Potential
Some preliminary studies and traditional knowledge suggest Moses-in-the-Cradle may have antimicrobial properties. Leaf extracts have been used in certain cultures to help cleanse small wounds and protect against minor infections.
Because of these properties, it has occasionally been included in homemade herbal rinses and washes. However, it’s important to note that it should never replace proper medical treatment for serious wounds or infections.
3. Respiratory Support in Traditional Use
In some traditional systems, teas or infusions made from the leaves have been used to ease mild respiratory discomfort, such as:
-
Coughs
-
Mild colds
-
Throat irritation
The plant was sometimes prepared as a warm herbal drink intended to soothe the throat and reduce discomfort. However, ingestion should only be done with caution and proper knowledge, as not all ornamental plants are safe to consume without guidance.
4. Antioxidant Content
Like many purple-leafed plants, Moses-in-the-Cradle contains antioxidant compounds. The deep purple pigmentation suggests the presence of anthocyanins, which are known for their antioxidant activity.
Antioxidants help combat oxidative stress in the body, which is associated with aging and various chronic conditions. While more research is needed to determine how potent Tradescantia spathacea is compared to other medicinal herbs, its coloration hints at beneficial plant compounds.
5. Digestive Aid in Folk Remedies
In certain traditional practices, diluted extracts of the plant were used as a mild digestive tonic. People believed it could help relieve:
-
Mild stomach discomfort
-
Bloating
-
Occasional digestive upset
Again, this use is largely based on anecdotal evidence rather than extensive clinical trials, so caution is essential.
6. A Natural Air-Purifying Houseplant
Beyond direct medicinal uses, Moses-in-the-Cradle contributes to a healthier indoor environment. Like many leafy houseplants, it helps improve air quality by absorbing certain airborne particles and releasing oxygen.
Its low-maintenance nature makes it ideal for homes and offices, adding both aesthetic appeal and environmental benefits.
How to Use Moses-in-the-Cradle Safely
While traditional remedies often use crushed leaves, teas, or topical applications, safety is important:
-
Always test a small area before applying plant sap to the skin.
-
Avoid ingesting the plant unless guided by a qualified herbal professional.
-
Keep out of reach of pets, as some ornamental plants may be mildly toxic.
-
Pregnant or breastfeeding individuals should avoid herbal experimentation without medical advice.
Because scientific studies are still limited, it’s best to view Moses-in-the-Cradle as a complementary plant rather than a replacement for professional healthcare.
Growing Your Own Healing Plant
One of the most appealing aspects of Tradescantia spathacea is how easy it is to grow.
Care Tips:
-
Prefers bright, indirect sunlight
-
Tolerates partial shade
-
Requires well-draining soil
-
Water moderately—avoid overwatering
-
Thrives in warm climates
It can be grown in pots indoors or as ground cover outdoors in tropical regions. With minimal care, it rewards you with vibrant color year-round.
The Beauty of Blending Nature and Wellness
Moses-in-the-Cradle reminds us that some of the most striking ornamental plants may also hold traditional healing wisdom. While modern science continues to explore its properties, centuries of folk use highlight its potential value.
However, it’s important to balance curiosity with caution. Natural does not always mean risk-free, and herbal remedies should complement—not replace—evidence-based medical care.
Whether you grow it for its dramatic purple foliage or explore its gentle traditional uses, Tradescantia spathacea stands as a fascinating example of how beauty and wellness can coexist in the natural world.
In the end, this colorful medicinal plant offers more than decoration—it offers a glimpse into the rich relationship between humans and the healing power of plants