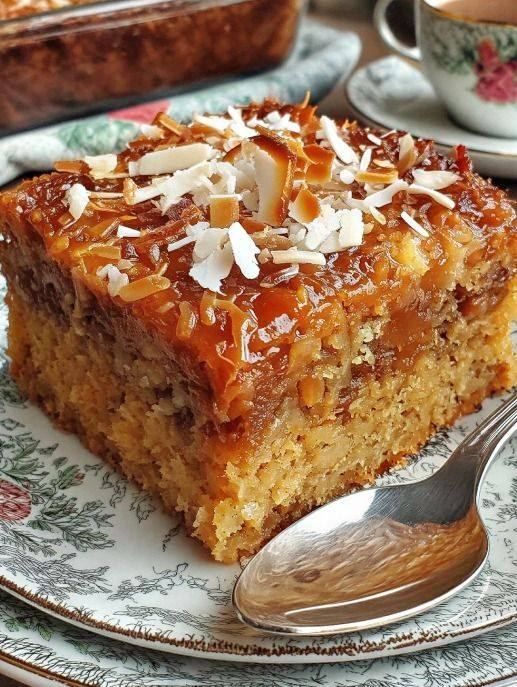
Creamy Apple Custard Cake
This creamy apple custard cake is the perfect balance between a fluffy sponge cake and a rich baked custard. With tender chunks of apples nestled inside a velvety batter, every bite melts in your mouth. Lightly dusted with powdered sugar, it’s simple yet elegant — perfect for tea time, dessert, or even a special breakfast treat.
Ingredients
For the cake:
-
3 large eggs (room temperature)
-
150 g (¾ cup) granulated sugar
-
100 ml (⅓ cup + 1 tbsp) vegetable oil or melted butter
-
120 ml (½ cup) milk (room temperature)
-
1 teaspoon vanilla extract
-
200 g (1½ cups) all-purpose flour
-
2 teaspoons baking powder
-
1 pinch salt
-
3 medium apples (peeled and diced into small cubes)
-
1 tablespoon lemon juice
For finishing:
-
Powdered sugar for dusting
Step 1: Prepare the Apples
Start by peeling and coring the apples. Dice them into small cubes — about 1 cm pieces work best. Toss the apple cubes with lemon juice in a bowl. This prevents browning and adds a slight brightness that enhances the flavor of the cake.
Set aside while you prepare the batter.
Step 2: Make the Creamy Batter
In a large mixing bowl, crack the eggs and add the sugar. Using a hand mixer or whisk, beat them together until the mixture becomes pale, thick, and slightly fluffy. This step is important because it incorporates air, giving the cake a lighter texture.
Slowly pour in the oil (or melted butter) while mixing. Then add the milk and vanilla extract. Continue mixing until smooth and fully combined.
In a separate bowl, sift together the flour, baking powder, and salt. Gradually add the dry ingredients into the wet mixture. Mix gently until you have a smooth, thick batter. Avoid overmixing, as this can make the cake dense.
The batter should be creamy and slightly thicker than pancake batter but still pourable.
Step 3: Fold in the Apples
Add the diced apples to the batter and gently fold them in using a spatula. Make sure the apple pieces are evenly distributed throughout the mixture. The apples will release moisture as they bake, creating that irresistible custard-like texture inside the cake.
Step 4: Prepare the Baking Pan
Line a rectangular baking pan (approximately 9×13 inches or 22×33 cm) with parchment paper. Lightly grease the sides if necessary.
Pour the batter into the prepared pan. Use a spatula to spread it evenly. The batter may look thick and slightly lumpy because of the apples — this is perfectly normal.
Step 5: Bake to Golden Perfection
Preheat your oven to 180°C (350°F).
Place the pan in the center rack and bake for 35–45 minutes. Baking time may vary depending on your oven. The cake is ready when:
-
The top is golden brown
-
The center is set
-
A toothpick inserted into the middle comes out mostly clean (a little moisture from apples is fine)
If the top browns too quickly, you can loosely cover it with aluminum foil during the last 10 minutes of baking.
Step 6: Cool and Slice
Remove the cake from the oven and let it cool in the pan for at least 20–30 minutes. This resting time allows the custard-like interior to firm up, making slicing easier.
Once slightly cooled, lift the cake out using the parchment paper. Place it on a serving tray and cut it into squares.
For a beautiful finish, generously dust the top with powdered sugar.
Texture and Flavor
This cake has a unique texture — soft on the outside with a creamy, almost pudding-like interior around the apples. The top forms a delicate golden crust, while the inside remains moist and tender.
The apples become incredibly soft during baking, blending with the batter to create pockets of sweetness in every bite. The subtle vanilla aroma enhances the natural apple flavor, making the cake comforting and irresistible.
Tips for Best Results
-
Use firm apples like Granny Smith or Honeycrisp. They hold their shape better during baking.
-
Room temperature ingredients mix more evenly and create a smoother batter.
-
Don’t overbake — this cake is meant to stay moist and slightly creamy inside.
-
For extra flavor, you can add:
-
½ teaspoon cinnamon
-
A pinch of nutmeg
-
Lemon zest
-
Optional Variations
1. Custard Boost:
For an even creamier texture, replace ¼ cup of milk with heavy cream.
2. Crunchy Topping:
Sprinkle sliced almonds or a crumble topping before baking.
3. Caramel Apple Twist:
Drizzle caramel sauce over the cooled cake before serving.
4. Fruit Swap:
You can replace apples with pears, peaches, or mixed berries.
Serving Suggestions
This cake is delicious warm or at room temperature. Serve it:
-
With a scoop of vanilla ice cream
-
Alongside whipped cream
-
With hot tea or coffee
-
As a light dessert after dinner
It also keeps well in the refrigerator for up to 3 days. Store in an airtight container. The flavor actually deepens the next day, making leftovers even more enjoyable.
Why You’ll Love This Recipe
-
Simple ingredients
-
Easy preparation
-
Soft and creamy texture
-
Perfect balance of sweetness
-
Great for gatherings
This creamy apple custard cake is proof that you don’t need complicated steps to create something truly special. One bite, and you’ll understand why it’s a favorite in so many homes.