I Didn’t Believe This Floor Trick Until I Tried It

Keeping floors clean and shiny can sometimes feel like a never-ending chore. Dust, footprints, food spills, and everyday dirt quickly take away that fresh, polished look we all want in our homes. Many people spend money on expensive cleaning products that promise sparkling floors but often leave streaks or chemical smells behind. For a long time, I believed that only strong store-bought cleaners could properly clean floors. However, I recently discovered a simple floor-cleaning trick that completely changed my mind.

At first, I was skeptical. The idea seemed too simple to actually work. But after trying it myself, I was surprised at how effective it was. Not only did it clean my floors beautifully, but it also made the entire house smell fresh and pleasant. The best part is that this trick uses common household ingredients that many people already have in their kitchens.

Why Traditional Floor Cleaners Can Be Problematic

Many commercial floor cleaners contain strong chemicals that may leave residue on surfaces. Over time, this buildup can actually make floors look dull instead of shiny. Some cleaners also create slippery surfaces, which can be dangerous, especially for children or elderly family members.

Another common issue is the strong artificial fragrance found in many products. While these scents may seem pleasant at first, they can sometimes cause headaches or discomfort for people sensitive to strong smells.

Because of these issues, many homeowners are starting to look for simpler and more natural cleaning methods.

The Simple Floor Cleaning Trick

This trick relies on a powerful yet gentle combination of three ingredients:

Ingredients

  • 1 bucket of warm water

  • 1 cup white vinegar

  • 1 tablespoon dish soap

  • Optional: a few drops of lemon essential oil for fragrance

Why These Ingredients Work

Each ingredient in this mixture plays an important role in cleaning the floor effectively.

White vinegar is known for its natural cleaning properties. It helps break down grease, remove dirt, and dissolve residue left by other cleaning products. Vinegar is also excellent at eliminating odors, leaving floors smelling fresh.

Dish soap helps lift dirt and grime from the floor surface. It breaks down oils and sticky residues that often build up in kitchens and high-traffic areas.

Warm water helps activate the cleaning power of the ingredients while loosening stubborn dirt and stains.

Lemon essential oil, if added, provides a light and refreshing scent that makes the entire home feel cleaner.

Step-by-Step Cleaning Method

This cleaning method is extremely simple and takes only a few minutes to prepare.

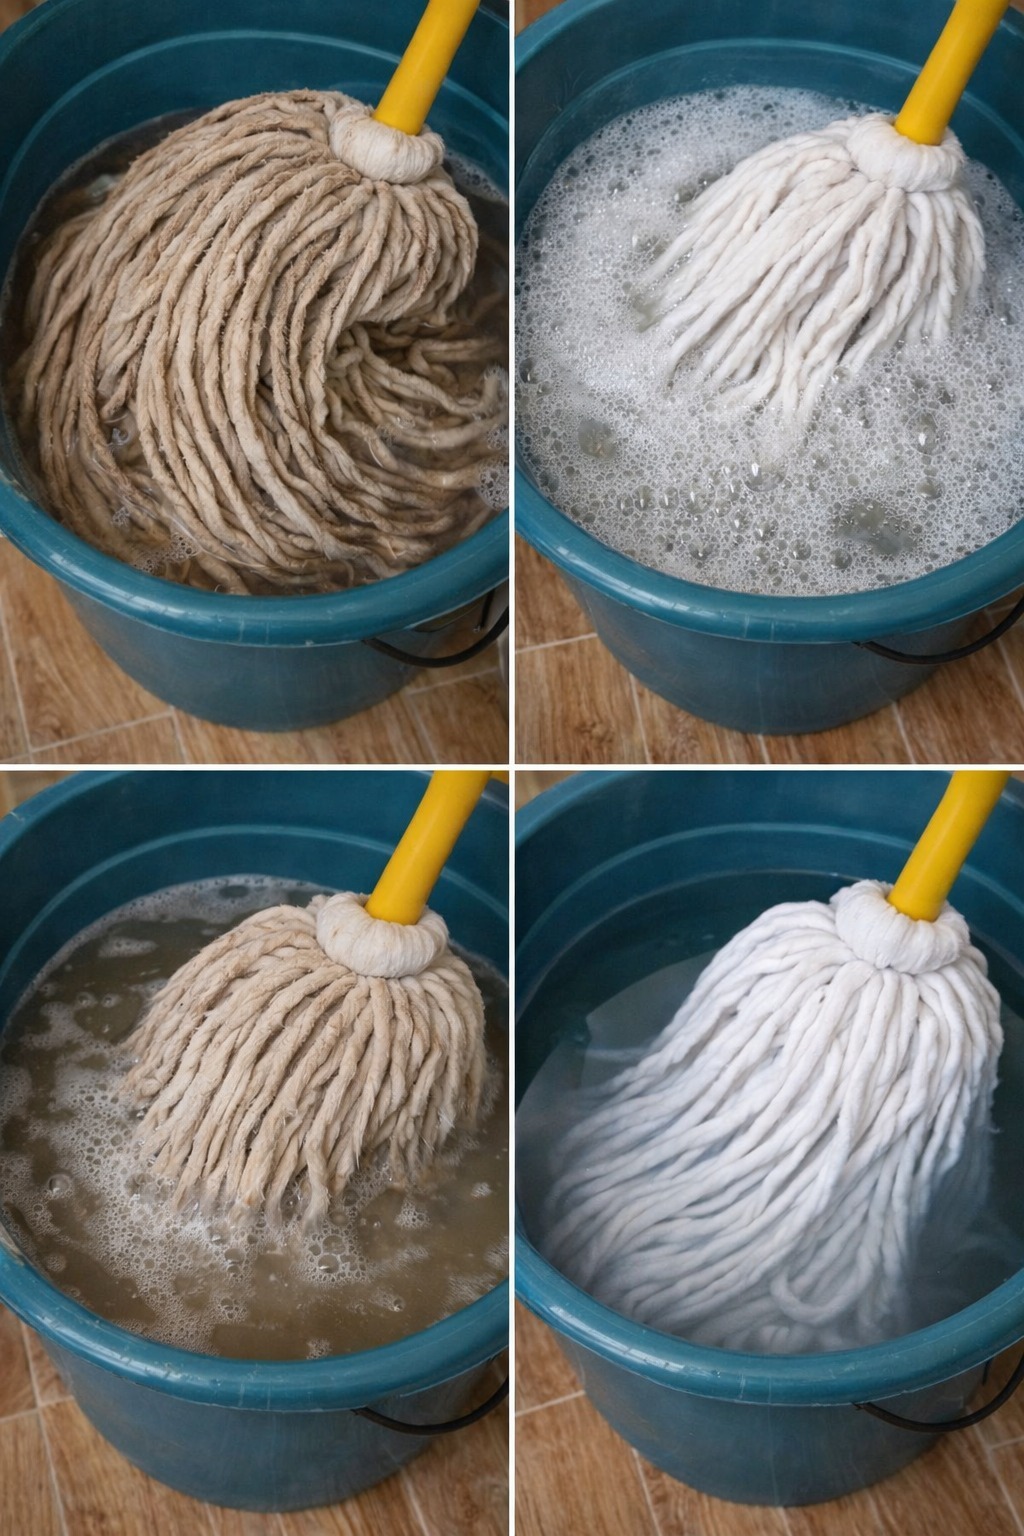
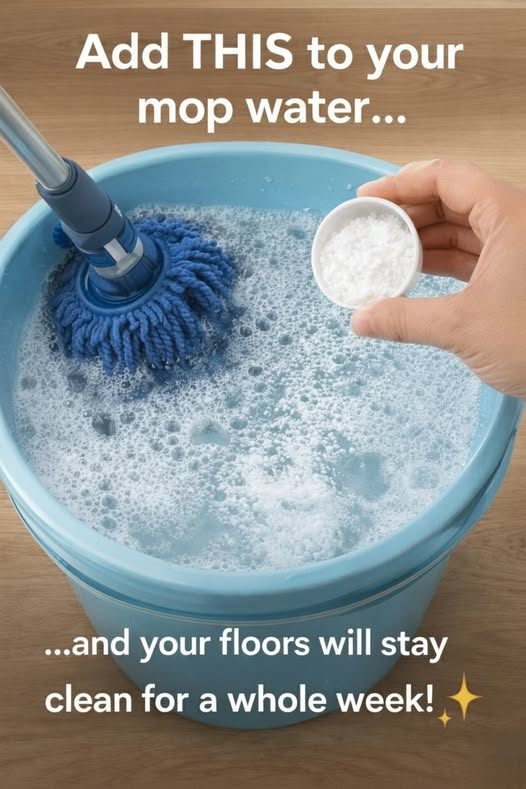
Step 1: Prepare the cleaning solution

Fill a bucket with warm water. Add the vinegar and dish soap, then gently mix the solution. If you like a pleasant scent, add a few drops of lemon essential oil.

Step 2: Sweep or vacuum the floor

Before mopping, remove dust, crumbs, and loose dirt using a broom or vacuum. This step prevents dirt from spreading while mopping.

Step 3: Mop the floor

Dip a mop into the cleaning solution and wring out the excess water. Mop the floor in sections, moving from one side of the room to the other.

Step 4: Allow the floor to air dry

One of the best parts of this trick is that the floor dries quickly without leaving streaks or sticky residue.

The Surprising Results

When I tried this method for the first time, I immediately noticed the difference. The floors looked brighter and cleaner than they had in a long time. Even areas that usually appeared dull began to shine again.

Another unexpected benefit was how fresh the entire room smelled. Instead of a heavy chemical odor, the house had a light, clean scent that felt much more natural.

The mixture also worked well on several types of floors, including tile, laminate, and vinyl. However, it’s always a good idea to test any cleaning solution on a small hidden area first, especially if you have delicate flooring.

Extra Tips for Even Better Results

If your floors are very dirty, you can slightly increase the amount of dish soap in the mixture. Just be careful not to add too much, as excess soap may create bubbles or streaks.

For extremely tough stains, allow the mop to sit on the area for a few seconds before wiping it away. This gives the vinegar time to break down stubborn dirt.

Another useful tip is to change the cleaning water if it becomes too dirty during the process. Fresh solution ensures the best cleaning results.

Why Simple Cleaning Methods Often Work Best

Many people are surprised to learn that some of the most effective cleaning solutions are also the simplest. Household ingredients like vinegar and soap have been used for generations because they are reliable, affordable, and easy to use.

Using simple cleaning mixtures can also reduce the number of harsh chemicals inside your home. This can create a healthier environment while still keeping surfaces spotless.

Final Thoughts

At first, I honestly didn’t believe this floor-cleaning trick would make much of a difference. It seemed too basic compared to the many commercial cleaners available in stores. But after trying it myself, I quickly realized how powerful this simple method can be.

Cauliflower Salad

Cauliflower salad is a refreshing and satisfying dish that brings together crisp vegetables, creamy dressing, and a delightful blend of textures and flavors. This simple yet delicious salad is perfect for family meals, picnics, potlucks, or even as a healthy side dish during busy weekdays. The star ingredient, cauliflower, is known for its mild flavor and incredible versatility. When combined with fresh vegetables and a rich dressing, it transforms into a vibrant dish that is both nutritious and incredibly tasty.

Cauliflower is packed with vitamins, minerals, and antioxidants that support overall health. It is rich in vitamin C, vitamin K, and fiber, making it a great choice for anyone looking to add more wholesome ingredients to their diet. The crunchy texture of raw cauliflower works beautifully in salads, offering a satisfying bite that pairs perfectly with creamy or tangy dressings.

One of the best things about cauliflower salad is how easy it is to customize. You can add different vegetables, herbs, proteins, or nuts to suit your taste preferences. Some people like to include crispy bacon for a smoky flavor, while others prefer sunflower seeds or almonds for extra crunch. Cheddar cheese, red onions, and fresh herbs can also enhance the flavor profile of the dish.

This recipe keeps things simple while delivering maximum flavor. The creamy dressing lightly coats the vegetables, creating a perfect balance between richness and freshness. The result is a salad that is light, refreshing, and full of texture.

Whether you are preparing a quick lunch, a light dinner side dish, or something to share with guests, cauliflower salad is always a wonderful option. It requires minimal cooking and can be made ahead of time, which allows the flavors to develop even more. Once chilled, the salad becomes even more delicious as the dressing blends with the vegetables.

Let’s explore how to prepare this delightful cauliflower salad step by step.

Ingredients

For the Salad

  • 1 medium head cauliflower, cut into small florets

  • 1 cup cherry tomatoes, halved

  • ½ cup red onion, finely chopped

  • ½ cup shredded cheddar cheese

  • ¼ cup chopped fresh parsley

  • ¼ cup sunflower seeds or chopped almonds

For the Dressing

  • ½ cup mayonnaise

  • 2 tablespoons sour cream

  • 1 tablespoon apple cider vinegar

  • 1 teaspoon Dijon mustard

  • ½ teaspoon salt

  • ½ teaspoon black pepper

  • 1 teaspoon honey (optional for a slight sweetness)

Instructions

Step 1: Prepare the Cauliflower

Start by washing the cauliflower thoroughly under cold running water. Remove the leaves and cut the cauliflower into small bite-sized florets. Smaller pieces work best for salads because they absorb the dressing better and are easier to eat.

If you prefer slightly softer cauliflower, you can blanch the florets in boiling water for about 1–2 minutes and then immediately transfer them to ice water. However, for a crisp and crunchy salad, raw cauliflower works perfectly.

Step 2: Chop the Vegetables

Next, slice the cherry tomatoes in half and finely chop the red onion. The red onion adds a mild sharpness that balances the creamy dressing. If you want a milder onion flavor, you can soak the chopped onions in cold water for about 10 minutes before adding them to the salad.

Chop the fresh parsley and measure out the sunflower seeds or almonds.

Step 3: Prepare the Dressing

In a small mixing bowl, combine the mayonnaise, sour cream, apple cider vinegar, Dijon mustard, salt, and black pepper. Whisk the ingredients together until the dressing becomes smooth and creamy.

If you like a slightly sweet balance, add one teaspoon of honey. This helps round out the tanginess of the vinegar and mustard.

Taste the dressing and adjust the seasoning if needed.

Step 4: Assemble the Salad

In a large salad bowl, add the cauliflower florets, cherry tomatoes, chopped red onion, shredded cheddar cheese, parsley, and sunflower seeds.

Pour the prepared dressing over the salad ingredients.

Step 5: Mix Everything Together

Gently toss the salad until all the ingredients are evenly coated with the creamy dressing. Make sure the dressing reaches every part of the cauliflower and vegetables for the best flavor.

Step 6: Chill Before Serving

Cover the salad bowl with plastic wrap or a lid and place it in the refrigerator for at least 30 minutes. This resting time allows the flavors to blend together beautifully.

Chilling the salad also enhances its refreshing taste.

Serving Suggestions

Cauliflower salad is incredibly versatile and pairs well with many dishes. You can serve it alongside grilled chicken, roasted meats, sandwiches, or burgers. It also works wonderfully as part of a summer barbecue spread or a light lunch.

For extra flavor, you can add crispy bacon bits, diced avocado, or even boiled eggs. A squeeze of fresh lemon juice can also brighten the flavors.

Storage Tips

Store leftover cauliflower salad in an airtight container in the refrigerator. It stays fresh for up to 3 days. Before serving again, give the salad a quick stir to redistribute the dressing.

Avoid freezing the salad because the creamy dressing may separate and the vegetables may lose their texture.

Final Thoughts

Cauliflower salad is a simple yet flavorful dish that combines freshness, crunch, and creamy goodness in every bite. With its nutritious ingredients and easy preparation, it is a perfect addition to any meal. Whether you enjoy it as a healthy side dish or a light main course, this salad offers a delicious way to enjoy the natural goodness of cauliflower.

Very Dirty Mop, Do Not Buy It Again: Just a Drop of This Ingredient Can Bring It Back to Life

Keeping your floors clean is an important part of maintaining a healthy and comfortable home. However, one problem many people face is dealing with a very dirty mop. Over time, mops absorb dust, grease, bacteria, and unpleasant odors. When this happens, many people think the only solution is to throw the mop away and buy a new one. But the truth is that you can restore a dirty mop easily using a simple household ingredient that works like magic.

Instead of wasting money on a new mop, you can revive your old one with just a small amount of a powerful cleaning ingredient: white vinegar. This natural cleaner has been used for generations to remove dirt, kill bacteria, and eliminate odors. With only a drop or two, you can bring your mop back to life and make it fresh again.

Let’s explore why mops get so dirty, how vinegar helps clean them, and the simple step-by-step method you can use at home.


Why Mops Become Extremely Dirty

Every time you clean your floor, your mop absorbs everything on the surface. Dust, grease, food residue, pet hair, and bacteria all collect in the mop fibers. Even if you rinse the mop after cleaning, some of that dirt remains trapped deep inside the material.

Over time, several problems start to appear:

  • Bad smells begin to develop because bacteria grow in the damp fibers.

  • Sticky residue makes the mop less effective when cleaning floors.

  • Gray or black stains appear as dirt builds up.

  • The mop spreads germs instead of removing them.

This is why many people get frustrated and decide to throw the mop away. But in most cases, the mop simply needs a deep cleaning.


The Secret Ingredient: White Vinegar

White vinegar is one of the most effective natural cleaning ingredients you can use in your home. It contains acetic acid, which helps dissolve dirt, grease, and mineral deposits.

Here are some of the reasons vinegar works so well:

  • It kills many types of bacteria

  • It removes unpleasant odors

  • It breaks down grease and grime

  • It softens mop fibers, helping them release trapped dirt

  • It is cheap, natural, and safe

Just a small amount can transform a dirty mop into a fresh, clean tool again.


Simple Mop Cleaning Recipe

Here is the easy method you can follow to clean even the dirtiest mop.

Ingredients

  • 1 bucket of hot water

  • 1 tablespoon white vinegar

  • 1 teaspoon dish soap

  • Optional: a few drops of lemon juice for freshness


Step-by-Step Cleaning Method

Step 1: Shake Out Loose Dirt

Before washing the mop, shake it outside or over a trash bin to remove loose dust, hair, and debris. This step helps prevent the dirt from spreading in the cleaning water.


Step 2: Prepare the Cleaning Solution

Fill a bucket with hot water. Add the tablespoon of white vinegar and the teaspoon of dish soap. Mix the solution well so the ingredients combine.

The hot water helps dissolve grease while vinegar works to disinfect and remove odors.


Step 3: Soak the Mop

Place the dirty mop into the bucket and allow it to soak for 20 to 30 minutes. During this time, the vinegar and soap will break down the dirt trapped in the fibers.

You may notice the water turning gray or brown, which means the grime is being released.


Step 4: Scrub If Necessary

If the mop is extremely dirty, gently scrub the fibers with your hands or a small brush. This helps remove stubborn buildup.


Step 5: Rinse Thoroughly

After soaking, rinse the mop under running water until the water runs clear. This removes any remaining dirt and cleaning solution.


Step 6: Dry the Mop Properly

Always allow the mop to dry completely before storing it. Hang it in a well-ventilated area so air can circulate around the fibers.

Drying is important because moisture encourages bacteria growth.


Extra Tips to Keep Your Mop Clean

Once your mop is clean again, these simple habits can help keep it fresh for longer.

1. Rinse After Every Use
Always rinse the mop thoroughly after cleaning floors.

2. Use Hot Water
Hot water helps remove grease and bacteria more effectively.

3. Disinfect Weekly
Soak the mop in vinegar solution once a week to prevent buildup.

4. Dry Completely
Never leave a mop sitting in a bucket of water.

5. Replace Only When Necessary
A well-maintained mop can last for many months before it needs replacing.


Why Natural Cleaning Methods Are Better

Using simple ingredients like vinegar is not only effective but also environmentally friendly. Many commercial cleaning products contain harsh chemicals that can irritate the skin and pollute indoor air.

Natural cleaning solutions are:

  • Safer for children and pets

  • Affordable and easy to find

  • Gentle on surfaces and cleaning tools

  • Better for the environment

With just a few household ingredients, you can keep your home clean without spending a lot of money.


Final Thoughts

A very dirty mop doesn’t always mean it’s time to throw it away. Often, it simply needs a deep cleaning to remove the dirt, grease, and bacteria trapped inside the fibers. With just a drop of white vinegar, a bit of dish soap, and hot water, you can restore your mop and make it fresh again.

Loaded Taco Salad Bowl Recipe

This vibrant, flavor-packed taco salad bowl is the perfect combination of fresh vegetables, seasoned ground beef, crunchy tortilla chips, and melted cheese. It’s hearty enough to serve as a complete meal yet fresh and crisp like a salad. Perfect for weeknight dinners, potlucks, or game-day gatherings, this recipe delivers bold Tex-Mex flavors in every bite.

Ingredients

For the Taco Meat:

  • 1 pound ground beef (80/20 for best flavor)

  • 1 small onion, finely diced

  • 2 cloves garlic, minced

  • 1 packet taco seasoning (or 2 tablespoons homemade taco seasoning)

  • ½ cup water

  • Salt and black pepper to taste

For the Salad Base:

  • 1 large head iceberg lettuce, chopped

  • 1 cup cherry tomatoes, halved (or 2 medium tomatoes, diced)

  • ½ cup red onion, finely diced

  • 1 cup canned black beans, drained and rinsed

  • 1 cup shredded cheddar cheese (or Mexican blend)

  • 1 ½ cups tortilla chips, lightly crushed

Optional Toppings:

  • ½ cup sour cream

  • ½ cup salsa

  • 1 avocado, diced or sliced

  • ¼ cup chopped fresh cilantro

  • Sliced jalapeños

  • Fresh lime wedges


Instructions

Step 1: Prepare the Taco Meat

In a large skillet over medium heat, add the ground beef and diced onion. Cook for 6–8 minutes, breaking the meat apart with a wooden spoon, until browned and fully cooked. Drain excess grease if necessary.

Add minced garlic and cook for another 30 seconds until fragrant. Stir in the taco seasoning and water. Reduce heat to low and let simmer for 3–5 minutes, allowing the flavors to blend and the sauce to slightly thicken. Taste and adjust seasoning with salt and pepper if needed. Remove from heat and set aside to cool slightly.

Step 2: Prepare the Salad Ingredients

While the meat is cooking, wash and thoroughly dry the lettuce. Chop it into bite-sized pieces and place it into a large serving bowl. Properly dried lettuce ensures the salad doesn’t become watery.

Add halved cherry tomatoes, diced red onion, and drained black beans over the lettuce. These ingredients add sweetness, crunch, and protein, creating a balanced base for the warm taco meat.

Step 3: Assemble the Salad

Once the taco meat has cooled slightly (it should be warm but not piping hot), spoon it evenly over the lettuce mixture. The warmth gently softens the cheese and slightly wilts the lettuce, enhancing the texture without making it soggy.

Sprinkle shredded cheddar cheese generously across the top. Add crushed tortilla chips for crunch. You can mix everything together just before serving or leave it layered for presentation and allow guests to toss their own portions.

Step 4: Add Optional Toppings

Top with dollops of sour cream, spoonfuls of salsa, creamy avocado slices, and a sprinkle of fresh cilantro. A squeeze of lime juice right before serving brightens all the flavors beautifully.

Serve immediately to maintain the crispness of the lettuce and chips.


Tips for the Best Taco Salad

1. Use Fresh, Crisp Lettuce:
Iceberg lettuce works best for its crunch and ability to hold up under warm toppings. Romaine can also be used for a slightly more nutrient-dense option.

2. Let the Meat Cool Slightly:
Adding extremely hot meat can overly wilt the lettuce. Letting it cool for 5 minutes ensures the perfect balance.

3. Customize the Protein:
You can substitute ground turkey, shredded chicken, or even seasoned tofu for a lighter or vegetarian version.

4. Make It Ahead (Smartly):
Prep all ingredients separately and store them in airtight containers. Assemble just before serving to keep everything fresh and crunchy.

5. Add Extra Flavor Layers:
A drizzle of Catalina dressing, ranch dressing, or chipotle crema can add a creamy tangy twist.


Storage Instructions

If you anticipate leftovers, store the components separately. Once fully mixed, the salad tends to become soggy due to the dressing and meat juices.

  • Refrigerate leftover taco meat in an airtight container for up to 3 days.

  • Store chopped vegetables separately for best freshness.

  • Keep tortilla chips in a sealed bag at room temperature.

Reheat the meat gently before assembling fresh portions.


Nutritional Benefits

This taco salad isn’t just delicious—it’s balanced. You get protein from the beef and beans, fiber from the vegetables and legumes, healthy fats from avocado, and calcium from cheese. By controlling toppings and portions, you can easily adjust it to fit your dietary needs.

For a lighter version:

  • Use lean ground beef or turkey.

  • Reduce cheese quantity.

  • Replace sour cream with Greek yogurt.

  • Add more vegetables like bell peppers or corn.


Serving Ideas

This taco salad is filling on its own, but it pairs wonderfully with:

  • Mexican rice

  • Refried beans

  • Fresh fruit salad

  • Iced tea or lime-infused water

It’s also great served in individual bowls for a build-your-own taco salad bar. Set out all toppings separately and let everyone customize their plate.


Final Thoughts

This loaded taco salad bowl is the perfect blend of comfort food and fresh ingredients. The seasoned meat provides savory richness, while crisp lettuce and juicy tomatoes bring freshness and texture. The cheese melts slightly into the warm beef, and the tortilla chips add irresistible crunch.

Whether you’re feeding your family on a busy weeknight or entertaining guests, this colorful and satisfying salad is always a crowd-pleaser. With simple ingredients and easy preparation, it’s a recipe you’ll return to again and again.

Is the Viral Vaseline and Salt Hack the Secret to Smoother Tighter-Looking Skin for Women Over 35

Is the Viral Vaseline and Salt Hack the Secret to Smoother, Tighter-Looking Skin for Women Over 35? Let’s break it down in a simple, honest way — and then I’ll share a safe, practical “UNIE-style” skincare routine you can try at home.

First, what is this viral hack? The trend usually involves mixing Vaseline (petroleum jelly) with regular table salt, applying it to the face, massaging gently, and leaving it on for a few minutes before rinsing. Some people claim it exfoliates, tightens skin, reduces wrinkles, and gives an instant glow — especially for women over 35 dealing with dryness, fine lines, and dullness.

But does it really work?

Let’s understand the ingredients.

Vaseline is an occlusive moisturizer. That means it seals moisture into the skin. It does not hydrate by itself, but it prevents water loss. This can make skin look smoother temporarily because dry lines appear less visible when the skin barrier is protected.

Salt, on the other hand, is a physical exfoliant. It removes dead skin cells through friction. However, regular table salt has rough, uneven edges. On facial skin — especially mature skin over 35, which tends to be thinner and more sensitive — salt can cause micro-tears, irritation, redness, and even worsen fine lines over time.

So what happens when you mix them?

The Vaseline reduces some of the harshness of salt, but it does not eliminate the risk of irritation. The result might be temporary smoothness because dead skin is removed and moisture is sealed in. However, this is not true tightening. It’s more of a short-term surface effect.

Now let’s talk about women over 35 specifically.

After 35, collagen production naturally declines. Hormonal shifts can cause dryness, loss of elasticity, and uneven texture. Skin barrier function also weakens slightly. That means harsh exfoliation can do more harm than good. Tightness after using salt often isn’t “lifting” — it’s mild inflammation or dehydration, which can actually accelerate aging if done frequently.

So is it a secret miracle?

No. It’s more of a temporary smoothing trick — and it’s not the safest method.

However, we can transform this idea into a safer “UNIE Glow Routine” that supports mature skin gently and effectively.

Here is a smarter version:

UNIE Gentle Glow Balm for Women 35+

Ingredients:
1 teaspoon petroleum jelly (like Vaseline)
1 teaspoon aloe vera gel (pure, no alcohol)
A pinch of fine sugar (not salt)
2 drops vitamin E oil (optional)

Why this works better:

Sugar has rounder particles than salt and is less abrasive. Aloe vera hydrates and soothes. Vitamin E supports skin barrier health. Petroleum jelly seals everything in to prevent moisture loss.

How to use:

First, wash your face with a gentle cleanser. Pat dry — do not rub.

Mix all ingredients in a small bowl until smooth.

Apply to your face with very light circular motions for no more than 60 seconds. Focus on areas with rough texture, not delicate eye areas.

Leave it on for 5 minutes as a hydrating mask.

Rinse with lukewarm water and pat dry.

Follow with a light moisturizer.

Use only once per week.

What to expect:

After one use, your skin may feel softer and look more radiant because dead skin cells were gently removed and moisture was sealed in. Over time, consistent gentle care supports smoother-looking skin.

But remember — real tightening comes from collagen support, not scrubbing.

For true long-term improvement, focus on:

Daily sunscreen (most important step)
Hydrating serums with hyaluronic acid
Retinol (if tolerated)
Adequate protein intake
Sleep and stress management

Also, always patch test new mixtures on your inner arm before applying to your face.

Important safety note:

If you have rosacea, eczema, active acne, or very sensitive skin, avoid physical exfoliants entirely. Choose mild chemical exfoliants like lactic acid instead.

Final Truth

The viral Vaseline and salt hack is not a miracle anti-aging secret. It may provide temporary smoothness but can irritate mature skin if overused. Women over 35 benefit far more from gentle hydration, barrier repair, sun protection, and collagen-supportive ingredients than from harsh exfoliation trends.

7 Reasons You Should Be Adding Sweet Potatoes to Your Diet

Sweet potatoes are more than just a colorful side dish. Naturally sweet, rich in nutrients, and incredibly versatile, they deserve a regular place in your kitchen. Whether roasted, mashed, baked, or blended into soups, sweet potatoes offer impressive health benefits while satisfying your taste buds. Here are seven compelling reasons to start adding sweet potatoes to your diet today — plus a simple, healthy recipe at the end.


1. Packed with Powerful Nutrients

Sweet potatoes are nutritional powerhouses. They’re especially rich in vitamin A (in the form of beta-carotene), which supports healthy vision, immune function, and skin health. One medium sweet potato can provide more than 100% of your daily vitamin A needs.

They also contain vitamin C, vitamin B6, potassium, and manganese. Potassium supports heart health and helps regulate blood pressure, while vitamin C boosts your immune system and promotes collagen production.


2. Excellent Source of Fiber

Fiber plays a crucial role in digestive health, and sweet potatoes are loaded with it. A single serving provides a significant amount of dietary fiber, helping to support regular digestion and prevent constipation.

Fiber also helps you feel fuller longer, which can assist with weight management. Including sweet potatoes in your meals may reduce cravings and overeating throughout the day.


3. Support for Blood Sugar Balance

Despite their sweet taste, sweet potatoes have a relatively moderate glycemic index compared to many refined carbohydrates. Their fiber content slows digestion and helps prevent sharp blood sugar spikes.

For individuals watching their blood sugar levels, sweet potatoes can be a better alternative to white bread, white rice, or processed snacks. When paired with protein and healthy fats, they become part of a balanced, blood sugar–friendly meal.


4. Rich in Antioxidants

Sweet potatoes, especially orange and purple varieties, are packed with antioxidants. Beta-carotene, anthocyanins (in purple sweet potatoes), and vitamin C help fight free radicals in the body.

Antioxidants reduce oxidative stress, which is linked to chronic conditions such as heart disease and certain cancers. By adding sweet potatoes to your diet, you’re giving your body natural protection against cellular damage.


5. Promote Heart Health

The combination of potassium, fiber, and antioxidants makes sweet potatoes heart-friendly. Potassium helps regulate blood pressure by balancing sodium levels in the body.

Fiber helps lower LDL (bad) cholesterol, reducing the risk of heart disease. Regularly including nutrient-rich whole foods like sweet potatoes can contribute to overall cardiovascular wellness.


6. Boost Immune Function

The high vitamin A and vitamin C content in sweet potatoes supports a strong immune system. Vitamin A helps maintain healthy mucous membranes in the respiratory and digestive tracts — your body’s first line of defense against pathogens.

Vitamin C enhances the production of white blood cells, helping your body fight infections more effectively. Especially during cold and flu season, sweet potatoes are a smart addition to your meals.


7. Incredibly Versatile and Delicious

Sweet potatoes can be used in countless recipes. They work beautifully in savory dishes like roasted vegetable bowls and soups, as well as in sweeter preparations like muffins and pies.

You can bake them whole, cube and roast them, mash them with herbs, blend them into smoothies, or even turn them into crispy fries. Their natural sweetness pairs well with spices like cinnamon, paprika, cumin, and rosemary.


Healthy Roasted Sweet Potato Recipe

Here’s a simple and delicious way to enjoy sweet potatoes at home.

Ingredients:

  • 2 large sweet potatoes

  • 2 tablespoons olive oil

  • 1 teaspoon paprika

  • ½ teaspoon garlic powder

  • ½ teaspoon black pepper

  • ½ teaspoon salt

  • Optional: pinch of cinnamon or chili flakes

Instructions:

  1. Preheat your oven to 400°F (200°C).

  2. Wash and peel the sweet potatoes (you can leave the skin on for extra fiber if desired).

  3. Cut into cubes about 1-inch in size for even cooking.

  4. Toss with olive oil in a large bowl until evenly coated.

  5. Add seasonings and mix well so the spices cover all pieces.

  6. Spread on a baking sheet in a single layer (avoid overcrowding to ensure crispiness).

  7. Roast for 25–30 minutes, flipping halfway through, until golden brown and tender inside.

Serve warm as a side dish, add to salads, or use in grain bowls with quinoa and grilled chicken.


Final Thoughts

Sweet potatoes are one of the most nutritious and versatile vegetables you can eat. From supporting your immune system and heart health to improving digestion and providing long-lasting energy, their benefits are impressive.

By incorporating sweet potatoes into your weekly meal plan, you’re choosing a whole food that nourishes your body while satisfying your taste buds. Try the simple roasted recipe above and experiment with different herbs and spices to keep things exciting.

5 Things Men Want From a Woman After 60 | Jorge Bucay

As we grow older, our priorities shift. The intensity and urgency of youth soften into something deeper, calmer, and more meaningful. According to the reflections often shared by Argentine psychotherapist and author Jorge Bucay, love after 60 is not about games, appearances, or proving anything. It is about authenticity, companionship, and emotional truth.

Men over 60 do not seek perfection. They seek peace. They do not crave drama. They crave depth. Here are five things men truly want from a woman after 60 — not from a place of immaturity, but from wisdom shaped by life experience.

1. Emotional Peace, Not Drama

After decades of responsibilities, careers, family challenges, and life’s inevitable disappointments, many men reach a stage where inner peace becomes a priority. They are no longer interested in power struggles or emotional turbulence.

A woman who communicates calmly, who listens without attacking, and who resolves conflict with maturity becomes deeply attractive. Emotional stability creates a safe space where both partners can relax and be themselves. At this stage in life, love should feel like coming home — not walking on eggshells.

Peace does not mean avoiding disagreements. It means handling them with respect. Men over 60 often value harmony more than being right.

2. Genuine Companionship

Loneliness can become more noticeable with age. Children grow up, careers slow down, and social circles shrink. What many men truly desire is companionship — someone to share daily life with.

This includes simple pleasures: morning coffee conversations, evening walks, traveling together, or even sitting quietly while reading. Companionship is not about constant excitement; it is about shared presence.

A woman who enjoys partnership — who sees “us” instead of only “me” — becomes incredibly meaningful. Mutual support, laughter, and shared routines create a bond that feels secure and fulfilling.

3. Respect and Appreciation

After 60, many men reflect on their lives — their achievements, mistakes, sacrifices, and lessons learned. Feeling respected for who they are, not just what they provide, matters deeply.

Respect does not mean admiration without limits. It means recognizing a man’s experiences, valuing his opinions, and acknowledging his efforts. Appreciation for small gestures — fixing something around the house, planning a dinner, offering help — strengthens emotional connection.

At this stage, ego battles are exhausting. Mutual respect becomes the foundation of love. A man who feels appreciated is more likely to give affection, loyalty, and kindness in return.

4. Emotional Intimacy Over Physical Perfection

While physical attraction never completely disappears, it changes. Wrinkles, gray hair, and slower movements are natural parts of aging. What replaces youthful obsession with appearance is emotional intimacy.

Men over 60 often long for deeper conversations — about life, fears, memories, dreams, even regrets. They want a partner who can open her heart and allow vulnerability.

Holding hands, meaningful eye contact, warm hugs — these gestures can carry more power than grand romantic displays. Emotional closeness creates a sense of being truly seen and understood.

In Bucay’s philosophy, love is a conscious choice. It is not possession, but connection. After 60, connection becomes the true source of passion.

5. Shared Growth and Positivity

Life after 60 is not an ending; it is another chapter. Many men want a partner who still sees possibilities — someone curious about life, open to learning, and willing to try new experiences.

This does not mean extreme adventures. It can mean learning a new hobby, traveling to a place never visited, joining a community group, or simply staying mentally engaged.

Positivity becomes magnetic. A woman who focuses on gratitude rather than constant complaints creates an uplifting atmosphere. Men at this stage often seek lightness — not denial of reality, but a balanced perspective.

A relationship built on encouragement and shared growth feels alive. It reminds both partners that aging does not mean shrinking; it means evolving.


A Different Kind of Love

Love after 60 is quieter, but deeper. It is less about proving worth and more about sharing it. According to the teachings of Jorge Bucay, true love respects individuality. It allows both people to remain whole while walking together.

Men in this stage of life are not searching for someone to complete them. They are searching for someone to accompany them — with honesty, kindness, and mutual respect.

In the end, what men want after 60 is simple yet profound:

  • Peace instead of chaos

  • Companionship instead of loneliness

  • Respect instead of competition

  • Emotional intimacy instead of superficial attraction

  • Shared growth instead of stagnation

These desires are not exclusive to men, of course. Many women want the same things. Aging strips away illusions and reveals what truly matters: connection, understanding, and a partnership rooted in authenticity.

After 60, love is not about starting over — it is about continuing life with someone who makes the journey lighter and more meaningful.

A month before my stroke, my body started warning me. These are the first symptoms

A month before a stroke happens, the body often whispers before it screams. Many people ignore the early warning signs because they seem mild, temporary, or unrelated. But just like a small crack in a wall signals deeper structural issues, these subtle symptoms may be the body’s way of asking for urgent attention. A stroke — medically known as a Stroke — occurs when blood flow to the brain is interrupted, either by a clot (ischemic stroke) or a burst blood vessel (hemorrhagic stroke). In many cases, the warning signs begin weeks before the major event.

One of the earliest symptoms people report is sudden weakness or numbness, especially on one side of the body. This may affect the face, arm, hand, or leg. You might notice your grip feels weaker, or one side of your face feels slightly numb when washing it. Sometimes it comes and goes, lasting only a few minutes. This can be a sign of a Transient Ischemic Attack, often called a “mini-stroke.” Though temporary, it is a serious red flag that a larger stroke may follow.

Another common early warning is unexplained dizziness or loss of balance. You may feel unsteady walking, as if the ground shifts beneath you. Climbing stairs may suddenly feel harder. Coordination problems — such as dropping objects more frequently or bumping into furniture — can also signal reduced blood flow to certain parts of the brain. These symptoms are often brushed off as fatigue or aging, but they should never be ignored.

Vision changes are also significant early clues. Some people experience blurred vision in one eye, double vision, or brief episodes of darkness. It might feel like a curtain partially closing over your sight. These episodes may last seconds or minutes and then disappear. Because they resolve quickly, many assume it’s eye strain. In reality, it can be reduced circulation to the brain’s visual centers.

Headaches that feel different from your usual headaches can also be a warning. A sudden, intense headache — especially if it feels like the “worst headache of your life” — can signal bleeding in the brain. However, even mild but unusual recurring headaches in the weeks leading up to a stroke deserve attention, particularly if accompanied by nausea, neck stiffness, or sensitivity to light.

Speech difficulties may develop gradually. You might struggle to find simple words or notice your speech becomes slightly slurred when tired. Family members may ask you to repeat yourself more often. Confusion, difficulty understanding conversations, or trouble concentrating can also appear. These changes are sometimes mistaken for stress or lack of sleep, but they may reflect impaired brain function.

Unexplained fatigue is another overlooked symptom. Feeling extremely tired despite adequate rest can occur when the brain is not receiving sufficient oxygen-rich blood. Some people describe a heavy, drained feeling in the weeks before their stroke. While fatigue alone does not confirm risk, combined with other symptoms it should prompt medical evaluation.

There may also be subtle emotional changes. Sudden irritability, anxiety, or mood swings can occur if certain brain areas are affected. In some cases, people feel a strange sense that “something isn’t right.” While this feeling is hard to describe medically, listening to your body’s instincts can be life-saving.

High blood pressure is the leading risk factor for stroke. According to organizations like the American Heart Association, uncontrolled hypertension significantly increases stroke risk. Unfortunately, high blood pressure often has no symptoms, which is why it is called the “silent killer.” Regular monitoring is essential, especially after age 40.

Other risk factors include diabetes, smoking, high cholesterol, obesity, and a sedentary lifestyle. Heart rhythm disorders such as Atrial Fibrillation also increase stroke risk because they can cause blood clots to form and travel to the brain.

If you notice any warning signs, remember the FAST method:

  • Face drooping

  • Arm weakness

  • Speech difficulty

  • Time to call emergency services

Even if symptoms disappear, seek medical help immediately. Early treatment can prevent permanent brain damage. Doctors may prescribe blood thinners, recommend lifestyle changes, or perform procedures to restore proper blood flow.

Prevention is powerful. Maintain a healthy diet rich in vegetables, fruits, whole grains, and lean protein. Exercise at least 30 minutes most days of the week. Control blood pressure, manage blood sugar, quit smoking, and limit alcohol intake. Regular health checkups can detect silent risk factors before they become emergencies.

Put raw cubed beef in a slow cooker with these 3 ingredients

There’s something deeply comforting about a meal that practically cooks itself. If you’re looking for a simple, hearty, and budget-friendly dish, this slow cooker beef recipe is about to become your new favorite. With just raw cubed beef and three powerful ingredients, you can create a rich, tender, flavor-packed meal that tastes like it simmered all day on the stove.

This recipe is perfect for busy weekdays, lazy Sundays, or anytime you want a satisfying dinner without standing in the kitchen for hours. Just add everything to your slow cooker, set it, and let time work its magic.


Why This Recipe Works

Slow cooking is one of the best ways to transform tougher cuts of beef into melt-in-your-mouth bites. The low, steady heat breaks down connective tissues, resulting in fork-tender meat soaked in deep, savory flavor.

The magic of this recipe lies in three simple ingredients that enhance the natural richness of the beef:

  • French onion soup mix

  • Cream of mushroom soup

  • Worcestershire sauce

That’s it. Simple ingredients. Big flavor.


Ingredients

  • 2 pounds raw beef, cubed (chuck roast works best)

  • 1 packet French onion soup mix

  • 1 can (10.5 oz) cream of mushroom soup

  • 2 tablespoons Worcestershire sauce

Optional additions (if desired):

  • ½ cup beef broth (for thinner gravy)

  • Fresh parsley for garnish

  • Sliced mushrooms or onions


Instructions

Step 1: Prepare the Beef

Place the raw cubed beef directly into the slow cooker. No need to brown it first (though you can if you want extra depth of flavor). Make sure the pieces are evenly spread at the bottom.

Step 2: Add the Flavor Boosters

Sprinkle the entire packet of French onion soup mix evenly over the beef. Then pour the cream of mushroom soup on top. Add Worcestershire sauce over everything.

If you prefer a thinner gravy, add beef broth at this stage.

Step 3: Mix Gently

Stir everything gently to coat the beef evenly. Make sure the seasoning mixture reaches all pieces.

Step 4: Slow Cook to Perfection

Cover and cook:

  • LOW for 7–8 hours
    or

  • HIGH for 4–5 hours

The beef should be fork-tender and coated in thick, savory gravy when done.


What Makes These 3 Ingredients So Good Together?

1. French Onion Soup Mix

This classic seasoning blend provides concentrated onion flavor, salt, herbs, and a slight sweetness that enhances the beef’s natural richness.

2. Cream of Mushroom Soup

It creates a creamy, thick gravy without needing flour or extra steps. It also adds umami depth and smooth texture.

3. Worcestershire Sauce

This ingredient is the secret weapon. It adds tanginess, slight sweetness, and a deep savory complexity that makes the dish taste slow-simmered and layered.

Together, these ingredients form a rich, comforting sauce that pairs beautifully with tender beef.


How to Serve

This dish is incredibly versatile. You can serve it over:

  • Mashed potatoes

  • Egg noodles

  • White or brown rice

  • Toasted bread

  • Cauliflower mash (for a low-carb option)

Add a simple green salad or steamed vegetables on the side for a complete meal.


Tips for the Best Results

Use the Right Cut

Chuck roast is ideal because it becomes incredibly tender when slow cooked. Avoid lean cuts like sirloin, which can dry out.

Don’t Lift the Lid

Every time you open the slow cooker, heat escapes and cooking time increases. Trust the process.

Want Thicker Gravy?

Remove the lid during the last 30 minutes of cooking to allow the sauce to thicken naturally. You can also mix 1 tablespoon cornstarch with 2 tablespoons water and stir it in.

Want Extra Flavor?

Sauté the beef in a hot pan with a little oil before placing it in the slow cooker. This adds a deeper, caramelized taste.


Make It Your Own

While this is a 3-ingredient base recipe, you can customize it easily:

  • Add baby potatoes and carrots for a full one-pot meal.

  • Stir in sour cream at the end for a stroganoff-style twist.

  • Add garlic powder or fresh thyme for extra aroma.

  • Toss in sliced bell peppers for added texture.


Storage and Reheating

Store leftovers in an airtight container in the refrigerator for up to 4 days.

To freeze, let it cool completely and store in freezer-safe containers for up to 3 months.

Reheat gently on the stove or microwave until warmed through. Add a splash of broth if needed to loosen the sauce.


Why You’ll Love This Recipe

  • Only 4 total ingredients

  • Minimal prep

  • Budget-friendly

  • Family-approved comfort food

  • Perfect for meal prep

  • Deep, rich flavor with almost no effort

This is one of those old-school, dependable slow cooker meals that never fails. It’s warm, hearty, and satisfying—everything comfort food should be.

Just place raw cubed beef in your slow cooker, add these three simple ingredients, and let the magic happen. By dinnertime, you’ll have a savory, tender beef dish swimming in creamy onion gravy that tastes like you worked on it all day.

Buttery Pecan Loaf Cake with Sweet Glaze

Buttery Pecan Loaf Cake with Sweet Glaze

Introduction

There’s something timeless about a homemade pecan loaf cake. The combination of toasted pecans folded into a soft, buttery batter creates a comforting dessert that feels both rustic and elegant. The added glaze on top enhances the sweetness while locking in moisture, and the extra pecans give it a beautiful finish and satisfying crunch.

This cake is perfect for holidays, brunch tables, afternoon tea, or even as a thoughtful homemade gift. Best of all, it’s simple to prepare and doesn’t require complicated techniques.


Ingredients

For the Cake:

  • 1 cup (226g) unsalted butter, softened

  • 1 cup granulated sugar

  • ½ cup brown sugar

  • 3 large eggs, room temperature

  • 1 teaspoon vanilla extract

  • 2 cups all-purpose flour

  • 1 teaspoon baking powder

  • ½ teaspoon baking soda

  • ½ teaspoon salt

  • 1 cup sour cream (or plain Greek yogurt)

  • 1 ½ cups chopped pecans (lightly toasted)

For the Glaze:

  • 1 cup powdered sugar

  • 2–3 tablespoons milk or cream

  • ½ teaspoon vanilla extract

  • ½ cup pecan halves for topping


Step-by-Step Instructions

1. Prepare the Oven and Pan

Preheat your oven to 350°F (175°C). Grease a 9×5-inch loaf pan thoroughly and line it with parchment paper, leaving some overhang for easy removal. This prevents sticking and ensures a smooth release.

2. Toast the Pecans

Place chopped pecans in a dry skillet over medium heat for 3–5 minutes, stirring frequently. Toasting enhances their natural oils and deepens their flavor. Let them cool completely before adding to the batter.

3. Cream Butter and Sugars

In a large mixing bowl, beat the softened butter, granulated sugar, and brown sugar together until light and fluffy (about 3–4 minutes). This step is essential because it incorporates air into the batter, creating a tender crumb.

4. Add Eggs and Vanilla

Add the eggs one at a time, mixing well after each addition. Stir in the vanilla extract. The mixture should look smooth and creamy.

5. Combine Dry Ingredients

In a separate bowl, whisk together the flour, baking powder, baking soda, and salt. This ensures even distribution of leavening agents.

6. Alternate Mixing

Gradually add the dry ingredients to the butter mixture in three parts, alternating with the sour cream. Start and end with the dry ingredients. Mix just until combined — do not overmix, as that can make the cake dense.

7. Fold in Pecans

Gently fold in the toasted chopped pecans using a spatula. This ensures they are evenly distributed without overworking the batter.

8. Bake

Pour the batter into the prepared loaf pan and smooth the top. Bake for 55–65 minutes, or until a toothpick inserted in the center comes out clean. If the top browns too quickly, loosely tent with foil during the last 15 minutes.

9. Cool Properly

Allow the cake to cool in the pan for about 15 minutes, then lift it out using the parchment paper and transfer to a wire rack. Let it cool completely before glazing.


Making the Glaze

In a small bowl, whisk together powdered sugar, vanilla extract, and 2 tablespoons of milk or cream. Add more liquid gradually until you reach a smooth, pourable consistency. The glaze should be thick but able to drizzle slowly.

Once the cake is completely cooled, pour the glaze evenly over the top. Arrange pecan halves on top while the glaze is still soft so they stick beautifully.

Allow the glaze to set for about 20–30 minutes before slicing.


Tips for Perfect Results

  • Room Temperature Ingredients: Eggs, butter, and sour cream should be at room temperature for better mixing and texture.

  • Do Not Overmix: Overmixing develops gluten and can make the cake tough.

  • Storage: Store in an airtight container at room temperature for up to 3 days, or refrigerate for up to 5 days.

  • Freezing: Wrap tightly in plastic wrap and freeze for up to 3 months. Thaw overnight in the refrigerator.


Flavor Variations

If you want to customize your pecan loaf cake, try these ideas:

  • Add 1 teaspoon cinnamon for a warm, spiced flavor.

  • Mix in ½ cup mini chocolate chips for a chocolate-pecan twist.

  • Replace vanilla with maple extract and drizzle with maple glaze for a fall-inspired dessert.

  • Add a tablespoon of bourbon to the glaze for a rich Southern-style touch.


Serving Suggestions

This pecan loaf cake pairs beautifully with:

  • A hot cup of coffee

  • Freshly brewed tea

  • Vanilla ice cream

  • Lightly sweetened whipped cream

Slice thick pieces and serve slightly warmed for the ultimate comfort experience.


Final Thoughts

This buttery pecan loaf cake delivers everything you want in a homemade dessert: moist texture, rich flavor, and a delightful crunch from toasted pecans. The simple glaze elevates it to bakery-quality presentation while keeping preparation easy enough for beginner bakers.

Whether you’re baking for a special occasion or just treating yourself, this cake is guaranteed to impress. One slice is never enough — the balance of sweetness and nuttiness keeps you coming back for more.