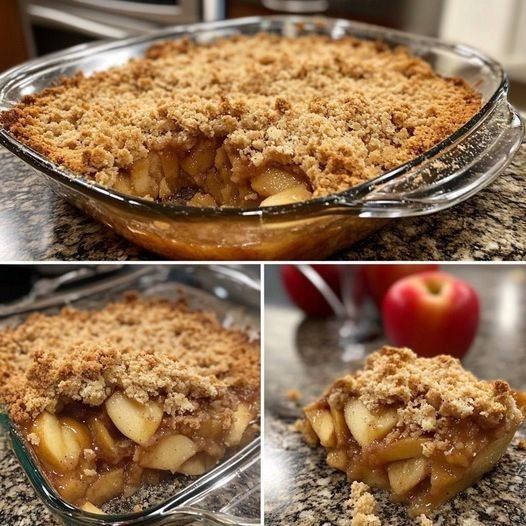
There’s something timeless about apple crisp—it’s cozy, aromatic, and deeply satisfying without needing much fuss. But this unique recipe takes the classic dessert up a notch by incorporating browned butter, a hint of cardamom, toasted oats, and a little splash of vanilla in the apple mixture itself. The result is a crisp that’s warm, buttery, lightly spiced, and layered with flavor—every bite is both crunchy and tender. Perfect for autumn evenings, holiday gatherings, or simply when you want dessert that tastes like a hug.
Why This Apple Crisp Is Special
While traditional apple crisp is wonderful, this version enhances depth and aroma in subtle ways:
-
Browned butter adds a nutty caramel richness.
-
Cardamom pairs beautifully with cinnamon without overpowering.
-
Toasting the oats creates a crisp topping that stays crunchy longer.
-
A little lemon + vanilla brightens the apples and keeps flavor balanced.
The result is elevated yet familiar—comforting, but with personality.
Ingredients
For the Apple Filling:
-
6 medium apples (a mix of tart and sweet, such as Granny Smith + Honeycrisp)
-
3 tablespoons lemon juice
-
⅓ cup brown sugar
-
2 tablespoons white sugar
-
1 teaspoon vanilla extract
-
1 teaspoon cinnamon
-
¼ teaspoon cardamom (optional but recommended)
-
2 tablespoons cornstarch or flour
-
Pinch of salt
For the Crisp Topping:
-
½ cup unsalted butter (to brown)
-
1 cup rolled oats
-
¾ cup all-purpose flour
-
⅔ cup brown sugar
-
½ teaspoon cinnamon
-
¼ teaspoon nutmeg
-
Pinch of ground ginger (optional)
-
¼ teaspoon salt
Step-by-Step Instructions
1. Prepare the Apples
Peel and slice your apples into even, thin slices—about ¼ inch thick. The thickness matters: too thick, and the apples remain firm; too thin, and they get mushy. Place the apple slices in a mixing bowl and sprinkle with lemon juice to keep them from browning and to enhance flavor.
Add brown sugar, white sugar, cinnamon, cardamom, vanilla, cornstarch, and a pinch of salt. Gently toss until the apples are evenly coated and glossy. Let them rest while you make the topping—this allows their natural juices to begin releasing, creating a more syrupy filling.
2. Brown the Butter
In a small saucepan over medium heat, melt the butter. Let it simmer, stirring occasionally, until it foams and turns golden brown with a nutty aroma. This takes about 4–6 minutes. As soon as the butter browns, remove it from the heat so it doesn’t burn.
That deep caramel aroma? That’s the magic moment.
3. Toast the Oats
Right after browning the butter, toss your oats into a dry skillet and toast them over medium heat for 2–3 minutes. This step adds crunch and prevents soggy topping—one of the secrets of a perfect crisp.
4. Make the Crisp Topping
In a mixing bowl, combine toasted oats, flour, brown sugar, cinnamon, nutmeg, ginger, and salt. Pour the browned butter over everything and mix with a fork until it becomes sandy and crumbly. It should clump easily when pinched but not be wet like dough.
5. Assemble
Preheat your oven to 350°F (175°C).
Transfer the apples into a greased 9×9-inch baking dish or a cast-iron skillet. Spread them evenly, then sprinkle the crisp topping generously over the apples, ensuring full coverage—those golden edges and bubbly spots are what make a crisp irresistible.
6. Bake
Bake for 40–50 minutes, or until:
-
The topping is golden brown and crisp.
-
The apple juices are bubbling around the edges.
If the topping browns too quickly, loosely tent with foil.
Let the crisp cool for at least 10 minutes before serving—this rest allows the filling to thicken beautifully.
Serving Suggestions
Apple crisp is wonderful on its own, but unforgettable with:
-
A scoop of vanilla ice cream
-
Freshly whipped cream
-
A drizzle of warm caramel
If serving at breakfast, try it with:
-
A spoonful of Greek yogurt
-
A sprinkle of chopped walnuts
Tips for Success
-
Apple Variety Matters: Using both tart and sweet apples ensures balance. Granny Smith holds shape, while Honeycrisp or Fuji add juiciness.
-
Don’t Skip the Rest Time: Letting the crisp cool slightly ensures the filling sets instead of running.
-
Want it Extra Crisp? Add ¼ cup chopped pecans or almonds to the topping.
Make-Ahead & Storage
-
Make Ahead: Assemble separately (apples in one container, topping in another) up to 24 hours ahead. Combine just before baking.
-
Store: Refrigerate leftovers (covered) for up to 4 days.
-
Reheat: Warm at 300°F for 10–12 minutes to return the topping’s crunch.
Final Thoughts
This apple crisp captures everything we love about homemade desserts—warmth, fragrance, texture, and the joy of simple ingredients coming together in perfect harmony. Whether you’re serving it at a family dinner, taking it to a gathering, or enjoying it on a cozy evening, it’s a recipe that feels like home.
