There’s something magical about the holidays, a time when the kitchen becomes a wonderland of sweet aromas and fond memories. Among all the treats that grace the Christmas table, Grandma’s Christmas Candy holds a special place. Every batch she made was filled with love, tradition, and a hint of holiday sparkle. This recipe is a nostalgic journey to those warm winter afternoons when Grandma stood by the stove, stirring her bubbling pot of sugar and butter, humming softly to carols playing in the background. Her Christmas Candy wasn’t just a dessert—it was a celebration of family, comfort, and old-fashioned sweetness that has stood the test of time.
🚀 Make Money Online – Up to $50 Per Day!
Ingredients
To recreate Grandma’s treasured Christmas Candy, you’ll need:
-
2 cups granulated sugar
-
1 cup light corn syrup
-
1 cup heavy cream
-
1/2 cup unsalted butter (room temperature)
-
1 teaspoon pure vanilla extract
-
1/4 teaspoon salt
-
1 cup chopped pecans or walnuts (optional)
-
1/2 cup shredded coconut (optional, for a festive touch)
-
Red and green food coloring (optional, to create a Christmas swirl)
-
Powdered sugar (for dusting)
This recipe yields about 2 pounds of soft, chewy candy—perfect for gifting, snacking, or storing in decorative tins.
Instructions
1. Prepare the candy workspace
Grease a 9×9-inch square pan with butter or line it with parchment paper. Lightly dust the surface with powdered sugar to prevent sticking. Have all ingredients measured and ready—timing is essential when making candy, and Grandma always said, “The secret is being ready before the sugar boils.”
2. Combine the base ingredients
In a large, heavy-bottomed saucepan, combine the sugar, corn syrup, and heavy cream. Place the pan over medium heat and stir continuously until the sugar dissolves completely. Once the mixture begins to simmer, add the butter and salt, stirring gently to blend everything together.
3. Cook to perfection
Attach a candy thermometer to the side of the pan. Allow the mixture to cook without stirring until it reaches the soft-ball stage (238°F or 114°C). If you don’t have a thermometer, Grandma used a simple trick: drop a tiny bit of the hot syrup into cold water—if it forms a soft, pliable ball, it’s ready.
4. Add flavor and texture
Once the mixture reaches the correct temperature, remove it from heat immediately. Stir in the vanilla extract for that warm, comforting flavor. At this point, you can also add the chopped nuts and coconut, if desired. These add a lovely crunch and richness that make the candy irresistibly good.
5. Optional festive swirl
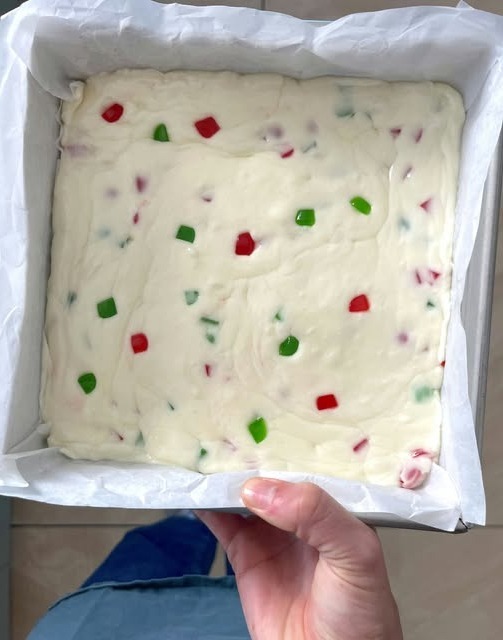
For that Christmas touch, divide the mixture into two bowls. Tint one portion with red food coloring and the other with green. Then, pour them alternately into the prepared pan, using a butter knife to create a light marble swirl pattern. This simple step turns the candy into a colorful holiday showpiece.
6. Cool and cut
Let the candy cool at room temperature for at least 2–3 hours or until it firms up completely. Once cooled, lift it out of the pan and place it on a cutting board dusted with powdered sugar. Using a sharp buttered knife, cut the candy into small squares or rectangles. Roll each piece lightly in powdered sugar to prevent sticking and to give it that classic frosted look.
7. Store and enjoy
Store the candy in an airtight tin lined with wax paper, separating layers with parchment. It will keep for up to 3 weeks at room temperature or even longer in the refrigerator.
Tips from Grandma’s Kitchen
-
Don’t rush the boil: Patience is key. Boiling too fast can cause the sugar to crystallize, making the candy grainy.
-
Use real butter: Margarine won’t provide the same creamy, caramel-like richness.
-
Avoid stirring once boiling begins: Stirring at the wrong time can break the smoothness of the candy texture.
-
Customize it: For variety, add peppermint extract for a cool twist or drizzle melted chocolate over the cooled candy for a festive flair.
Why Grandma’s Candy Stands Out
Unlike modern shortcuts, Grandma’s candy was a labor of love. She believed in simple ingredients, slow cooking, and a touch of tradition. Each bite tastes of nostalgia—sweet, buttery, and slightly chewy with a hint of vanilla warmth. The nuts add an earthy depth, while the swirl of color and coconut flakes make it feel unmistakably festive.
The best part? This candy isn’t overly sweet or sticky—it melts beautifully in your mouth, leaving behind that comforting holiday flavor that reminds you of cozy kitchens and glowing Christmas trees.
Serving Ideas
-
Gift it beautifully: Wrap individual pieces in colorful foil or cellophane and place them in a Christmas tin or mason jar. Tie with a red ribbon for a homemade gift that feels personal and heartfelt.
-
Add to dessert platters: Combine Grandma’s Christmas Candy with cookies, fudge, and peppermint bark for a dessert tray that everyone will talk about.
-
Pair with hot cocoa: These chewy, buttery candies pair perfectly with a steaming cup of cocoa or coffee, especially after a chilly evening carol walk.
A Taste of Holiday Love
Each year when you make Grandma’s Christmas Candy, you’re not just recreating a recipe—you’re reviving a piece of family history. The sound of sugar bubbling, the scent of vanilla in the air, and the joy of wrapping each piece all evoke that timeless Christmas spirit.
It’s more than candy—it’s a warm reminder of simpler times, laughter around the fireplace, and the unspoken love that comes from sharing something homemade. Whether you’re carrying on Grandma’s tradition or starting your own, this recipe brings the same sweetness to every generation.
