If you’ve ever tried to make gluten-free sandwich bread and ended up with a dense, dry brick instead of a soft, airy loaf, this recipe is about to change everything. This unique gluten-free sandwich bread combines a balanced blend of wholesome flours, a touch of natural starch for structure, and a few bakery-style secrets to create a soft, chewy crumb that’s perfect for sandwiches, toast, or even French toast. There’s no kneading, no complicated steps—just simple ingredients, patience, and a little magic from your kitchen.
🚀 Make Money Online – Up to $50 Per Day!
The Secret Behind Perfect Gluten-Free Bread
Traditional bread relies on gluten to provide elasticity and structure, trapping air bubbles for a fluffy crumb. Without gluten, many recipes fall flat—literally. The trick is to mimic gluten’s role by combining the right mix of starches and binding agents. In this recipe, we use a trio of rice flour, tapioca starch, and sorghum flour, giving the bread a soft yet stable texture. Psyllium husk powder acts as the “gluten” replacement, providing stretch and moisture retention that keeps the loaf tender for days.
Unlike many gluten-free recipes that rely heavily on starch, this one balances nutrition and texture. Sorghum adds a nutty warmth, rice flour gives lightness, and tapioca contributes a pleasant chew—making each bite taste like real bread, not a substitute.
Ingredients
Dry Ingredients:
-
1 ½ cups (180 g) white rice flour
-
1 cup (120 g) sorghum flour
-
¾ cup (90 g) tapioca starch
-
2 tbsp psyllium husk powder (not whole husks)
-
1 tbsp baking powder
-
2 ½ tsp instant yeast
-
1 tsp salt
-
1 tbsp sugar (feeds the yeast and adds light sweetness)
Wet Ingredients:
-
1 ½ cups (360 ml) warm water (about 100°F or 38°C)
-
2 tbsp olive oil (adds richness and softness)
-
1 tsp apple cider vinegar (enhances rise and flavor)
-
2 large eggs, room temperature (for structure and moisture)
Optional for flavor:
-
1 tbsp honey or maple syrup
-
1 tsp chia seeds or flaxseed meal (for a rustic texture)
Step-by-Step Instructions
Step 1: Prepare the Yeast
In a small bowl, combine the warm water, sugar, and yeast. Stir gently and let it sit for about 5–7 minutes, until a foamy layer forms on top. This step is crucial—if the yeast doesn’t foam, it’s inactive and won’t make your bread rise.
Step 2: Mix the Dry Ingredients
In a large mixing bowl, whisk together rice flour, sorghum flour, tapioca starch, psyllium husk powder, baking powder, and salt. The psyllium husk will start to absorb moisture quickly once combined, so make sure it’s evenly mixed in now for consistent results later.
Step 3: Add the Wet Ingredients
Once the yeast mixture is ready, add it to the dry ingredients. Then, pour in olive oil, apple cider vinegar, and eggs. If you’re using honey, add it now. Mix with a hand mixer fitted with dough hooks or a sturdy spoon until the batter comes together.
Unlike wheat dough, this will be more like a thick batter than a firm dough—soft, sticky, and stretchy from the psyllium. That’s exactly what you want.
Step 4: Rest the Dough
Cover the bowl with a clean kitchen towel and let it rest for 10 minutes. During this time, the psyllium husk and flours fully hydrate, thickening the mixture and improving the final crumb structure.
Step 5: Shape and Rise
Line a 9×5-inch loaf pan with parchment paper. Spoon the dough into the pan and smooth the top with a wet spatula or your fingers. For a professional bakery look, make a shallow slit across the top using a sharp knife—this helps control the rise.
Cover loosely with plastic wrap or a damp cloth and let it rise in a warm place for 40–60 minutes, or until it has nearly doubled in size. Gluten-free dough doesn’t rise as high as wheat dough, but it should puff nicely.
Step 6: Bake the Bread
Preheat your oven to 375°F (190°C). Once preheated, place the pan in the center of the oven and bake for 45–50 minutes, or until the top is golden brown and firm. You can check for doneness by inserting a thermometer into the center—it should read about 200°F (93°C).
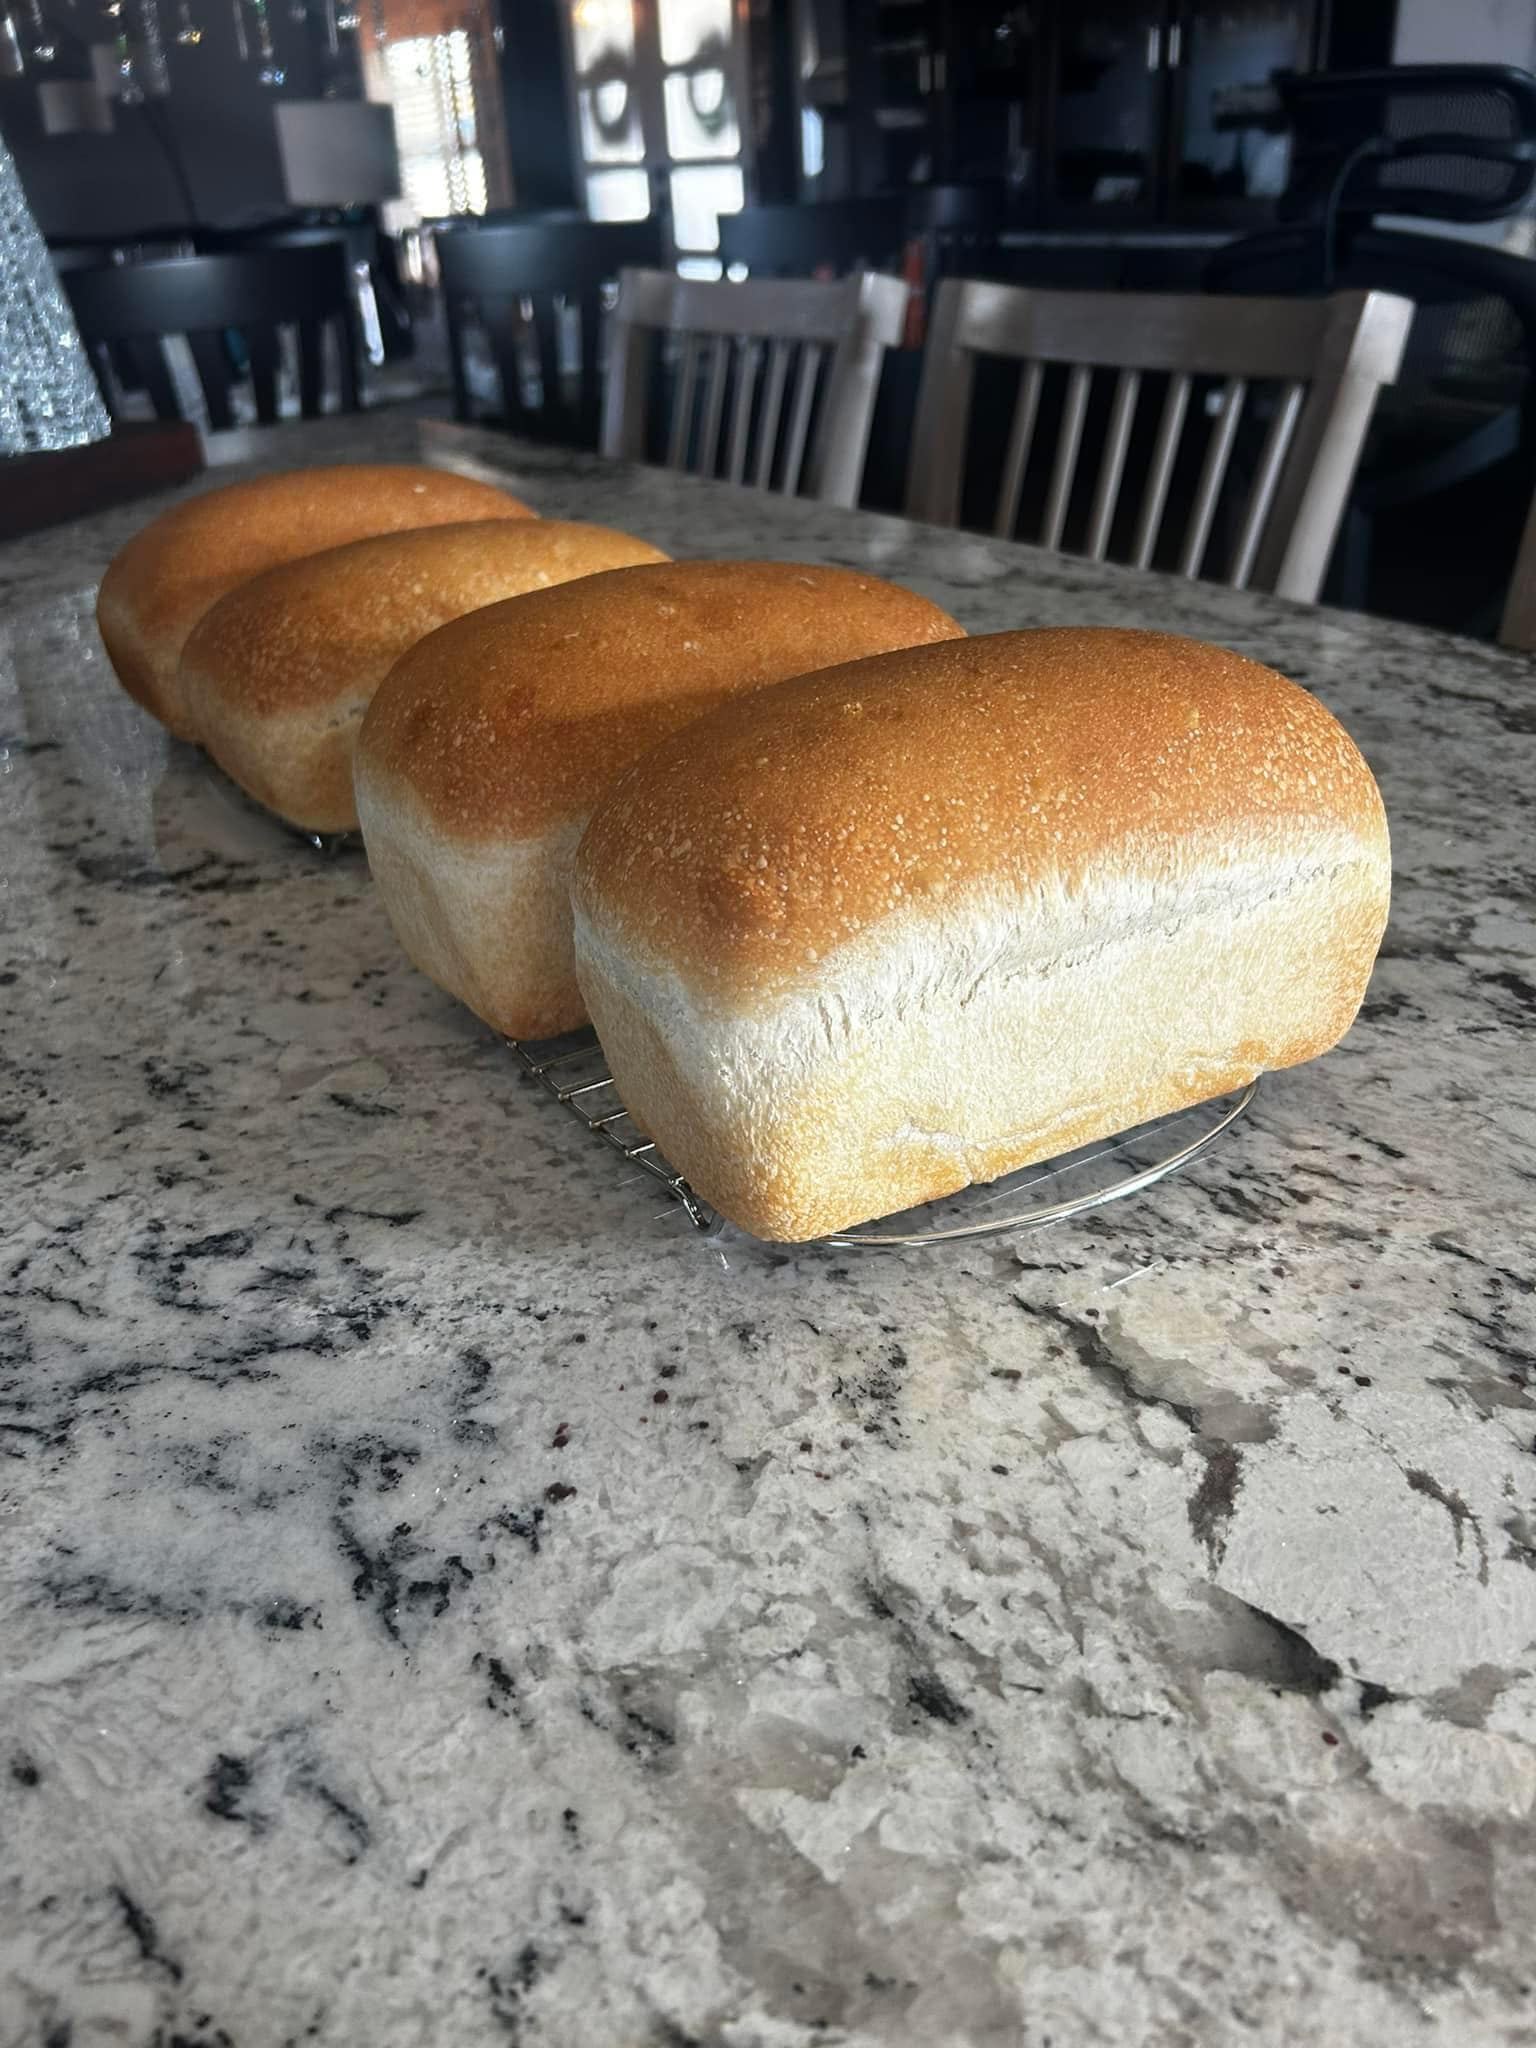
Step 7: Cool Completely
Remove the bread from the pan and let it cool completely on a wire rack. This step is non-negotiable! If you slice it too soon, the steam trapped inside will make the texture gummy. Once cool, slice with a serrated knife and enjoy the soft, fluffy slices.
Tips for Success
-
Measure accurately. Use a kitchen scale for the flours—gluten-free baking is sensitive to small changes in ratio.
-
Don’t skip the psyllium husk. It’s the secret to soft, flexible bread. Without it, the loaf will crumble.
-
Warm environment matters. Letting the dough rise in a slightly warm place (like inside an off oven with the light on) ensures better lift.
-
Store correctly. Wrap the loaf in plastic wrap or an airtight container. It stays fresh at room temperature for up to 3 days or freezes beautifully for up to a month.
-
Toast before eating. Gluten-free bread shines when lightly toasted—it enhances the flavor and texture.
Why This Recipe Stands Out
What makes this gluten-free sandwich bread truly unique is its texture and flavor combination. Most gluten-free loaves lean on starch-heavy formulas that taste bland or artificial. Here, the blend of sorghum and rice flours introduces a mellow, almost nutty flavor, while the psyllium keeps it springy and moist.
The bread slices beautifully without crumbling and can handle sandwich fillings, spreads, or even a dunk in soup without falling apart. Whether you’re layering turkey and cheese, making peanut butter toast, or using it for French toast, it behaves like classic bread but feels lighter and easier to digest.
It’s also nutrient-balanced: sorghum flour offers protein and fiber, tapioca brings smoothness, and olive oil provides healthy fats. Together, they create a loaf that nourishes as it satisfies.
Variations to Try
-
Seeded Sandwich Bread: Mix in 2 tablespoons of sesame seeds, sunflower seeds, or pumpkin seeds for crunch.
-
Herbed Bread: Add 1 teaspoon of dried rosemary, thyme, or Italian seasoning for a savory twist.
-
Sweet Breakfast Loaf: Replace the vinegar with orange juice and stir in 2 tablespoons of honey and a handful of raisins.
-
Vegan Option: Swap the eggs for 2 flax “eggs” (2 tablespoons flaxseed meal + 6 tablespoons warm water). The texture will be slightly denser but still delicious.
Serving Ideas
-
Classic Sandwich: Stack ham, cheese, and mustard between two soft slices.
-
Avocado Toast: Top with smashed avocado, salt, and chili flakes.
-
French Toast: Dip slices in an egg mixture, fry, and drizzle with syrup.
-
Garlic Bread: Brush slices with butter and garlic powder, toast until golden.
Final Thoughts
This gluten-free sandwich bread isn’t just a replacement—it’s a recipe that stands proudly on its own. The soft interior, golden crust, and real bread flavor prove that gluten-free baking can be both wholesome and indulgent. Once you try this loaf, you may never go back to store-bought gluten-free bread again.
Whether you’re baking for health reasons or pure curiosity, this recipe gives you the satisfaction of pulling a warm, golden loaf from the oven—proof that with the right balance of science and soul, even gluten-free bread can be extraordinary.
