There are recipes you merely follow… and then there are recipes you practice, like a quiet ritual passed from one pair of hands to the next. Buttermilk biscuits belong to that special second category. Soft, pillowy, golden biscuits with buttery layers don’t just appear because you mixed flour and fat—they rise because you respected the process. This is the sacred craft of buttermilk biscuits: part technique, part intuition, and part kitchen alchemy. Today, you’ll learn a one-of-a-kind recipe built on heritage, simplicity, and the pursuit of tender perfection.
Why Buttermilk Biscuits Are a Craft, Not Just a Recipe
True biscuits begin long before the oven heats. They start with cold ingredients, gentle hands, and the promise that the dough will be handled with care. Buttermilk provides tang and lift. Cold butter creates steam pockets—those beloved flaky layers. And the way you mix, fold, and shape the dough determines whether you’ll have cloud-soft biscuits or dense hockey pucks.
Consider this recipe your guide not just for making biscuits, but for mastering them.
Ingredients (Makes 10–12 Biscuits)
-
2 ½ cups all-purpose flour (plus extra for dusting)
-
1 tablespoon baking powder
-
½ teaspoon baking soda
-
1 teaspoon fine salt
-
2 teaspoons sugar (optional but recommended)
-
½ cup (1 stick/113 g) COLD unsalted butter, cubed
-
1 cup COLD buttermilk, plus a little extra for brushing
-
2 tablespoons melted butter (for brushing after baking)
The Sacred Method — Step-by-Step
1. Chill Everything First
This is the first sacred rule of biscuit making: cold ingredients = flaky biscuits.
Place your butter cubes, bowl, and even the flour in the fridge for 10 minutes before starting. Biscuits love the cold.
2. Whisk the Dry Ingredients
In a large chilled bowl, combine flour, baking powder, baking soda, salt, and sugar. Whisk lightly. This distributes the leavening and aerates the flour, setting the stage for lift.
3. Cut in the Butter (the Holy Step)
Add the cold butter cubes. Using a pastry cutter or your fingertips, gently work the butter into the flour until you have pea-sized pieces.
This step is sacred because every tiny butter piece becomes a steam pocket in the oven—your layers depend on this.
4. Make a Well, Pour Buttermilk
Create a small well in the center and pour in the cold buttermilk.
Using a fork or your hand in a claw shape, mix just until the dough comes together.
Stop early rather than mix too long—overworked dough toughens biscuits.
5. Turn the Dough Out and Start the Lamination Ritual
Scatter flour on your counter, turn out the dough, and gently pat it into a rectangle.
Now comes the biscuit-maker’s secret:
Fold the dough like a letter — fold the top third down and the bottom third up.
Turn it, gently pat into a rectangle again, and repeat 3 times.
This creates natural, buttery layers without a rolling pin.
6. Shape the Dough
Pat the dough into a 1-inch thick slab.
Use a biscuit cutter or a round glass dipped in flour.
Push straight down—never twist—twisting seals the edges and prevents rising.
Gather scraps and gently pat them together for more biscuits, but handle lightly.
7. Prepare for Baking
Place biscuits close together on a parchment-lined baking sheet if you want tall, soft biscuits, or spaced apart for crisper edges.
Brush the tops lightly with buttermilk.
8. Bake Until Golden
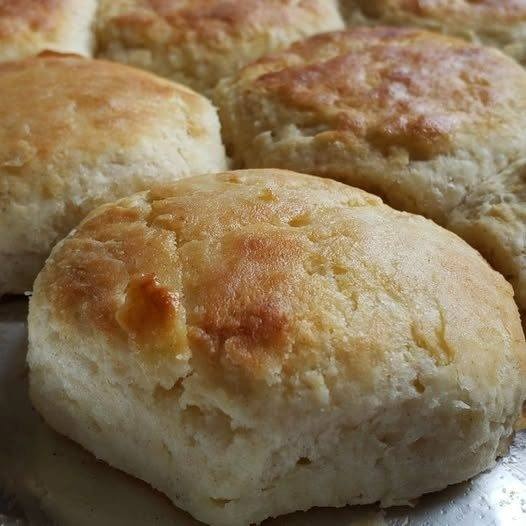
Bake at 450°F (230°C) for 12–15 minutes, or until the tops are tall, risen, and deeply golden.
9. Finish with Butter
When they emerge from the oven, brush each with melted butter. This gives a glossy, irresistible finish and softens the crust.
Expert Tips for Biscuit Mastery
✔ Keep Everything Cold
Warm butter melts too early and ruins the layers. If the dough softens, refrigerate it for 10 minutes before baking.
✔ Don’t Overwork
The less you touch the dough, the more tender the biscuits.
✔ Use Aluminum-Free Baking Powder
It gives a cleaner flavor and better rise.
✔ Buttermilk Substitute (If Needed)
Mix 1 cup milk + 1 tablespoon lemon juice or vinegar.
Let sit 10 minutes—it won’t be identical, but it works beautifully.
What Makes This Recipe Unique?
This biscuit ritual isn’t just about ingredients—it’s about transformation:
-
A lamination method without rolling
-
Sacred temperature control
-
A gentle folding ritual for natural layers
-
Buttermilk that infuses tang and tenderness
-
A finishing brush of melted butter for bakery-level flavor
Each biscuit is a small handcrafted masterpiece.
Serving Ideas to Honor Your Biscuits
-
Split and drizzle with honey
-
Sandwich with country sausage gravy
-
Serve warm with salted butter and homemade jam
-
Turn into breakfast sliders
-
Top with strawberries and whipped cream for a quick shortcake
However you serve them, these biscuits deserve to be the centerpiece of the table.
Final Thoughts: The Craft Lives On
You now know the sacred craft: cold ingredients, gentle hands, and a patient folding ritual. This recipe delivers biscuits that rise high, flake beautifully, and melt on your tongue—biscuits that remind you why cooking is an act of care and art. Practice it a few times, and soon you’ll have a signature biscuit that’s unmistakably yours.
