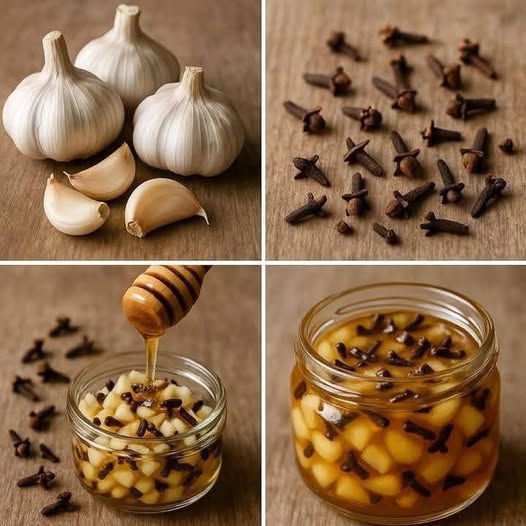
Mixing Garlic and Honey with Cloves

Across cultures and centuries, simple kitchen ingredients have been trusted not only for flavor, but also for their powerful natural properties. One such timeless combination is garlic, honey, and cloves—a trio rooted in traditional medicine and still valued today for its versatility and ease of preparation. This mixture is often praised for supporting immunity, soothing seasonal discomforts, and adding a warming boost to daily wellness routines.

What makes this blend special is not just the ingredients themselves, but how they work together. Each component brings its own unique strength, and when combined, they create a syrup-like infusion that is both potent and pleasantly aromatic.

Let’s explore why this mixture has endured for generations and how you can prepare it safely at home.

Why Garlic, Honey, and Cloves Work So Well Together

Garlic has long been respected for its natural sulfur compounds, especially allicin, which forms when garlic is crushed. Traditionally, garlic has been used to support the body during colder months and times of fatigue.

Raw honey acts as both a preservative and a soothing base. Its thick texture helps mellow garlic’s sharpness while allowing the mixture to age gracefully. Honey has been used historically to coat the throat, support digestion, and balance strong flavors.

Cloves, small but mighty, are rich in aromatic oils. In traditional practices, cloves were often used to warm the body, freshen breath, and add antimicrobial support. Their slightly sweet, spicy profile ties the mixture together.

When combined, these three ingredients create a powerful infusion that feels comforting, warming, and deeply traditional.

Garlic, Honey, and Clove Infusion (UNIE Recipe)

Ingredients

  • 1 cup raw, unfiltered honey

  • 8–10 garlic cloves, peeled and lightly crushed

  • 1–1½ teaspoons whole cloves

Equipment

  • A clean glass jar with a tight-fitting lid

  • Wooden or silicone spoon

Step-by-Step Preparation

  1. Prepare the Garlic
    Gently crush each garlic clove with the flat side of a knife. Crushing (rather than chopping finely) helps release beneficial compounds while preventing the mixture from becoming too sharp.

  2. Layer the Ingredients
    Place the crushed garlic and whole cloves into the glass jar. Pour the raw honey over them until everything is fully submerged.

  3. Stir and Seal
    Stir slowly to remove air bubbles. Seal the jar tightly with the lid.

  4. Infusion Time
    Store the jar at room temperature, away from direct sunlight. Allow it to infuse for 7–14 days, gently turning or stirring the jar once daily.

  5. Ready to Use
    Over time, the honey will become thinner as it absorbs moisture from the garlic. The flavor will mellow, and the infusion will deepen in aroma.

How to Use This Mixture

This infusion is traditionally used in small amounts. Common ways people incorporate it include:

  • Taking 1 teaspoon daily, especially during seasonal changes

  • Mixing a spoonful into warm (not hot) water or herbal tea

  • Drizzling lightly over roasted vegetables or savory dishes

  • Using a small amount as a natural sweetener with depth and spice

Avoid heating the mixture directly, as high temperatures may reduce honey’s natural qualities.

Storage and Shelf Life

Thanks to honey’s natural preservative properties, this mixture can last several months when stored properly.

  • Keep the jar sealed

  • Use clean utensils every time

  • If bubbles or an off smell appear, discard and remake

Refrigeration is optional, but room temperature storage is traditional and effective.

Flavor Profile and What to Expect

At first taste, the mixture may seem strong—garlic-forward with a warm clove finish. Over time, the sharpness softens, and the result becomes pleasantly sweet, spicy, and deeply aromatic. Many people find that after a week or two, the mixture is surprisingly smooth.

A Gentle Note on Wellness Use

This recipe is rooted in traditional food wisdom, not modern medical treatment. While many people enjoy it as part of a balanced lifestyle, it should not replace professional medical advice or prescribed treatments. Those with allergies, sensitivities, or medical conditions should consult a healthcare professional before regular use.

Final Thoughts

Mixing garlic and honey with cloves is a beautiful reminder that some of the most enduring traditions come from simplicity. With just three humble ingredients, you can create a preparation that feels nourishing, grounding, and timeless.


Cleaning your iron: it only takes 30 seconds.

If your iron has started dragging across fabric, leaving brown streaks, or spitting mysterious gunk onto your favorite shirt, don’t panic—and definitely don’t toss it. A dirty iron is incredibly common, and the fix is surprisingly simple. In fact, you can clean most household irons in about 30 seconds using items you already have at home. No special products, no soaking, no disassembly. Just a quick reset that makes your iron glide like new again.

Let’s break it down step by step, explain why irons get dirty in the first place, and show you how to keep yours spotless with almost zero effort.

Why Irons Get Dirty So Fast

Even if you use distilled water and keep your iron “clean,” residue builds up over time. Here’s what’s usually causing the problem:

  • Mineral deposits from tap water clog steam holes

  • Fabric fibers and starch melt onto the soleplate

  • Burnt synthetic materials leave plastic-like residue

  • Hard water scale builds up inside the steam chamber

All of this creates friction, uneven heat, and stains—exactly what you don’t want when ironing.

The good news? Most of this grime sits right on the surface and comes off instantly with the right method.

The 30-Second Iron Cleaning Method

This is the fastest, safest, and most effective trick for everyday iron buildup.

What You’ll Need

  • White toothpaste (plain, non-gel)

  • A soft cloth or paper towel

  • Optional: cotton swab for steam holes

That’s it. No vinegar fumes. No baking soda mess.

Step-by-Step (Seriously Fast)

  1. Unplug the iron
    Make sure it’s completely cool. Safety first—always.

  2. Apply toothpaste to the soleplate
    Squeeze a small amount directly onto the dirty areas. You don’t need much—about the size of a coin.

  3. Rub gently with a cloth
    Using circular motions, wipe the toothpaste over the soleplate. You’ll see residue lifting almost immediately.

  4. Wipe clean
    Use a damp cloth or paper towel to remove all toothpaste. The surface should look smooth and shiny.

  5. Clear steam holes (optional)
    If buildup is visible, use a cotton swab to clean around the holes.

That’s it. Start to finish: about 30 seconds.

Why Toothpaste Works So Well

This isn’t a random internet trick—it’s basic chemistry.

  • Toothpaste contains mild abrasives that scrub without scratching

  • It breaks down burnt-on starch and mineral film

  • It’s safe for non-stick and stainless steel soleplates

As long as you avoid gel toothpaste (which lacks abrasives), this method is both gentle and effective.

Test Before You Iron

Before using your iron on clothes:

  1. Plug it back in

  2. Set it to medium heat

  3. Run it over an old cotton cloth for 10–15 seconds

This removes any leftover moisture or residue and ensures the soleplate is perfectly clean.

What About Steam Buildup Inside the Iron?

If your iron spits water or leaves white flakes, mineral deposits inside may be the culprit. While the toothpaste method cleans the outside, here’s a quick internal refresh you can do occasionally:

  • Fill the water tank halfway with distilled water

  • Turn on steam

  • Let it steam for 30–60 seconds over a sink

  • Empty the tank and let the iron cool

This helps flush loose mineral residue without harsh chemicals.

Common Mistakes to Avoid

To protect your iron and extend its life, avoid these cleaning errors:

  • ❌ Using steel wool or scouring pads (they scratch the soleplate)

  • ❌ Pouring vinegar directly onto the iron surface

  • ❌ Cleaning while the iron is hot

  • ❌ Using abrasive powders not meant for coated metal

Gentle and quick always wins here.

How Often Should You Clean Your Iron?

  • Light use: once every 1–2 months

  • Frequent use: once every 2–3 weeks

  • Heavy starch use: weekly quick wipe

The 30-second method makes it easy to stay consistent—no excuses needed.

Pro Tips to Keep Your Iron Clean Longer

  • Use distilled water instead of tap water

  • Avoid ironing over zippers, decals, or plastic prints

  • Let starch dry slightly before ironing

  • Empty the water tank after each use

These small habits drastically reduce buildup.

Final Thoughts

A dirty iron doesn’t need hours of scrubbing or expensive cleaners. With one simple household item and half a minute of your time, you can restore smooth glide, even heat, and spotless results. The best part? Once you try this method, you’ll never dread iron maintenance again.

The Power of Clove Steam Inhalation: Fast Respiratory Relief from a Simple Kitchen Spice

When congestion tightens your chest, your sinuses feel blocked, or a stubborn cough refuses to ease, relief might be closer than you think—right in your spice rack. Clove, a small but mighty aromatic bud, has been used for centuries in traditional wellness practices. One of the simplest and most comforting ways to harness its benefits is clove steam inhalation. This gentle ritual can help open airways, soothe irritation, and bring quick comfort using nothing more than hot water and whole cloves.


Why Cloves Work for Breathing Relief

Cloves (Syzygium aromaticum) are rich in eugenol, a natural compound known for its warming aroma and soothing properties. When released as steam, clove’s volatile oils disperse into the air, where they can help:

  • Loosen mucus in the nose, throat, and chest

  • Soothe irritated airways with a warming, calming effect

  • Create a sense of openness in congested nasal passages

  • Freshen breathing with their naturally antiseptic scent

Steam itself is powerful—it hydrates dry passages and thins secretions. Adding clove enhances the experience with aromatherapeutic benefits that many people find fast-acting and comforting.

Important note: Clove steam inhalation is a supportive home remedy, not a medical treatment. If you have asthma, severe respiratory disease, or symptoms that persist or worsen, consult a healthcare professional.

The UNIE Clove Steam Inhalation Recipe

Ingredients

  • 1–2 teaspoons whole cloves (about 8–12 cloves)

  • 4–5 cups water

Optional Add-Ins (use sparingly)

  • A slice of fresh ginger (extra warmth)

  • A pinch of salt (traditional comfort)

  • A drop of eucalyptus oil (only if you tolerate essential oils; never use more than one drop)

Step-by-Step Method

  1. Boil the water.
    Bring 4–5 cups of water to a rolling boil in a pot or kettle.

  2. Add the cloves.
    Remove from heat and add whole cloves. Cover and let steep for 2–3 minutes so the aromatic oils release into the steam.

  3. Prepare safely.
    Place the pot on a heat-safe surface. Sit comfortably at a table.

  4. Inhale the steam.
    Drape a towel loosely over your head and the pot to trap steam. Keep your face 12–18 inches away to avoid burns.
    Breathe slowly through your nose and mouth for 5–10 minutes.

  5. Rest and hydrate.
    After inhalation, rest for a few minutes and sip warm water or herbal tea.

Frequency: 1–2 times daily during congestion. Stop if you feel dizzy or uncomfortable.

What It Can Help With

Clove steam inhalation is commonly used for:

  • Nasal congestion from colds or seasonal changes

  • Sinus pressure and stuffiness

  • Dry, irritated throat

  • Mild chest tightness associated with mucus buildup

Many people report feeling relief within minutes due to the combined effects of warm steam and clove’s penetrating aroma.

Safety Tips (Very Important)

  • Avoid direct heat: Steam can burn. Always keep a safe distance.

  • Children & seniors: Supervise closely or avoid steam inhalation altogether for young children.

  • Asthma & sensitivities: Strong aromas can trigger symptoms for some. Test cautiously or skip.

  • Essential oils: If adding any oil, use one drop max and never apply oils directly to skin or water meant for inhalation without dilution.

  • Pregnancy: Consult a healthcare provider before use.

Enhancing the Ritual

Turn this into a calming wellness moment:

  • Inhale slowly, counting to four on each breath.

  • Close your eyes and focus on the warmth opening your breath.

  • Follow with a warm shower to extend the steam benefits.

  • Apply a gentle chest rub (oil-free) afterward for comfort.

Why This Simple Remedy Endures

Clove steam inhalation endures because it’s accessible, affordable, and comforting. In moments when you need fast relief without complicated preparations, this age-old practice offers a gentle nudge toward easier breathing. It doesn’t replace medical care, but as a supportive ritual, it can make a noticeable difference—especially during seasonal congestion or after a long day of dry air exposure.

Final Thoughts

Sometimes the most effective comforts are the simplest. With just hot water and a handful of cloves, you can create a soothing steam that helps your breath feel freer and your body more at ease. Listen to your body, use this remedy mindfully, and let the warm, spicy aroma of clove remind you that healing rituals don’t have to be complicated to be powerful.

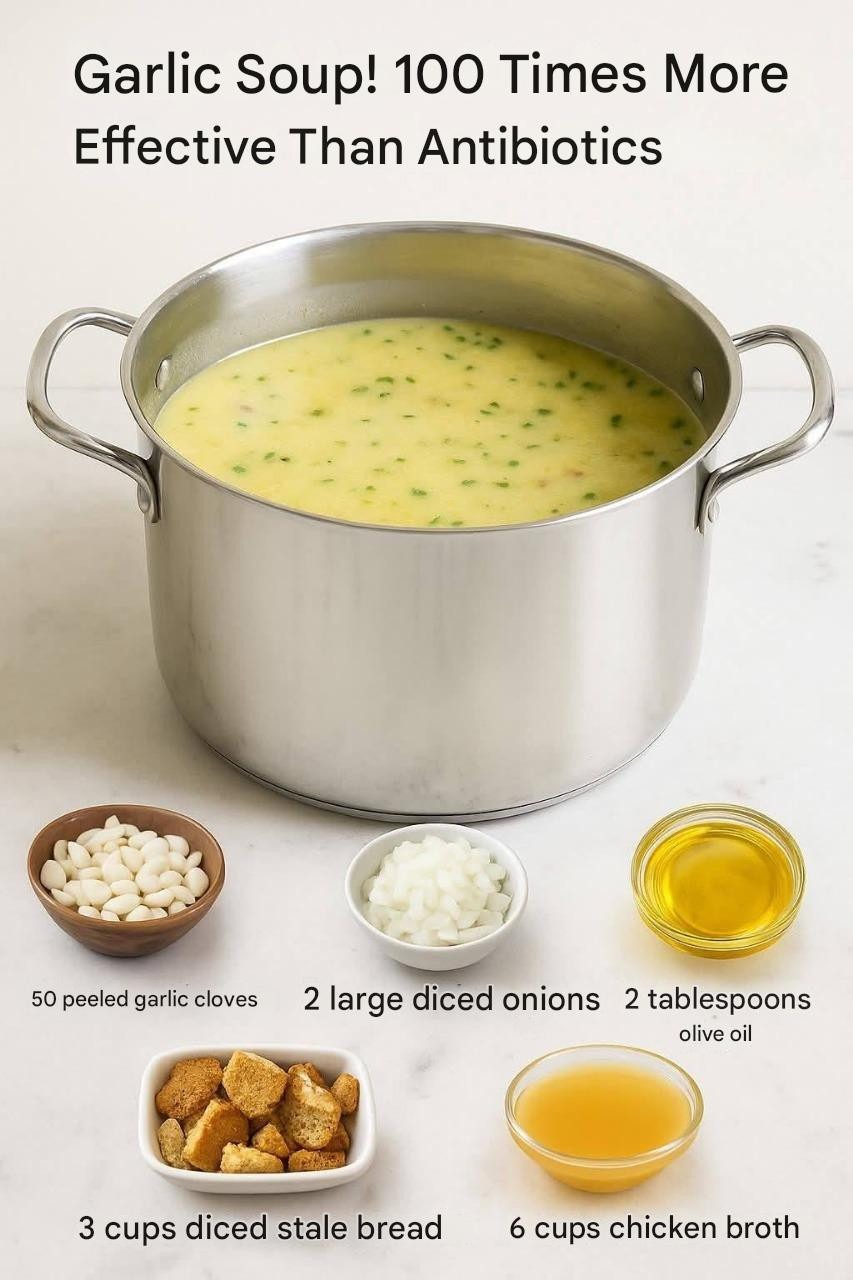
Natural and Fortifying Garlic Soup

Garlic soup is one of those humble, old-world recipes that quietly carries generations of wisdom. Found in many cultures—from French soupe à l’ail to Mediterranean farmhouse kitchens—this simple dish has long been valued for its comforting warmth, bold flavor, and naturally fortifying ingredients. When prepared slowly and thoughtfully, garlic transforms from sharp and pungent into mellow, sweet, and deeply aromatic, creating a soup that feels both restorative and indulgent.

This Natural and Fortifying Garlic Soup is not about complexity or fancy techniques. It’s about letting good ingredients do what they do best. With a base of gently cooked garlic, onions, herbs, and a rich broth, this soup is perfect for chilly evenings, tired days, or anytime your body is craving something grounding and nourishing.

Why Garlic Soup Is So Special

Garlic has been treasured for centuries, not just for its flavor but for its role in traditional cooking and wellness rituals. When simmered slowly, garlic becomes soft and almost creamy, losing its harsh bite and developing a subtle sweetness. Combined with warm broth and herbs, it creates a soup that feels deeply comforting and satisfying without being heavy.

This soup is:

  • Naturally simple and budget-friendly

  • Easy to digest

  • Comforting without cream (though optional additions are welcome)

  • Perfect as a light meal or a healing starter

It’s the kind of recipe you’ll come back to again and again.

Ingredients (Serves 4)

  • 2 whole heads of garlic (about 20–24 cloves), peeled

  • 2 tablespoons olive oil or butter

  • 1 medium onion, finely chopped

  • 1 teaspoon salt (adjust to taste)

  • ½ teaspoon black pepper

  • 1 teaspoon dried thyme or fresh thyme leaves

  • 1 bay leaf

  • 4–5 cups vegetable or chicken broth (warm)

  • 1 slice day-old bread or ½ cup bread cubes (optional, for body)

  • 1 egg yolk (optional, traditional and enriching)

  • 1 tablespoon lemon juice or apple cider vinegar (optional)

  • Fresh parsley or chives, for garnish

Step-by-Step Instructions

1. Prepare the Garlic

Peel all the garlic cloves. If you want a milder flavor, blanch the cloves in boiling water for 30 seconds, then drain. This step is optional but helpful if you’re sensitive to strong garlic.

2. Build the Flavor Base

In a heavy-bottomed pot, heat the olive oil or butter over low to medium heat. Add the chopped onion and cook gently for 5–7 minutes until soft and translucent. Do not brown.

Add the garlic cloves and cook slowly for another 3–4 minutes, stirring often. The goal is to soften the garlic without letting it color. This slow cooking is what gives the soup its signature sweetness.

3. Simmer the Soup

Add the thyme, bay leaf, salt, and pepper. Pour in the warm broth and bring the soup to a gentle simmer. Reduce the heat, cover partially, and let it cook for 20–25 minutes until the garlic cloves are very tender.

4. Add Body (Optional)

For a more traditional texture, add the bread or bread cubes to the soup and simmer for another 5 minutes until softened. This naturally thickens the soup without cream.

5. Blend or Mash

Remove the bay leaf. Use an immersion blender to blend the soup until smooth, or mash gently with a spoon or potato masher for a rustic texture. You can also blend half and leave half chunky.

6. Enrich the Soup (Optional but Classic)

In a small bowl, whisk the egg yolk with lemon juice. Slowly ladle a bit of hot soup into the mixture while whisking, then stir it back into the pot off the heat. This step adds silkiness and depth without making the soup heavy.

Serving Suggestions

Ladle the soup into warm bowls and garnish with fresh parsley or chives. Serve with:

  • Crusty bread or toasted sourdough

  • A drizzle of olive oil

  • Grated Parmesan or pecorino (optional)

This soup works beautifully as a light dinner, a soothing lunch, or a nourishing starter before a larger meal.

Tips for the Best Garlic Soup

  • Low and slow is key – Never rush garlic; gentle heat creates sweetness.

  • Use good broth – Since the ingredients are simple, broth quality matters.

  • Adjust strength – Blanch garlic for mild flavor or roast it first for depth.

  • Make it creamy – Add a splash of warm milk or cream if desired.

Final Thoughts

Natural and Fortifying Garlic Soup is proof that simplicity can be powerful. With just a handful of pantry ingredients, you can create a dish that feels deeply satisfying, timeless, and nurturing. It’s the kind of recipe that doesn’t just feed the body—it comforts the spirit.

Drink this to lose 70 pounds

Losing a significant amount of weight—whether it’s 30, 50, or even 70 pounds—is not about shortcuts. It’s about consistency, hormone balance, digestion, and controlling cravings. This simple homemade drink has gained popularity because it targets the root causes of weight gain, not just calories.

This recipe won’t melt fat overnight. What it will do is help your body work with you instead of against you.

Why This Drink Works

Weight gain is often driven by:

  • Insulin spikes

  • Constant hunger and cravings

  • Poor digestion

  • Inflammation

  • Slow metabolism

  • Water retention

This drink addresses all of these gently and naturally.

Key Benefits:

  • Helps reduce appetite naturally

  • Supports blood sugar balance

  • Improves digestion and gut health

  • Reduces bloating and water weight

  • Encourages fat burning over time

  • Boosts energy without stimulants

When consumed daily and paired with mindful eating, many people report steady, noticeable weight loss over months.

The Fat-Loss Support Drink Recipe

Ingredients:

  • 1 glass warm water

  • 1 tablespoon fresh lemon juice

  • 1 teaspoon apple cider vinegar (with the mother)

  • ½ teaspoon cinnamon powder

  • ½ teaspoon grated ginger (or ginger powder)

  • 1 teaspoon raw honey (optional)

How to Prepare:

  1. Warm the water (not boiling).

  2. Add lemon juice and apple cider vinegar.

  3. Stir in cinnamon and ginger.

  4. Add honey if needed.

  5. Mix well and drink slowly.

When to Drink It

  • Best time: Morning on an empty stomach

  • Optional second time: 30 minutes before dinner

Consistency matters more than timing.

What Each Ingredient Does

Lemon Juice

Supports liver detoxification, improves digestion, and helps reduce insulin spikes that lead to fat storage.

Apple Cider Vinegar

Helps control appetite, improves insulin sensitivity, and reduces cravings—especially for sugar.

Cinnamon

Stabilizes blood sugar and prevents sudden hunger crashes that lead to overeating.

Ginger

Boosts metabolism, reduces inflammation, and improves digestion.

Honey (Optional)

Provides a small amount of natural sweetness without spiking blood sugar when used sparingly.

What Results to Expect (Realistically)

Week 1–2:

  • Reduced bloating

  • Better digestion

  • Fewer cravings

Week 3–6:

  • Noticeable weight loss

  • Smaller appetite

  • Improved energy

2–6 months:

  • Consistent fat loss

  • Inches lost

  • Better blood sugar control

Losing 70 pounds is possible, but it happens over time with daily habits—not overnight drinks.

Important Lifestyle Tips (This Is Where Results Multiply)

To maximize results:

  • Eat protein at every meal

  • Reduce sugar and refined carbs

  • Walk 20–30 minutes daily

  • Drink enough water

  • Sleep 7–8 hours

This drink supports your body—but your habits do the real work.

Who Should Avoid This Drink

  • Pregnant women

  • People with stomach ulcers

  • Anyone on blood sugar or blood pressure medication (check with a doctor)

The Truth You Deserve

There is no miracle drink—but there are powerful daily rituals that change your body slowly, safely, and permanently. This drink is one of them.

Skillet Dish with Chicken, Noodles & Vegetables — The One-Pan Wonder That’s Ready in 30 Minutes

Some nights call for comfort food without the chaos. You want something warm, filling, and full of flavor—but you don’t want to wash a mountain of dishes afterward. That’s where this Skillet Dish with Chicken, Noodles & Vegetables comes in. It’s a true one-pan miracle: tender chicken, slurp-worthy noodles, colorful vegetables, and a savory sauce that pulls everything together in just 30 minutes.

This dish is perfect for busy weeknights, last-minute dinners, or anytime you need a reliable meal that tastes like you spent way more effort than you actually did.

Why This One-Pan Skillet Works So Well

The beauty of this recipe is balance. You get protein from the chicken, carbs from the noodles, and freshness from the vegetables—all cooked in one skillet so the flavors layer naturally. The noodles absorb the seasoned broth as they cook, creating a light but satisfying sauce without needing cream or complicated steps.

Even better? This recipe is flexible. Swap vegetables based on what’s in your fridge, use different noodles, or adjust the seasoning to suit your mood.

Ingredients You’ll Need

For the skillet dish:

  • 2 tablespoons olive oil

  • 1 pound chicken breast, thinly sliced

  • 1 small onion, finely chopped

  • 3 cloves garlic, minced

  • 1 cup carrots, sliced into thin rounds

  • 1 cup bell peppers, sliced (any color)

  • 1 cup broccoli florets

  • 2 cups chicken broth

  • 6 ounces egg noodles (or any quick-cooking noodles)

  • 1 tablespoon soy sauce

  • 1 teaspoon paprika

  • ½ teaspoon black pepper

  • ½ teaspoon dried thyme or Italian seasoning

  • Salt, to taste

Optional additions:

  • A splash of lemon juice for brightness

  • Red chili flakes for heat

  • Fresh parsley or green onions for garnish

Step-by-Step Instructions

1. Sauté the Chicken

Heat olive oil in a large skillet over medium-high heat. Add the sliced chicken and season lightly with salt and pepper. Cook for 4–5 minutes, stirring occasionally, until the chicken is lightly golden and cooked through. Remove it from the skillet and set aside.

This step builds flavor and ensures the chicken stays juicy instead of overcooking later.

2. Build the Flavor Base

In the same skillet, add the chopped onion. Sauté for 2 minutes until soft and fragrant. Stir in the garlic and cook for another 30 seconds—just until aromatic.

Add carrots, bell peppers, and broccoli. Cook for 3–4 minutes, stirring often. The vegetables should soften slightly but still keep a bit of crunch.

3. Add the Broth and Noodles

Pour in the chicken broth and soy sauce, scraping up any browned bits from the bottom of the pan. These bits are pure flavor. Bring the mixture to a gentle boil.

Add the noodles directly into the skillet, pressing them down so they’re mostly submerged. Sprinkle in paprika, black pepper, and thyme.

4. Simmer and Combine

Reduce heat to medium-low and let everything simmer for 7–10 minutes, stirring occasionally. As the noodles cook, they’ll soak up the seasoned broth and release starch, creating a silky sauce.

Return the cooked chicken to the skillet and stir well. Let it cook for another 2–3 minutes until everything is heated through and coated in the sauce.

5. Taste and Finish

Taste and adjust seasoning with salt or extra soy sauce if needed. Add a squeeze of lemon juice if you want a little brightness. Remove from heat and garnish with fresh parsley or green onions.

Tips for the Best Skillet Dish

  • Slice chicken thinly so it cooks fast and stays tender.

  • Don’t overcook the noodles—they should be soft but not mushy.

  • Use a wide skillet to ensure even cooking and proper liquid reduction.

  • Prep everything first so the cooking process flows smoothly.

Easy Variations to Try

  • Creamy version: Stir in ¼ cup cream or evaporated milk at the end.

  • Asian-inspired: Add ginger, sesame oil, and swap paprika for a dash of hoisin.

  • Vegetarian: Skip the chicken and add mushrooms or snap peas instead.

  • Spicy kick: Add sriracha or chili oil before serving.

Why You’ll Keep Coming Back to This Recipe

This skillet dish checks all the boxes: fast, flavorful, comforting, and minimal cleanup. It’s the kind of recipe you can memorize after one try and adapt endlessly based on what’s in your kitchen. Whether you’re feeding your family or just yourself, it delivers a satisfying meal without stress.

Heavenly Dinner: Just 5 Ingredients — The Sauce Is So Rich and Creamy

Some of the most unforgettable dinners aren’t complicated or time-consuming. They’re simple, comforting, and made with ingredients you probably already have in your kitchen. This heavenly dinner proves exactly that. With just five humble ingredients, you can create a dish so rich, creamy, and satisfying that it tastes like something from a cozy restaurant kitchen. No long prep, no fancy tools—just pure comfort on a plate.

This recipe is perfect for busy weeknights, lazy weekends, or anytime you want a stress-free meal that still feels special. The magic lies in the sauce: velvety, savory, and deeply comforting, it coats every bite beautifully. Let’s dive in.

Why This 5-Ingredient Dinner Works

The beauty of this dish is balance. Each ingredient plays a clear role, and nothing is wasted. Instead of layering dozens of flavors, this recipe focuses on quality, simplicity, and technique. When cooked gently, these ingredients come together to create a sauce that tastes far more luxurious than the effort required.

This meal is also incredibly versatile. Serve it over pasta, rice, mashed potatoes, or even with crusty bread to soak up every drop of that creamy sauce.

The 5 Simple Ingredients

Here’s all you need to make this heavenly dinner:

  1. Boneless chicken breasts or thighs
    Tender, juicy, and perfect for soaking up flavor. Thighs give extra richness, while breasts keep it lighter.

  2. Heavy cream
    This is the heart of the dish. It creates that silky, indulgent sauce that makes the recipe unforgettable.

  3. Butter
    Adds depth, richness, and a smooth base for the sauce.

  4. Garlic
    Just a few cloves bring warmth and aroma that elevate the entire dish.

  5. Parmesan cheese (freshly grated)
    Salty, nutty, and slightly sharp, Parmesan thickens the sauce and adds incredible flavor.

Salt and black pepper are assumed pantry staples and don’t count toward the five ingredients.

Step-by-Step Instructions

Step 1: Prepare the Chicken
Pat the chicken dry with paper towels and season both sides generously with salt and black pepper. This simple seasoning allows the creamy sauce to shine later.

Step 2: Sear for Flavor
In a large skillet over medium heat, melt the butter. Once it starts to foam slightly, add the chicken. Cook for about 4–5 minutes per side, until golden brown and cooked through. Remove the chicken from the pan and set aside.

Step 3: Build the Sauce
In the same skillet (don’t wipe it out—those browned bits are flavor!), add the minced garlic. Sauté for about 30 seconds until fragrant, being careful not to burn it.

Slowly pour in the heavy cream, stirring constantly. Lower the heat and let the sauce gently simmer for 3–5 minutes until it begins to thicken.

Step 4: Make It Creamy and Rich
Add the grated Parmesan cheese, stirring until fully melted and smooth. The sauce should now be thick, glossy, and irresistibly creamy. Taste and adjust seasoning if needed.

Step 5: Bring It All Together
Return the chicken to the pan, spooning the sauce over each piece. Let it simmer gently for another 2–3 minutes so the flavors meld beautifully.

Serving Suggestions

This dish is incredibly flexible. Here are a few delicious ways to serve it:

  • Over buttery pasta for a classic creamy dinner

  • With steamed rice to soak up the sauce

  • Alongside mashed potatoes for ultimate comfort

  • With roasted vegetables for a balanced plate

  • Served with crusty bread for dipping (highly recommended!)

Tips for the Best Results

  • Use freshly grated Parmesan, not pre-shredded, for the smoothest sauce.

  • Keep the heat low once the cream is added to prevent curdling.

  • If the sauce gets too thick, add a small splash of milk or pasta water to loosen it.

  • Chicken thighs provide extra richness if you want an even more indulgent dish.

Why You’ll Love This Recipe

This heavenly dinner is proof that you don’t need a long ingredient list to create something extraordinary. It’s comforting, elegant, and deeply satisfying, with a sauce so rich and creamy you’ll want to lick the plate clean. Whether you’re cooking for family, guests, or just yourself, this recipe delivers maximum flavor with minimal effort.

COVID-19 vaccine: four years later, the list of persistent symptoms continues to grow

Four years after the global rollout of COVID-19 vaccines, billions of doses later, and countless lives saved, discussion has shifted from emergency response to long-term outcomes. While vaccines remain one of the most effective public-health tools ever deployed, a growing number of individuals continue to report persistent symptoms following vaccination, prompting ongoing scientific investigation and public debate.

It’s important to approach this topic with nuance. Persistent symptoms do not mean vaccines are broadly unsafe—but they do highlight the complexity of immune responses and the need for continued research, transparency, and patient support.

What Are “Persistent Symptoms”?

Persistent post-vaccination symptoms—sometimes informally referred to as post-vaccine syndrome—describe health complaints that last weeks or months beyond the expected short-term side effects such as fever, arm pain, or fatigue.

Reported symptoms vary widely and may include:

  • Prolonged fatigue

  • Headaches or brain fog

  • Muscle or joint pain

  • Heart palpitations

  • Dizziness or balance issues

  • Sleep disturbances

  • Tingling or numbness

These symptoms are not universal, and most vaccinated individuals do not experience them. However, a small subset of people report ongoing effects that affect quality of life, leading clinicians and researchers to explore possible mechanisms.

Why Are Reports Increasing?

There are several reasons why reports of persistent symptoms appear to be growing—even years later:

1. Greater Awareness
Early in the pandemic, focus was on survival and mass vaccination. As time passed, individuals began noticing patterns, comparing experiences, and speaking up—especially through patient advocacy groups and online communities.

2. Better Surveillance
Healthcare systems now track adverse events more carefully. Long-term follow-ups and pharmacovigilance systems have improved, capturing symptoms that may not have been obvious in initial trials.

3. Overlap With Long COVID
One of the biggest challenges is distinguishing vaccine-related symptoms from Long COVID, which can occur after infection—even mild or asymptomatic cases. Many people were infected unknowingly before or after vaccination, complicating cause-and-effect analysis.

What Does Science Say So Far?

Current scientific consensus recognizes that:

  • Most vaccine side effects are mild and temporary

  • Serious long-term adverse effects are rare

  • Persistent symptoms are being actively studied

Researchers are exploring several possible explanations, including immune dysregulation, autonomic nervous system responses, inflammation, and unmasking of underlying conditions. Importantly, similar post-immune symptoms have been observed after other vaccines and viral infections throughout medical history.

No large-scale evidence suggests COVID-19 vaccines cause widespread chronic illness. However, medicine acknowledges that rare outcomes can still matter deeply to those affected.

Who May Be More Vulnerable?

Studies suggest persistent symptoms may be more commonly reported among:

  • Individuals with autoimmune conditions

  • People with a history of allergic reactions

  • Those who previously experienced Long COVID

  • Individuals with heightened inflammatory responses

This does not mean vaccination should be avoided in these groups—but rather that personalized medical guidance is essential.

The Role of Risk–Benefit Balance

One of the most important points often lost in online discussions is risk comparison. COVID-19 infection itself is strongly linked to:

  • Long COVID

  • Heart inflammation

  • Neurological complications

  • Blood clotting disorders

For the vast majority of people, the risk of long-term complications is significantly higher after infection than after vaccination. This is why global health authorities continue to support vaccination while also encouraging ongoing safety monitoring.

Listening Without Dismissing

A major concern raised by patients reporting persistent symptoms is feeling unheard. Regardless of cause, symptoms are real to the person experiencing them. Modern medicine increasingly emphasizes patient-centered care—acknowledging experiences while seeking evidence-based explanations and treatments.

Many healthcare providers now focus on:

  • Symptom management

  • Inflammation reduction

  • Nervous system regulation

  • Gradual recovery strategies

This approach mirrors treatment paths used for other post-viral and post-immune conditions.

What Comes Next?

Four years later, COVID-19 vaccines are no longer “new,” but research is far from finished. Ongoing studies aim to:

  • Identify biological markers for persistent symptoms

  • Improve screening and follow-up

  • Refine vaccine formulations

  • Develop targeted treatments for those affected

Science evolves by asking hard questions—not by ignoring concerns or exaggerating fears.

Final Thoughts

The conversation around persistent symptoms after COVID-19 vaccination reflects a broader truth: no medical intervention is one-size-fits-all. Vaccines have saved millions of lives and remain overwhelmingly safe and effective, yet continued research is essential to support the small number of individuals who experience prolonged effects.

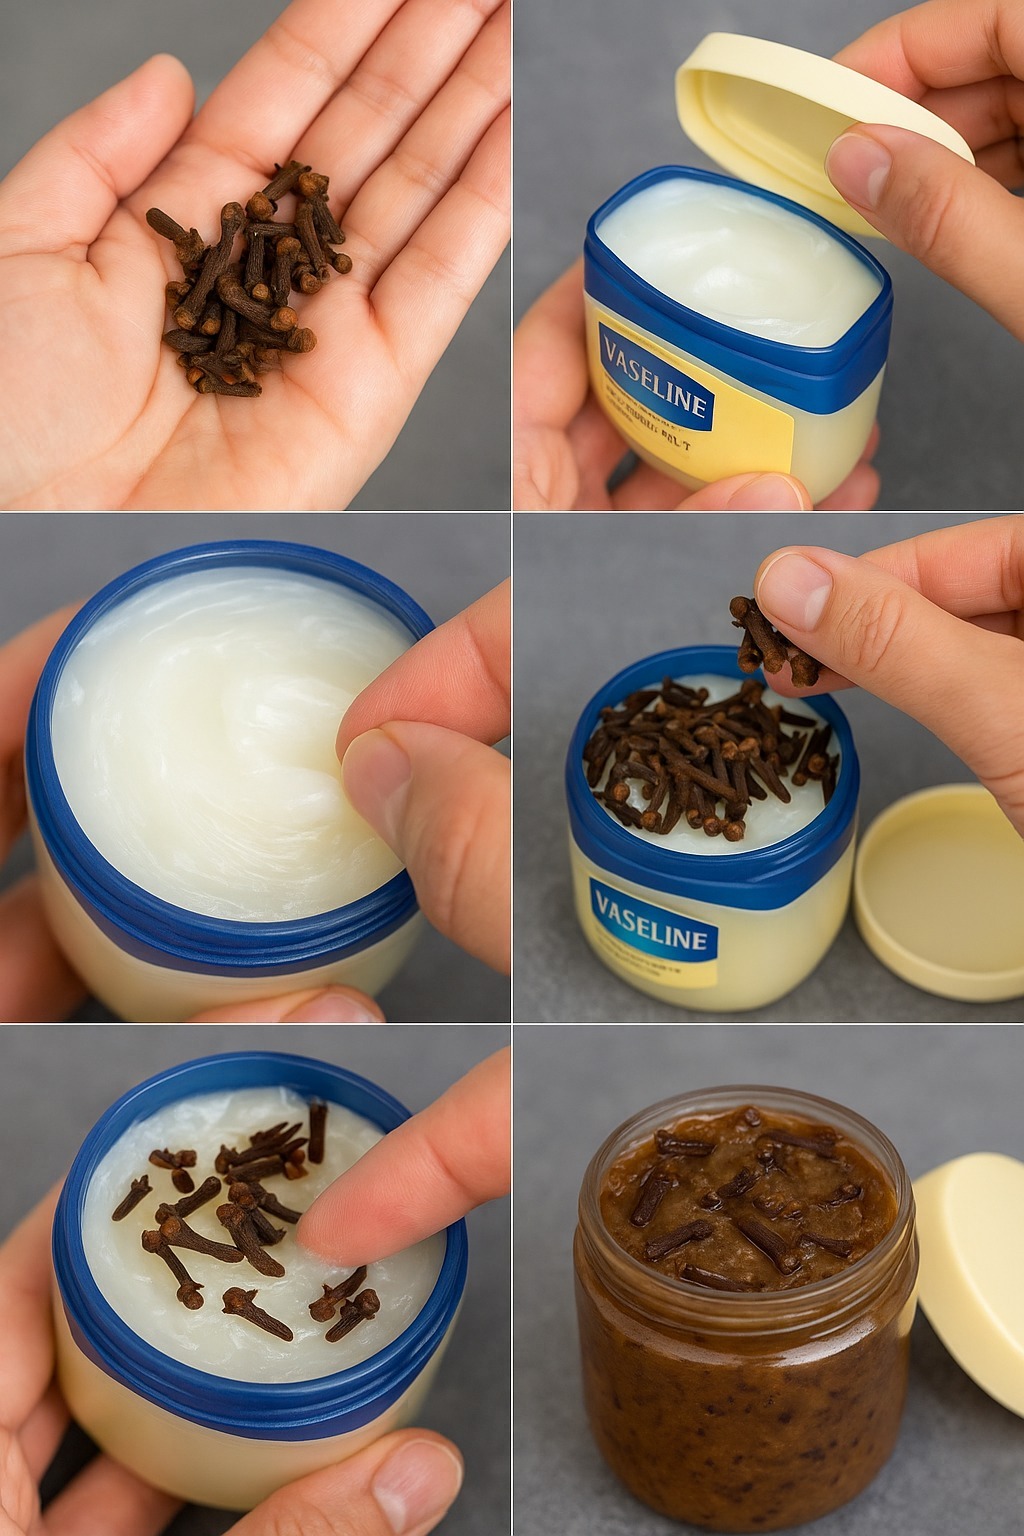
Mix cloves with Vaseline : A secret nobody will never tell you. thank me later

What if small, daily choices could gently guide your body toward better balance, less pain, and more energy? While no single food or drink can magically cure chronic conditions like diabetes, fatty liver disease, or joint pain, consistent lifestyle habits can dramatically support the body’s natural healing systems. When nutrition, movement, and mindful routines work together, the results can feel life-changing.

Let’s explore how a simple daily wellness recipe, paired with smart habits, may help reduce inflammation, stabilize blood sugar, support liver function, and ease joint discomfort over time.

Understanding the Root of the Problem

Diabetes, fatty liver disease, and joint pain often share the same underlying triggers:

  • Chronic inflammation

  • Insulin resistance

  • Excess fat accumulation in the liver

  • Oxidative stress

  • Poor circulation

These conditions don’t appear overnight. They develop slowly, fueled by processed foods, sugar overload, inactivity, stress, and poor sleep. The good news? They can also be improved gradually by addressing those same roots.

The Power of a Daily Anti-Inflammatory Wellness Drink

This simple, natural drink is designed to support metabolic health, liver detoxification, and joint lubrication, using ingredients known for their traditional and scientifically studied benefits.

The Wellness Support Recipe

Ingredients:

  • 1 cup warm water

  • 1 tablespoon fresh lemon juice

  • ½ teaspoon turmeric powder

  • ¼ teaspoon cinnamon powder

  • 1 teaspoon olive oil

  • A pinch of black pepper

How to Prepare:

  1. Warm the water until comfortable to drink (not boiling).

  2. Add lemon juice, turmeric, cinnamon, olive oil, and black pepper.

  3. Stir well and drink slowly, preferably on an empty stomach in the morning.

Why This Recipe Supports the Body

Turmeric
Turmeric contains curcumin, a powerful compound known for its anti-inflammatory properties. It may help reduce joint stiffness and support insulin sensitivity when consumed consistently.

Cinnamon
Cinnamon has been shown to help regulate blood sugar levels by improving insulin response, making it especially helpful for people managing glucose fluctuations.

Lemon Juice
Lemon supports liver enzymes and digestion. A healthy liver plays a crucial role in fat metabolism and detoxification.

Olive Oil
Rich in healthy monounsaturated fats, olive oil supports joint lubrication, reduces inflammation, and helps the liver process fats more efficiently.

Black Pepper
Black pepper enhances the absorption of curcumin by up to 2000%, making turmeric far more effective.

How This Helps With Diabetes Support

This drink may help:

  • Reduce insulin resistance

  • Prevent sharp blood sugar spikes

  • Support pancreatic function

  • Encourage healthier cravings

Paired with a balanced diet rich in fiber, lean protein, and healthy fats, it can become a powerful daily habit for blood sugar control.

Supporting Fatty Liver Health Naturally

Fatty liver disease often improves when the liver gets a break from sugar, refined carbs, and excess calories. Ingredients like lemon and olive oil support bile flow and fat metabolism, while turmeric helps reduce liver inflammation.

Additional liver-friendly habits:

  • Avoid sugary drinks

  • Eat more vegetables and legumes

  • Limit refined carbohydrates

  • Stay hydrated throughout the day

Relief for Joint Pain and Stiffness

Joint pain is often driven by inflammation and poor circulation. The anti-inflammatory properties of turmeric and olive oil may help:

  • Reduce morning stiffness

  • Improve joint flexibility

  • Support cartilage health

  • Ease swelling over time

Gentle daily movement like walking, stretching, or yoga enhances these benefits.

Lifestyle Habits That Multiply the Results

This recipe works best when combined with simple, realistic habits:

  • Walk 20–30 minutes daily

  • Sleep 7–8 hours per night

  • Reduce sugar and ultra-processed foods

  • Practice stress-reduction techniques like deep breathing

  • Stay consistent, not perfect

Healing is not about extremes—it’s about sustainability.

What to Expect Over Time

With regular use and healthy lifestyle choices, many people report:

  • Improved energy levels

  • Less joint stiffness

  • Better digestion

  • More stable blood sugar readings

  • Reduced bloating and inflammation

Results vary, and improvements happen gradually, but consistency is key.

A Gentle Reminder

This recipe is not a medical treatment and does not replace prescribed medications. Always consult a healthcare professional before making significant dietary changes, especially if you have a diagnosed condition.

Final Thoughts

You don’t need drastic diets or expensive supplements to support your health. Sometimes, healing begins with a warm cup, a mindful morning, and the decision to care for your body one day at a time. While you may not “say goodbye” overnight, you can absolutely say hello to better balance, mobility, and vitality.

Say goodbye to diabetes, fatty liver disease and joint pain

What if small, daily choices could gently guide your body toward better balance, less pain, and more energy? While no single food or drink can magically cure chronic conditions like diabetes, fatty liver disease, or joint pain, consistent lifestyle habits can dramatically support the body’s natural healing systems. When nutrition, movement, and mindful routines work together, the results can feel life-changing.

Let’s explore how a simple daily wellness recipe, paired with smart habits, may help reduce inflammation, stabilize blood sugar, support liver function, and ease joint discomfort over time.

Understanding the Root of the Problem

Diabetes, fatty liver disease, and joint pain often share the same underlying triggers:

  • Chronic inflammation

  • Insulin resistance

  • Excess fat accumulation in the liver

  • Oxidative stress

  • Poor circulation

These conditions don’t appear overnight. They develop slowly, fueled by processed foods, sugar overload, inactivity, stress, and poor sleep. The good news? They can also be improved gradually by addressing those same roots.

The Power of a Daily Anti-Inflammatory Wellness Drink

This simple, natural drink is designed to support metabolic health, liver detoxification, and joint lubrication, using ingredients known for their traditional and scientifically studied benefits.

The Wellness Support Recipe

Ingredients:

  • 1 cup warm water

  • 1 tablespoon fresh lemon juice

  • ½ teaspoon turmeric powder

  • ¼ teaspoon cinnamon powder

  • 1 teaspoon olive oil

  • A pinch of black pepper

How to Prepare:

  1. Warm the water until comfortable to drink (not boiling).

  2. Add lemon juice, turmeric, cinnamon, olive oil, and black pepper.

  3. Stir well and drink slowly, preferably on an empty stomach in the morning.

Why This Recipe Supports the Body

Turmeric
Turmeric contains curcumin, a powerful compound known for its anti-inflammatory properties. It may help reduce joint stiffness and support insulin sensitivity when consumed consistently.

Cinnamon
Cinnamon has been shown to help regulate blood sugar levels by improving insulin response, making it especially helpful for people managing glucose fluctuations.

Lemon Juice
Lemon supports liver enzymes and digestion. A healthy liver plays a crucial role in fat metabolism and detoxification.

Olive Oil
Rich in healthy monounsaturated fats, olive oil supports joint lubrication, reduces inflammation, and helps the liver process fats more efficiently.

Black Pepper
Black pepper enhances the absorption of curcumin by up to 2000%, making turmeric far more effective.

How This Helps With Diabetes Support

This drink may help:

  • Reduce insulin resistance

  • Prevent sharp blood sugar spikes

  • Support pancreatic function

  • Encourage healthier cravings

Paired with a balanced diet rich in fiber, lean protein, and healthy fats, it can become a powerful daily habit for blood sugar control.

Supporting Fatty Liver Health Naturally

Fatty liver disease often improves when the liver gets a break from sugar, refined carbs, and excess calories. Ingredients like lemon and olive oil support bile flow and fat metabolism, while turmeric helps reduce liver inflammation.

Additional liver-friendly habits:

  • Avoid sugary drinks

  • Eat more vegetables and legumes

  • Limit refined carbohydrates

  • Stay hydrated throughout the day

Relief for Joint Pain and Stiffness

Joint pain is often driven by inflammation and poor circulation. The anti-inflammatory properties of turmeric and olive oil may help:

  • Reduce morning stiffness

  • Improve joint flexibility

  • Support cartilage health

  • Ease swelling over time

Gentle daily movement like walking, stretching, or yoga enhances these benefits.

Lifestyle Habits That Multiply the Results

This recipe works best when combined with simple, realistic habits:

  • Walk 20–30 minutes daily

  • Sleep 7–8 hours per night

  • Reduce sugar and ultra-processed foods

  • Practice stress-reduction techniques like deep breathing

  • Stay consistent, not perfect

Healing is not about extremes—it’s about sustainability.

What to Expect Over Time

With regular use and healthy lifestyle choices, many people report:

  • Improved energy levels

  • Less joint stiffness

  • Better digestion

  • More stable blood sugar readings

  • Reduced bloating and inflammation

Results vary, and improvements happen gradually, but consistency is key.

A Gentle Reminder

This recipe is not a medical treatment and does not replace prescribed medications. Always consult a healthcare professional before making significant dietary changes, especially if you have a diagnosed condition.

Final Thoughts

You don’t need drastic diets or expensive supplements to support your health. Sometimes, healing begins with a warm cup, a mindful morning, and the decision to care for your body one day at a time. While you may not “say goodbye” overnight, you can absolutely say hello to better balance, mobility, and vitality.