
The 5 Most Powerful Natural Laxative Foods in the World – Gentle Relief Recipe Guide

Digestive health plays a crucial role in overall wellness. When your digestive system slows down, it can lead to discomfort, bloating, heaviness, and constipation. Fortunately, nature provides powerful solutions in the form of natural laxative foods that gently stimulate bowel movements, improve gut balance, and support long-term digestive health. According to experts and organizations like the World Health Organization, a diet rich in fiber, water, and natural plant foods is essential for maintaining regular bowel function.

This guide explores five of the most effective natural laxative foods in the world and includes a simple daily recipe to help restore healthy digestion naturally and safely.

1. Prunes – The Gold Standard for Constipation Relief

Prunes, or dried plums, are widely considered the most effective natural laxative food. They contain high levels of dietary fiber and sorbitol, a natural sugar alcohol that draws water into the intestines and softens stool.

Benefits:

  • Stimulates bowel movements naturally

  • Softens hard stool

  • Supports healthy gut bacteria

  • Provides antioxidants and potassium

Prunes work quickly yet gently, making them ideal for regular digestive support.

2. Papaya – The Enzyme-Rich Digestive Healer

Papaya contains a powerful digestive enzyme called papain, which helps break down proteins and improve intestinal movement. It also contains water and fiber, which support smooth elimination.

Benefits:

  • Improves digestion efficiency

  • Reduces bloating and heaviness

  • Softens stool naturally

  • Supports colon cleansing

Papaya is especially effective when eaten in the morning on an empty stomach.

3. Chia Seeds – Fiber Powerhouses for Gut Movement

Chia seeds absorb up to 10 times their weight in water, forming a gel-like consistency that lubricates the intestines and promotes easy bowel movements.

Benefits:

  • Extremely high in soluble fiber

  • Helps stool pass smoothly

  • Feeds beneficial gut bacteria

  • Improves hydration in the intestines

The gel-forming property makes chia seeds particularly effective for chronic constipation.

4. Flaxseeds – Natural Intestinal Lubricants

Flaxseeds are rich in both soluble and insoluble fiber. They help bulk up stool while also lubricating the digestive tract, making elimination easier.

Benefits:

  • Improves stool consistency

  • Reduces intestinal inflammation

  • Supports healthy gut microbiome

  • Provides omega-3 fatty acids

Medical experts from institutions such as Harvard Medical School emphasize the importance of fiber-rich seeds like flax for digestive regularity.

5. Yogurt – Restores Healthy Gut Bacteria

Yogurt contains probiotics, which are beneficial bacteria that improve digestion and stimulate regular bowel movements.

Benefits:

  • Restores healthy intestinal flora

  • Improves digestion efficiency

  • Reduces constipation naturally

  • Strengthens gut health long-term

Choose plain, natural yogurt for the best results.

Powerful Natural Laxative Recipe

This simple recipe combines several of these foods into one effective digestive remedy.

Ingredients:

  • 5 prunes

  • 1 cup fresh papaya cubes

  • 1 tablespoon chia seeds

  • 1 tablespoon ground flaxseeds

  • 1 cup plain yogurt

  • ½ cup warm water

Instructions:

Step 1: Soften the prunes
Soak the prunes in warm water for 10 minutes. This makes them easier to digest and activates their natural laxative properties.

Step 2: Prepare the chia seeds
Mix chia seeds with 2 tablespoons of water and let them sit for 5 minutes until they form a gel.

Step 3: Blend the ingredients
Add soaked prunes, papaya, yogurt, chia gel, and flaxseeds into a blender. Blend until smooth and creamy.

Step 4: Serve fresh
Drink this mixture immediately, preferably in the morning on an empty stomach.

Why This Recipe Works

This combination provides multiple digestive benefits:

  • Fiber adds bulk and stimulates movement

  • Natural sugars draw water into stool

  • Probiotics improve gut balance

  • Enzymes enhance digestion

  • Healthy fats lubricate intestines

Together, these effects promote gentle and natural bowel movements.

When to Use This Recipe

This natural remedy is ideal if you experience:

  • Occasional constipation

  • Slow digestion

  • Bloating

  • Heavy feeling after meals

  • Irregular bowel movements

It is safe for daily use and provides long-term digestive support.

Additional Tips for Better Digestive Health

To enhance the effects of this recipe:

  • Drink plenty of water daily

  • Eat more fruits and vegetables

  • Exercise regularly

  • Avoid excessive processed foods

  • Maintain consistent meal times

Hydration is especially important because fiber needs water to work effectively.

What to Expect

Many people notice improvements within 6–12 hours after consuming this recipe. With regular use, digestion becomes more consistent, comfortable, and efficient.

Benefits include:

  • Easier bowel movements

  • Reduced bloating

  • Improved gut health

  • Increased comfort

  • Better overall wellness

Conclusion

Constipation is common but easily managed with natural foods. Prunes, papaya, chia seeds, flaxseeds, and yogurt are among the most powerful natural laxatives available. They work by improving intestinal movement, softening stool, and restoring healthy gut balance.
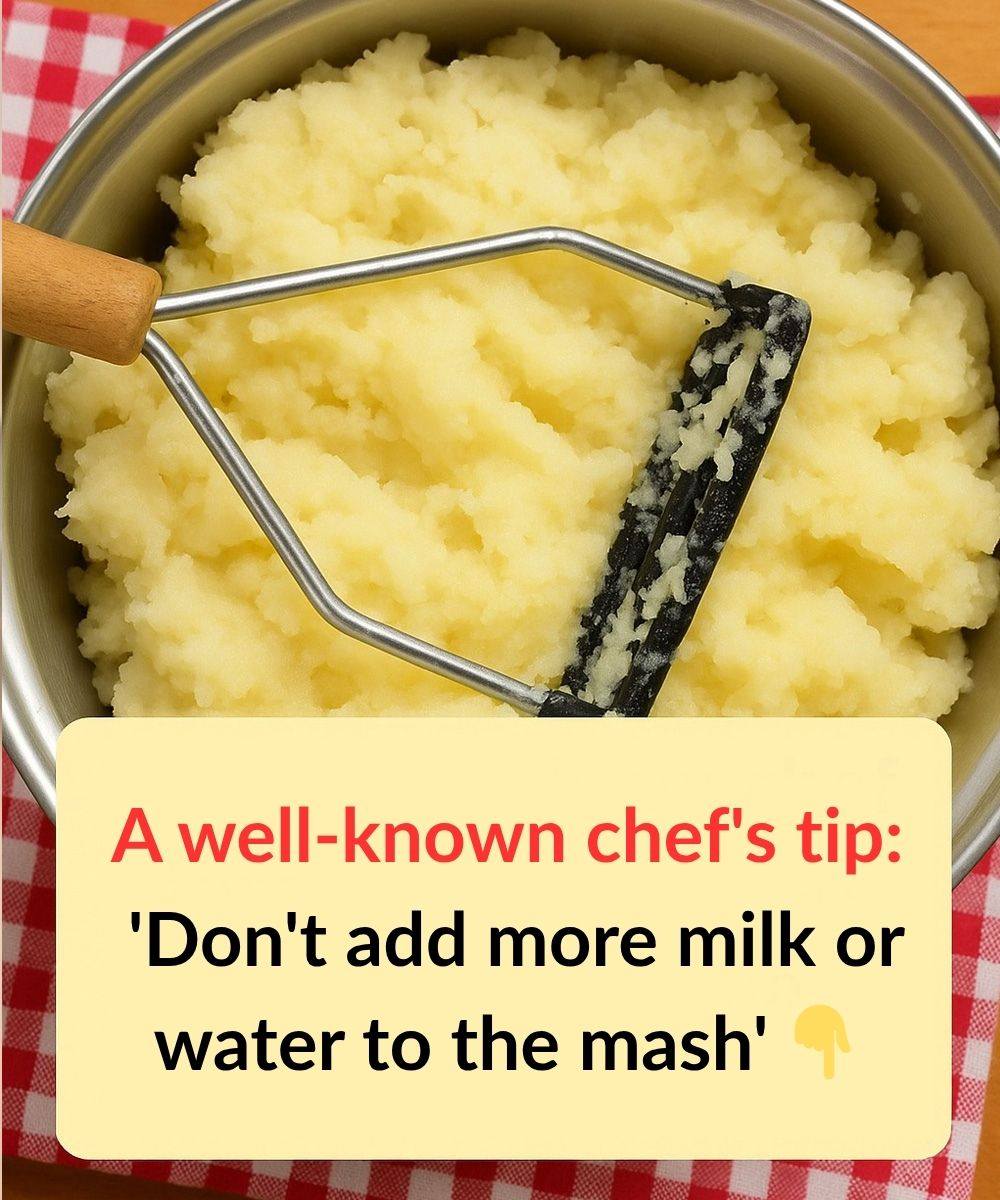

Creamy Homemade Mashed Potatoes

Mashed potatoes are one of the most beloved comfort foods around the world. Soft, fluffy, and buttery, they pair perfectly with everything from roasted chicken to grilled steak. Although they seem simple to prepare, achieving perfectly smooth and creamy mashed potatoes requires a few important techniques. One well-known chef’s tip is especially important: don’t add too much milk or water to the mash. Doing so can make the potatoes gluey and watery instead of light and fluffy.

In this detailed guide, you’ll learn how to make rich, creamy mashed potatoes the right way.


Ingredients

  • 1 kg (2.2 lbs) potatoes (Yukon Gold or Russet work best)

  • 4 tablespoons unsalted butter (room temperature)

  • ½ cup warm milk or cream (adjust as needed)

  • Salt to taste

  • Optional: black pepper, garlic, chopped parsley


Choosing the Right Potatoes

The type of potato you use makes a big difference. Yukon Gold potatoes produce naturally creamy mash with a buttery flavor. Russet potatoes are starchier and give you a fluffier texture. Avoid waxy potatoes like red potatoes if you want smooth mash, as they can turn slightly gluey.


Step-by-Step Instructions

1. Peel and Cut Evenly

Peel the potatoes and cut them into evenly sized chunks. This ensures they cook at the same rate. Uneven pieces may result in some being overcooked while others remain firm.

2. Start in Cold Water

Place the potato chunks in a pot and cover them with cold water. Starting with cold water helps the potatoes cook evenly from the inside out. Add a generous pinch of salt to the water.

3. Boil Gently

Bring the pot to a boil over medium-high heat. Once boiling, reduce to a gentle simmer and cook for about 15–20 minutes, or until the potatoes are fork-tender. Do not overboil, as waterlogged potatoes can lead to watery mash.

4. Drain Thoroughly

Drain the potatoes well and return them to the hot pot. Let them sit for 1–2 minutes over low heat to allow excess moisture to evaporate. This step is crucial for fluffy mashed potatoes.

5. Mash While Hot

Use a potato masher, ricer, or food mill to mash the potatoes while they are still hot. Avoid using a blender or food processor, as overmixing can release too much starch and create a glue-like texture.


The Chef’s Secret: Don’t Add Too Much Liquid

Many people believe adding extra milk or water makes mashed potatoes creamier. In reality, too much liquid can ruin the texture. Instead:

  • Warm the milk or cream before adding it. Cold liquid cools down the potatoes and affects texture.

  • Add butter first and mix well. The fat coats the starch, helping maintain fluffiness.

  • Slowly pour in warm milk or cream in small amounts, mixing gently until you reach the desired consistency.

Remember, you can always add more liquid — but you can’t remove it once added.


Seasoning and Flavor Variations

Classic mashed potatoes need only butter and salt, but you can enhance the flavor in many ways:

  • Garlic Mashed Potatoes: Add roasted or sautéed garlic.

  • Cheesy Mash: Stir in grated Parmesan or cheddar cheese.

  • Herb Mash: Mix in fresh parsley, chives, or thyme.

  • Cream Cheese Addition: A spoonful of cream cheese makes them extra rich.

Taste and adjust seasoning before serving.


Common Mistakes to Avoid

  1. Overmixing: Leads to sticky, gummy potatoes.

  2. Adding cold milk: Can make mash dense and less smooth.

  3. Skipping the drying step: Extra moisture causes watery mash.

  4. Undersalting: Potatoes need proper seasoning to bring out their flavor.


Serving Suggestions

Mashed potatoes pair beautifully with:

  • Roast chicken

  • Grilled steak

  • Turkey and gravy

  • Meatloaf

  • Sausages

  • Vegetable stews

They also make a perfect base for shepherd’s pie or can be piped decoratively onto casseroles.


Storage Tips

If you have leftovers:

  • Store in an airtight container in the refrigerator for up to 3 days.

  • Reheat gently over low heat, adding a splash of warm milk if needed.

  • Avoid microwaving for too long, as it can dry them out.

Mashed potatoes can also be frozen, although the texture may slightly change upon thawing.


Final Thoughts

Perfect mashed potatoes are all about technique. Choose the right potatoes, cook them properly, remove excess moisture, and most importantly — don’t overload them with milk or water. Adding liquid gradually and gently mixing ensures a smooth, creamy texture every time.

With these tips, you’ll never serve bland or watery mashed potatoes again. Instead, you’ll have a fluffy, buttery side dish that feels luxurious yet comforting — the kind that disappears quickly from the dinner table.

Once you master this classic recipe, you can experiment with flavors and make it your own. Whether served at a holiday feast or a simple weeknight dinner, mashed potatoes remain one of the most satisfying and timeless dishes in home cooking.

11 Things You Didn’t Know About Hard Boiled Eggs

Hard-boiled eggs are one of the simplest foods in the world, yet they are packed with surprising facts, powerful nutrition, and incredible versatility. Whether you enjoy them for breakfast, as a snack, or sliced over salads, hard-boiled eggs have earned their place in kitchens across the globe. Beyond their convenience, they offer numerous benefits that many people don’t realize. Here are 11 fascinating things you probably didn’t know about hard-boiled eggs—plus a simple recipe to prepare them perfectly every time.

1. Hard-Boiled Eggs Are Nutritional Powerhouses

Eggs are loaded with high-quality protein, vitamins, and essential minerals. One hard-boiled egg contains about 6 grams of protein and important nutrients like vitamin B12, vitamin D, selenium, and choline. According to the United States Department of Agriculture, eggs provide a balanced combination of nutrients that support muscle growth, brain health, and overall body function.2. They Support Brain Health

Eggs are one of the best sources of choline, a nutrient essential for brain development and memory. Choline helps produce neurotransmitters that regulate mood and cognitive function. Regular consumption of eggs may support mental clarity and focus.

3. Hard-Boiled Eggs Are Great for Weight Management

Eggs are highly satisfying and can help you feel full longer. Their high protein content reduces hunger and helps control calorie intake. This makes them an excellent choice for those trying to maintain or lose weight without feeling deprived.

4. The Yolk Contains Most of the Nutrients

While some people avoid egg yolks, they actually contain most of the egg’s vitamins and minerals. The yolk provides healthy fats, vitamins A, D, E, and K, and powerful antioxidants like lutein and zeaxanthin, which support eye health.

5. Eggs Can Support Heart Health

Moderate egg consumption can be part of a heart-healthy diet. The American Heart Association states that eggs can fit into healthy eating patterns, especially when combined with fruits, vegetables, and whole grains.

6. Older Eggs Are Easier to Peel

Fresh eggs are harder to peel after boiling because the egg white sticks more tightly to the shell. Slightly older eggs peel more easily due to changes in internal pH levels.

7. Hard-Boiled Eggs Are Extremely Versatile

They can be eaten plain, sliced into salads, mashed into sandwiches, or used in many recipes. Their neutral flavor makes them easy to combine with different seasonings and dishes.

8. The Green Ring Around the Yolk Is Harmless

Sometimes hard-boiled eggs develop a greenish ring around the yolk. This happens when eggs are overcooked and sulfur reacts with iron. While it may not look appealing, it is completely safe to eat.

9. Eggs Provide Natural Energy

Eggs contain a balanced mix of protein and fats that provide steady energy. Unlike sugary foods, they do not cause rapid spikes and crashes in blood sugar levels.

10. Hard-Boiled Eggs Are Safe When Properly Prepared

Proper cooking eliminates harmful bacteria. The World Health Organization emphasizes that fully cooked eggs reduce the risk of foodborne illness and are safe for regular consumption.

11. They Have a Long Shelf Life

Hard-boiled eggs can be stored in the refrigerator for up to one week, making them a convenient food to prepare in advance for busy days.

Perfect Hard-Boiled Eggs Recipe

Ingredients

  • 6 large eggs

  • Water (enough to cover eggs)

  • Ice (optional, for ice bath)

Instructions

Step 1: Place Eggs in a Pot
Arrange the eggs in a single layer at the bottom of a saucepan. Avoid stacking them to ensure even cooking.

Step 2: Add Water
Fill the pot with cold water until the eggs are covered by about 1 inch of water.

Step 3: Bring to a Boil
Place the pot on medium-high heat and bring the water to a gentle boil.

Step 4: Turn Off Heat and Cover
Once boiling, turn off the heat and cover the pot with a lid. Let the eggs sit in the hot water for 10–12 minutes, depending on how firm you want the yolks.

Step 5: Cool the Eggs
Transfer the eggs to a bowl of ice water for 5–10 minutes. This stops the cooking process and makes peeling easier.

Step 6: Peel and Enjoy
Gently tap the eggs on a hard surface and peel the shell. Your perfectly cooked hard-boiled eggs are ready to eat.

Tips for Best Results

  • Use slightly older eggs for easier peeling

  • Avoid overcooking to prevent green yolks

  • Store eggs in the refrigerator after cooking

  • Add a pinch of salt if desired for flavor

Conclusion

Hard-boiled eggs are far more than just a simple snack. They are packed with essential nutrients, support brain and heart health, and provide long-lasting energy. Easy to prepare and incredibly versatile, they fit perfectly into almost any diet. Whether you eat them in the morning, add them to meals, or enjoy them as a quick snack, hard-boiled eggs offer a powerful combination of convenience, nutrition, and taste. By mastering the simple recipe above, you can enjoy perfectly cooked eggs anytime while benefiting from one of nature’s most complete foods.

Stubborn limescale in the toilet disappears with this ingredient

If you’ve noticed a chalky white crust or stubborn brown ring forming inside your toilet bowl, you’re dealing with limescale. This hard, crusty buildup forms when water contains high levels of minerals like calcium and magnesium. Over time, these minerals cling to the porcelain surface, creating unsightly stains that seem impossible to remove.

The good news? You don’t need expensive chemical cleaners. One simple household ingredient can dissolve stubborn limescale naturally and effectively: white vinegar.

Let’s explore why limescale forms, how vinegar works, and exactly how to use it for sparkling results.


Why Limescale Builds Up in Toilets

Limescale forms when hard water evaporates and leaves mineral deposits behind. Toilets are especially vulnerable because:

  • Water constantly sits in the bowl.

  • The rim area traps mineral deposits.

  • Flushing repeatedly adds fresh minerals.

  • Hard water accelerates buildup.

Over time, these minerals harden into thick crusts that regular brushing can’t remove. If ignored, limescale can even block water flow under the rim.


The Ingredient That Makes It Disappear: White Vinegar

White vinegar contains acetic acid, which reacts with alkaline mineral deposits like calcium carbonate. When the acid comes into contact with limescale, it breaks it down, softens it, and helps dissolve it.

Why white vinegar works so well:

  • Naturally acidic

  • Affordable and widely available

  • Safe for porcelain

  • Non-toxic and eco-friendly

  • No harsh fumes

Unlike strong chemical cleaners, vinegar won’t damage septic systems or release harmful vapors.


Step-by-Step Method to Remove Stubborn Limescale

Here’s the exact method to get rid of thick toilet limescale using vinegar.

What You’ll Need:

  • 2–3 cups white vinegar

  • Toilet brush

  • Rubber gloves

  • Old sponge or cloth

  • Optional: baking soda for extra power


Step 1: Remove Excess Water

Turn off the toilet’s water supply if possible and flush to lower the water level. Use a cup or sponge to remove excess water so the vinegar can directly contact the stains.


Step 2: Heat the Vinegar Slightly

Warm the vinegar until it’s hot but not boiling. Warm vinegar works faster because heat enhances its chemical reaction with mineral deposits.


Step 3: Pour Generously

Slowly pour the warm vinegar into the bowl, making sure it coats all limescale areas, especially under the rim and around the waterline.

Let it sit for at least 2 hours. For heavy buildup, leave it overnight.


Step 4: Scrub Thoroughly

After soaking, use a toilet brush or pumice stone designed for porcelain to gently scrub the softened deposits. Most of the buildup should flake away easily.


Step 5: Flush and Repeat if Needed

Flush to rinse. If some stubborn patches remain, repeat the process or add baking soda for extra strength.


Boosting Power: Vinegar + Baking Soda

For extreme limescale, sprinkle one cup of baking soda into the bowl first. Then pour in vinegar slowly.

The fizzing reaction helps lift and loosen mineral crusts. Let it sit for several hours before scrubbing.


Alternative Natural Option: Citric Acid

If vinegar smell bothers you, citric acid (found in lemons) works similarly. Dissolve 2–3 tablespoons of citric acid powder in hot water and pour it into the bowl. Let sit overnight.


Preventing Limescale from Returning

Once your toilet is clean, prevention is key.

  • Pour one cup of vinegar into the bowl once a week.

  • Brush lightly to prevent mineral buildup.

  • Consider installing a water softener if your area has very hard water.

  • Clean under the rim regularly.

Consistent maintenance keeps deposits from becoming rock-hard again.


What NOT to Do

Avoid these common mistakes:

  • Don’t mix vinegar with bleach. It creates dangerous fumes.

  • Don’t use metal tools that scratch porcelain.

  • Avoid overly abrasive powders that damage the glaze.

Damaged porcelain attracts more limescale over time.


Why This Method Is Better Than Store Cleaners

Commercial descalers can work quickly, but they often contain hydrochloric acid or other harsh chemicals. These can:

  • Irritate skin and lungs

  • Damage septic systems

  • Corrode plumbing with repeated use

Vinegar offers a safer, budget-friendly alternative that still delivers impressive results.


Final Thoughts

Stubborn toilet limescale doesn’t have to mean scrubbing endlessly or buying expensive cleaners. With just white vinegar and a little patience, you can dissolve thick mineral buildup naturally and restore your toilet’s shine.

The key is soaking time. The longer vinegar sits, the more effectively it breaks down deposits. For severe buildup, overnight treatment works best.

This Recipe Is My Favorite of the Day: Creamy Garlic Butter Chicken and Parmesan Pasta

Some recipes are good, some are great, and then there are those special dishes that instantly become your favorite of the day. This Creamy Garlic Butter Chicken and Parmesan Pasta is exactly that kind of recipe. It brings together tender, juicy chicken, rich garlic butter, and a silky parmesan cream sauce that wraps around every bite of pasta like comfort itself. It’s the perfect balance of flavor, texture, and warmth, making it ideal for lunch, dinner, or even a special weekend treat.

What makes this recipe truly stand out is its simplicity combined with its luxurious taste. You don’t need complicated ingredients or professional skills—just a few pantry staples and a love for good food. The result is a restaurant-quality dish made right in your own kitchen.

Why This Recipe Is So Special

This recipe has everything you could want in a perfect meal. The chicken is seasoned and seared until golden brown, locking in all its natural juices. The garlic butter adds deep flavor and richness, while the creamy parmesan sauce gives the dish its irresistible smooth texture.

The pasta absorbs the sauce beautifully, ensuring every forkful is flavorful and satisfying. It’s comforting without being heavy, rich without being overwhelming, and simple without being boring.

This dish is also incredibly versatile. You can serve it as a family dinner, a romantic meal, or even prepare it ahead of time for busy days. It reheats wonderfully and tastes just as good the next day.

Ingredients

For the chicken:

  • 2 large chicken breasts, sliced into strips

  • 1 teaspoon salt

  • ½ teaspoon black pepper

  • 1 teaspoon paprika

  • 2 tablespoons butter

  • 1 tablespoon olive oil

  • 4 cloves garlic, minced

For the pasta and sauce:

  • 250 grams pasta (penne, fettuccine, or your favorite type)

  • 2 tablespoons butter

  • 3 cloves garlic, minced

  • 1 cup heavy cream

  • ½ cup grated parmesan cheese

  • ½ teaspoon salt (adjust to taste)

  • ½ teaspoon black pepper

  • ½ teaspoon Italian seasoning

  • ½ cup pasta water (reserved)

  • 2 tablespoons chopped parsley (optional, for garnish)

Instructions

Step 1: Cook the pasta

Bring a large pot of salted water to a boil. Add the pasta and cook according to package instructions until al dente. Before draining, reserve about ½ cup of pasta water. Drain the pasta and set aside.

Step 2: Prepare the chicken

Season the sliced chicken with salt, pepper, and paprika. Heat olive oil and butter in a large skillet over medium-high heat. Once the butter melts and begins to sizzle, add the chicken pieces in a single layer.

Cook for about 4–5 minutes on each side until golden brown and fully cooked. Add minced garlic and cook for another minute until fragrant. Remove the chicken from the skillet and set aside.

Step 3: Make the creamy parmesan sauce

In the same skillet, add butter and minced garlic. Cook for about 30 seconds until fragrant. Pour in the heavy cream and stir gently.

Let the cream simmer for 2–3 minutes, then add the grated parmesan cheese. Stir continuously until the cheese melts and the sauce becomes smooth.

Add salt, black pepper, and Italian seasoning. If the sauce is too thick, add a little reserved pasta water to reach your desired consistency.

Step 4: Combine everything

Add the cooked pasta into the sauce and mix well so every piece is coated. Return the cooked chicken to the skillet and stir gently to combine.

Let everything cook together for another 2–3 minutes so the flavors blend perfectly.

Step 5: Garnish and serve

Turn off the heat and sprinkle chopped parsley on top for freshness and color. Serve hot and enjoy every creamy, flavorful bite.

Tips for Perfect Results

Use fresh garlic for the best flavor. Fresh garlic provides a stronger, more natural taste compared to garlic powder.

Do not overcook the chicken. Overcooked chicken becomes dry and tough, while properly cooked chicken remains juicy and tender.

Reserve pasta water. This starchy water helps adjust the sauce consistency and makes it cling better to the pasta.

Use good-quality parmesan cheese. Freshly grated parmesan melts better and gives a richer flavor.

Cook pasta al dente. Slightly firm pasta holds the sauce better and provides the best texture.

Variations You Can Try

You can easily customize this recipe based on your preferences.

Add vegetables like mushrooms, spinach, or broccoli for extra nutrition and flavor.

Use shrimp instead of chicken for a seafood variation.

Add chili flakes if you enjoy a little heat.

Use milk instead of heavy cream for a lighter version.

Add mozzarella cheese for extra creaminess.

Why You’ll Love This Recipe

This recipe is loved by everyone because it combines familiar ingredients in a delicious way. It’s comforting, filling, and incredibly satisfying. The creamy texture, rich garlic butter flavor, and perfectly cooked chicken make every bite unforgettable.

It’s also quick to prepare, taking only about 30–40 minutes from start to finish. This makes it perfect for busy weekdays when you still want something special.

The aroma alone will fill your kitchen with warmth and anticipation.

Final Thoughts

This Creamy Garlic Butter Chicken and Parmesan Pasta truly deserves the title of “favorite recipe of the day.” It’s simple enough for beginners yet impressive enough to serve guests. The combination of juicy chicken, creamy sauce, and perfectly cooked pasta creates a meal that feels comforting and indulgent at the same time.

The danger of falling in love after 60 what no one tells you.

Falling in love after 60 can feel like a miracle. After decades of marriage, loss, divorce, raising children, building careers, and surviving life’s unexpected turns, love may return when you least expect it. It can feel intense, healing, and deeply meaningful. But while love at any age brings joy, falling in love later in life carries unique risks that few people openly discuss.

This is not about discouraging love. It’s about understanding the emotional, financial, and practical realities that come with it — especially when you’ve already lived a full life.

1. Emotional Vulnerability Is Deeper Than You Think

By 60, most people have experienced significant loss — the death of a spouse, the end of a long marriage, or estranged relationships with children. When someone new enters your life, they may fill a space that has felt empty for years.

That emotional intensity can cloud judgment. The fear of loneliness often makes people overlook red flags they would have seen clearly in their 30s or 40s. After years of independence, companionship can feel so comforting that you may rush into commitments too quickly.

Unlike young love, later-life love often carries unresolved grief. If you haven’t fully processed past loss, you might attach not just to the new person — but to the idea of rebuilding what you once had.

2. Financial Complications Can Be Serious

Love after 60 often intersects with retirement savings, pensions, property, and inheritance. Unlike younger couples who are building wealth together, older couples are combining what they already own.

This can create tension with adult children. They may worry about inheritance, property ownership, or financial exploitation. Even if their concerns are misplaced, suspicion can damage family relationships.

There’s also the real risk of financial abuse. Unfortunately, romance scams and predatory relationships disproportionately target older adults. When emotions are strong, it’s easy to make financial decisions — joint accounts, shared property, large gifts — that are difficult to reverse later.

Protecting yourself doesn’t mean distrusting love. It means setting clear boundaries, keeping some assets separate, and consulting a legal or financial advisor before making major commitments.

3. Blending Families Isn’t Simple

At 60, you don’t just fall in love with a person — you inherit their history. Adult children, ex-spouses, grandchildren, and long-standing family dynamics come with the relationship.

Adult children may struggle to accept a new partner, especially if they’re still grieving the other parent. They might see the relationship as a betrayal or fear that they’re being replaced.

Tension can escalate quickly if the new partner moves into the family home or if assets begin shifting. Even subtle comments — “It’s too soon” or “You’ve changed” — can create emotional strain.

Falling in love after 60 isn’t just about two hearts; it’s about navigating entire family systems.

4. Health Realities Change the Stakes

In your 20s or 30s, love feels open-ended. After 60, health becomes part of the equation.

One partner may be significantly healthier than the other. Chronic illness, mobility limitations, or cognitive decline can shift the relationship dynamic from romantic partnership to caregiver-patient.

This doesn’t mean love isn’t worth it. But it does mean that discussions about medical directives, long-term care, and expectations should happen earlier rather than later.

The danger lies not in illness — but in avoiding the conversation.

5. Independence Can Quietly Disappear

After decades of managing your own life, routines, and decisions, falling in love can slowly reshape your independence.

You may compromise more than you expect. You may relocate, change daily habits, or adjust friendships to accommodate the relationship. Sometimes these changes are healthy. Sometimes they chip away at the autonomy you worked hard to build.

At this stage of life, independence isn’t just freedom — it’s identity. Losing too much of it can create resentment, even in a loving relationship.

6. The Fear of Starting Over Is Stronger

When relationships fail at 25, you feel like you have time. After 60, the fear of “wasting your remaining years” can push you to stay in a relationship that isn’t right.

You might tolerate incompatibility, emotional distance, or even disrespect because the idea of being alone again feels unbearable.

But staying in the wrong relationship at 60 costs more than time. It costs peace.

7. Society Doesn’t Prepare You for Late-Life Romance

Movies celebrate young love. Advice columns focus on dating in your 20s and 30s. Very little honest conversation exists about romance after 60.

Older adults are often expected to either remain loyal to a deceased spouse forever or quietly accept loneliness. When love appears, it can feel both exhilarating and guilt-inducing.

There is also social judgment. Friends may question your choices. Family may doubt your motives. Even you might question yourself: “Am I being foolish?”

These doubts can create inner conflict that complicates what should be joyful.


So Is Falling in Love After 60 a Mistake?

Not at all.

In fact, love later in life can be more mature, intentional, and deeply fulfilling than youthful romance. You know who you are. You understand compromise. You appreciate companionship in a way younger people often cannot.

But the danger lies in pretending it’s simple.

Love after 60 requires:

  • Slower decisions

  • Honest financial conversations

  • Clear legal planning

  • Respect for family dynamics

  • Protection of independence

  • Emotional self-awareness

When approached thoughtfully, it can be one of life’s greatest gifts.

The real truth no one tells you is this: love after 60 isn’t dangerous because of age — it’s dangerous when you ignore the realities that come with it.

And perhaps the greatest lesson of all is this — at 60, you don’t need love to complete you. You choose it to enrich you. When that distinction is clear, love becomes less risky and far more powerful.

Doctors reveal that consuming bananas at 11 am causes in

Doctors Reveal What Happens When You Eat Bananas at 11 AM

Bananas are one of the most popular fruits in the world — affordable, portable, and packed with nutrients. But recently, some health experts have discussed whether eating bananas at a specific time of day, such as 11 AM, offers unique benefits. So what really happens when you consume a banana around mid-morning? Let’s explore the science-backed effects and whether timing truly matters.


1. A Natural Energy Boost Before Lunch

Around 11 AM, many people experience a dip in energy. Breakfast has already been digested, and lunch is still an hour or two away. This is where bananas shine.

Bananas are rich in natural sugars — glucose, fructose, and sucrose — which provide quick yet steady energy. Unlike processed snacks that cause a rapid spike and crash, bananas contain fiber that slows sugar absorption. This makes them a smart mid-morning snack to stabilize energy levels.

Doctors often recommend bananas to people who feel sluggish before noon because they offer carbohydrates without the heaviness of greasy snacks. The result? Better focus, improved productivity, and fewer cravings before lunch.


2. Blood Sugar Support (When Eaten Correctly)

There’s a myth that bananas spike blood sugar dangerously. In reality, bananas have a moderate glycemic index, especially when slightly green. Eating one at 11 AM can help prevent extreme hunger that might lead to overeating at lunch.

If you pair a banana with protein — such as nuts or yogurt — you further slow sugar absorption. Many nutritionists suggest this combination for better blood sugar control.

For people without diabetes, a banana at 11 AM is generally safe and beneficial. However, individuals with blood sugar conditions should monitor portion sizes and consult a healthcare provider.


3. Supports Heart Health

Bananas are well-known for their potassium content. Potassium plays a major role in maintaining healthy blood pressure and supporting heart function.

Eating a banana mid-morning helps replenish potassium levels that may drop after overnight fasting. Regular potassium intake has been linked to reduced risk of hypertension and cardiovascular issues.

Doctors frequently recommend potassium-rich foods like bananas for individuals managing blood pressure naturally.


4. Improves Digestion Before Lunch

Bananas contain dietary fiber, particularly pectin, which supports gut health. Eating one around 11 AM can:

  • Help regulate bowel movements

  • Reduce bloating

  • Support beneficial gut bacteria

Because bananas are easy to digest, they’re often recommended for people with sensitive stomachs. A mid-morning banana can keep digestion smooth and prevent overeating later.


5. May Help With Weight Management

Contrary to popular belief, bananas do not cause weight gain when eaten in moderation. In fact, having a banana at 11 AM can reduce cravings for sugary snacks or pastries.

The fiber content promotes fullness, meaning you’re less likely to overeat at lunch. Doctors emphasize that structured snacking — especially fruit-based — can support healthy weight management.


6. Boosts Mood and Mental Focus

Bananas contain vitamin B6 and small amounts of tryptophan, which the body converts into serotonin — often called the “feel-good” hormone.

Around mid-morning, stress levels can rise due to work pressure. A banana may help support mood stability and mental clarity. While it’s not a cure for anxiety or depression, its nutrient profile contributes to overall brain health.


7. Good for Active Individuals

For people who exercise late morning or early afternoon, eating a banana at 11 AM can act as a pre-workout snack. Athletes often rely on bananas for:

  • Quick fuel

  • Muscle cramp prevention

  • Electrolyte balance

The potassium and carbohydrates work together to support muscle performance.


8. Are There Any Risks?

For most healthy individuals, eating a banana at 11 AM is perfectly safe. However, a few considerations include:

  • People with kidney disease may need to limit potassium.

  • Overeating bananas (more than 2–3 daily) could contribute excess calories.

  • Extremely ripe bananas have higher sugar levels.

Timing itself does not make bananas harmful. What matters more is overall diet balance.


Does 11 AM Really Matter?

There’s nothing magical about 11 AM specifically. The benefit comes from eating a nutritious snack during a natural energy dip. If your schedule makes 10 AM or 12 PM more convenient, that works too.

Doctors emphasize consistency and mindful eating rather than strict timing rules.


The Bottom Line

Consuming a banana at 11 AM can:

  • Boost energy naturally

  • Support heart health

  • Improve digestion

  • Help control appetite

  • Enhance focus and mood

Rather than causing harm, this simple fruit can actually improve your day when used wisely.

If you’re looking for a convenient, affordable, and doctor-approved mid-morning snack, a banana is one of the easiest choices you can make. The key is balance — pair it with protein, watch portion sizes if needed, and enjoy it as part of a varied diet.

Itchy scalp Here are the main causes

An itchy scalp can be frustrating, distracting, and sometimes even embarrassing—especially when it leads to visible flakes or constant scratching. While occasional itching is normal, persistent scalp irritation often signals an underlying issue that needs attention. Understanding the main causes of an itchy scalp can help you choose the right solution and finally find relief.

Below are the most common reasons your scalp may be itching—and what you can do about each one.

1. Dandruff (Seborrheic Dermatitis)
4

One of the most common causes of an itchy scalp is dandruff, a mild form of seborrheic dermatitis. It appears as white or yellowish flakes and may be accompanied by redness or greasy patches.

Dandruff is often linked to an overgrowth of a yeast-like fungus called Malassezia, which naturally lives on the scalp. When it grows excessively, it irritates the skin and speeds up the shedding process, leading to visible flakes.

What helps:

Use anti-dandruff shampoos containing zinc pyrithione, ketoconazole, selenium sulfide, or salicylic acid.

Wash regularly to prevent oil buildup.

Avoid heavy hair products that clog pores.

If symptoms are severe or persistent, you may need a medicated prescription shampoo.

2. Dry Scalp
4

A dry scalp occurs when the skin loses moisture. Unlike dandruff, dry scalp flakes are usually smaller and less oily. It often worsens during cold weather or in dry climates.

Frequent washing with harsh shampoos, hot showers, and dehydration can strip natural oils from the scalp.

What helps:

Switch to a gentle, moisturizing shampoo.

Reduce washing frequency.

Use scalp oils like coconut oil or argan oil (apply lightly and rinse thoroughly).

Stay hydrated and consider using a humidifier in winter.

3. Product Buildup and Sensitivity
4

Hair sprays, gels, dry shampoos, and dyes can irritate the scalp—especially if you are sensitive to certain ingredients. This condition is known as contact dermatitis.

Symptoms include:

Itching

Redness

Burning sensation

Sometimes small blisters

What helps:

Stop using new or irritating products immediately.

Choose fragrance-free and hypoallergenic formulas.

Use a clarifying shampoo once a week to remove buildup.

If severe, a doctor may recommend a mild topical steroid.

4. Psoriasis of the Scalp
4

Scalp psoriasis is an autoimmune condition that causes thick, scaly patches that may extend beyond the hairline. The scales often appear silvery and may crack or bleed if scratched.

Unlike dandruff, psoriasis patches are thicker and more defined.

What helps:

Medicated shampoos with coal tar or salicylic acid.

Prescription topical treatments from a dermatologist.

Stress management, as stress can trigger flare-ups.

If you suspect psoriasis, consult a healthcare professional for proper diagnosis.

5. Fungal Infections (Ringworm)
4

Despite its name, ringworm is not caused by worms but by a fungal infection known as tinea capitis. It is more common in children but can affect adults too.

Symptoms include:

Intense itching

Red, scaly patches

Hair loss in circular areas

Swollen lymph nodes in severe cases

What helps:

Oral antifungal medication (prescribed by a doctor).

Antifungal shampoos as supportive treatment.

Avoid sharing combs, hats, or pillows.

This condition requires medical treatment and does not resolve on its own.

6. Head Lice
4

Head lice are tiny insects that live on the scalp and feed on blood. They cause intense itching, especially behind the ears and at the nape of the neck.

You may notice:

Small white nits attached to hair shafts

Crawling sensation

Irritated scalp from scratching

What helps:

Over-the-counter lice treatments.

Fine-tooth lice comb to remove nits.

Wash bedding and clothing in hot water.

Prompt treatment prevents spreading.

7. Stress and Hormonal Changes

Stress can disrupt your skin’s natural barrier and trigger itching—even without visible flakes or rash. Hormonal fluctuations during pregnancy, menopause, or illness can also affect scalp health.

Stress may worsen existing conditions like dandruff or psoriasis.

What helps:

Practice relaxation techniques.

Maintain a balanced diet.

Get adequate sleep.

Use gentle, soothing scalp treatments.

When to See a Doctor

You should seek medical advice if:

The itching is severe or painful

You notice hair loss

There are open sores or bleeding

Symptoms persist despite home treatment

A proper diagnosis ensures the correct treatment plan.

Final Thoughts

An itchy scalp is rarely “just random.” Whether caused by dandruff, dryness, infection, product irritation, or a skin condition like psoriasis, identifying the root cause is the key to relief.

Start by observing your symptoms: Are there flakes? Redness? Hair loss? Did you recently change hair products? Once you pinpoint the likely cause, you can choose the most effective treatment.

Healthy scalp care habits—gentle cleansing, avoiding harsh chemicals, managing stress, and maintaining hydration—can go a long way in preventing future flare-ups.

If in doubt, consult a healthcare professional for personalized advice. Your scalp deserves the same care and attention as the rest of your skin.

3 Baking Soda Recipes to Burn Belly Fat

If you’ve been looking for simple, natural ways to support your weight-loss journey, baking soda is one ingredient that often comes up in home remedy circles. While it’s important to understand that no single drink can magically “burn” belly fat, certain combinations may support digestion, reduce bloating, and help you feel lighter when paired with a balanced diet and regular exercise.

Below are 3 baking soda drink recipes that are commonly used to support metabolism, digestion, and reduced water retention.

1. Lemon & Baking Soda Morning Detox Drink

This is the most popular baking soda recipe for supporting belly fat loss. Lemon is rich in vitamin C and antioxidants, while baking soda may help balance stomach acidity and reduce bloating.

Ingredients:

  • 1 glass (250 ml) warm water

  • Juice of ½ fresh lemon

  • ½ teaspoon baking soda

Instructions:

  1. Warm the water slightly (do not boil).

  2. Add freshly squeezed lemon juice.

  3. Stir in baking soda slowly. It will fizz.

  4. Drink immediately on an empty stomach in the morning.

How It May Help:

  • Supports digestion

  • Reduces bloating

  • May improve hydration

  • Encourages healthier eating habits when used as a morning ritual

How Often:

Drink 3–4 times per week. Avoid daily long-term use without medical advice.


2. Apple Cider Vinegar & Baking Soda Fat-Flush Drink

Apple cider vinegar is often associated with appetite control and blood sugar balance. When combined with baking soda, it creates a neutralizing reaction that may be gentler on the stomach.

Ingredients:

  • 1 cup warm water

  • 1 tablespoon raw apple cider vinegar

  • ¼ teaspoon baking soda

Instructions:

  1. Add apple cider vinegar to warm water.

  2. Stir in baking soda slowly.

  3. Wait for the fizzing to stop.

  4. Drink before meals once daily.

How It May Help:

  • May help control appetite

  • Supports digestion

  • May reduce water retention

  • Can help stabilize blood sugar levels

Best Time to Drink:

30 minutes before lunch.


3. Baking Soda & Honey Metabolism Booster

Honey contains natural enzymes and antioxidants. When paired with baking soda and warm water, it may help soothe digestion and reduce bloating.

Ingredients:

  • 1 cup warm water

  • 1 teaspoon raw honey

  • ¼ teaspoon baking soda

Instructions:

  1. Dissolve honey in warm water.

  2. Add baking soda and stir gently.

  3. Drink in the evening before bed.

How It May Help:

  • May support metabolism

  • Helps reduce acidity

  • Can ease bloating before bedtime

  • Supports gut comfort


Important Safety Notes ⚠️

While baking soda is generally safe in small amounts, it contains sodium and should be used carefully.

Avoid if you:

  • Have high blood pressure

  • Have kidney problems

  • Are on a low-sodium diet

  • Are pregnant or breastfeeding without medical advice

Possible Side Effects:

  • Gas or bloating

  • Electrolyte imbalance (if overused)

  • Increased sodium levels

Never exceed ½ teaspoon per serving, and avoid long-term daily use.


Does Baking Soda Really Burn Belly Fat?

Let’s be clear: baking soda does not directly burn fat. There is no scientific evidence proving it melts belly fat on its own. However, it may:

  • Reduce bloating

  • Improve digestion

  • Support hydration

  • Encourage better eating habits

True belly fat reduction happens through:

  • Calorie control

  • Regular exercise

  • Strength training

  • Better sleep

  • Stress management

These drinks can be a supportive addition — not a miracle solution.


Bonus Tips to Boost Results Naturally

If you want better results, combine these drinks with:

✔ 30 minutes of daily walking
✔ Eating more fiber (vegetables, fruits, whole grains)
✔ Reducing sugar and processed foods
✔ Drinking enough water
✔ Getting 7–8 hours of sleep


Final Thoughts

Baking soda drinks can help reduce bloating and support digestion, which may make your stomach feel flatter. However, sustainable belly fat loss requires consistency in diet and lifestyle.

If you decide to try these recipes, start slowly and monitor how your body responds. When used responsibly and combined with healthy habits, these simple kitchen remedies can support your overall wellness journey.

Doctors reveal that eating boiled eggs in the morning can make your heart become

Boiled eggs have long been a breakfast favorite around the world. Simple, affordable, and packed with nutrients, they are often recommended by nutrition experts as part of a balanced morning meal. In recent years, doctors and researchers have taken a closer look at how eating boiled eggs in the morning may influence heart health. The results are encouraging: when consumed in moderation as part of a healthy diet, boiled eggs can actually support a stronger, healthier heart.

Let’s explore why this humble breakfast staple deserves a place on your plate — and how to prepare it perfectly.

Why Boiled Eggs Are Good for Your Heart

Eggs were once criticized for their cholesterol content. However, modern research shows that dietary cholesterol does not affect blood cholesterol levels in most people as much as once believed. In fact, eggs contain several nutrients that actively support heart health.

1. High-Quality Protein

Boiled eggs are rich in complete protein, meaning they provide all nine essential amino acids. Protein helps maintain muscle mass, including the heart muscle. Starting your morning with protein also stabilizes blood sugar levels, reducing cravings and supporting healthy weight management — an important factor in heart health.

2. Healthy Fats

Egg yolks contain healthy fats that help the body absorb fat-soluble vitamins. These fats can increase HDL (the “good” cholesterol), which helps remove excess LDL (the “bad” cholesterol) from the bloodstream.

3. Choline for Cardiovascular Function

Eggs are one of the best sources of choline, a nutrient essential for cell membrane integrity and nervous system function. Choline also plays a role in reducing inflammation — a key contributor to heart disease.

4. Antioxidants: Lutein and Zeaxanthin

Although better known for supporting eye health, lutein and zeaxanthin also reduce oxidative stress in the body. Lower oxidative stress means less damage to blood vessels and arteries.

5. Vitamin D and B Vitamins

Eggs contain vitamin D, which supports heart muscle function, and B vitamins such as B12 and folate that help regulate homocysteine levels. High homocysteine is associated with an increased risk of cardiovascular disease.

What Doctors Actually Say

Major health organizations, including the American Heart Association, now acknowledge that eggs can be part of a heart-healthy diet when eaten in moderation. For most healthy individuals, one egg per day fits comfortably within dietary guidelines.

Studies published in reputable journals such as the Journal of the American College of Cardiology have suggested that moderate egg consumption does not increase heart disease risk in healthy individuals and may even be associated with improved heart outcomes when part of a balanced diet.

The key is moderation and overall dietary pattern. Eggs should be paired with fiber-rich vegetables, whole grains, and healthy fats rather than processed meats like bacon or sausage.

 Perfect Heart-Friendly Boiled Eggs

Here’s a simple and nutritious way to enjoy boiled eggs in the morning.

Ingredients:

  • 2 large fresh eggs

  • Water (enough to cover eggs)

  • A pinch of sea salt

  • Optional: black pepper, olive oil drizzle, sliced avocado, whole-grain toast

Instructions:

  1. Place Eggs in a Pot
    Arrange the eggs in a single layer in a saucepan.

  2. Add Water
    Fill the pot with cold water until the eggs are covered by about 1 inch.

  3. Bring to a Boil
    Heat on medium-high until the water reaches a rolling boil.

  4. Turn Off Heat and Cover
    Once boiling, turn off the heat and cover the pot.

    • For soft-boiled: let sit 6–7 minutes

    • For medium-boiled: 8–9 minutes

    • For hard-boiled: 10–12 minutes

  5. Cool Immediately
    Transfer eggs to cold water or an ice bath for 5 minutes. This stops cooking and makes peeling easier.

  6. Peel and Serve
    Sprinkle lightly with sea salt and black pepper. Serve alongside sliced avocado or whole-grain toast for a balanced breakfast.

Tips for Maximum Heart Benefits

  • Pair boiled eggs with vegetables like spinach, tomatoes, or arugula.

  • Avoid frying eggs in butter or pairing with processed meats.

  • Stick to 1–2 eggs per day unless advised otherwise by your doctor.

  • If you have existing heart disease, diabetes, or high cholesterol, consult your healthcare provider about ideal intake.

Who Should Be Careful?

While eggs are safe for most people, individuals with certain metabolic conditions or familial hypercholesterolemia should monitor cholesterol intake carefully. If unsure, personalized medical advice is always best.

Final Thoughts

Boiled eggs in the morning are more than just convenient — they are a nutrient powerhouse. Packed with protein, healthy fats, vitamins, and antioxidants, they can support heart muscle function, reduce inflammation, and promote balanced cholesterol levels when eaten as part of a wholesome diet.