3 exercises to help you get pain on your leg causing sciatica: effective practice

Sciatica can be one of the most frustrating types of pain to deal with. That sharp, shooting discomfort that travels from your lower back down through your hip and into your leg is often caused by irritation or compression of the sciatic nerve — the longest nerve in the body. Conditions like a herniated disc, tight muscles, or prolonged sitting can all contribute to this issue.

While severe cases should always be evaluated by a healthcare professional, gentle and consistent exercise can play a powerful role in relieving pressure on the nerve and reducing discomfort. Below are three effective exercises that may help ease leg pain caused by sciatica. These movements are commonly recommended in physical therapy and supported by organizations such as the American Academy of Orthopaedic Surgeons and the National Institute of Neurological Disorders and Stroke for managing nerve-related back pain conservatively.

Before starting, remember: move slowly, never force a stretch, and stop if pain worsens.


1. Knee-to-Chest Stretch

This simple stretch helps reduce tension in the lower back and gluteal muscles, which can relieve pressure on the sciatic nerve.

How to Do It:

  1. Lie on your back on a comfortable surface.

  2. Bend your knees with feet flat on the floor.

  3. Gently pull one knee toward your chest using both hands.

  4. Hold for 20–30 seconds.

  5. Lower your leg slowly and repeat on the other side.

  6. Perform 3–5 repetitions per leg.

Why It Works:

Tight lower back muscles can aggravate sciatic pain. Bringing the knee toward the chest helps gently stretch the lumbar spine and surrounding muscles. This can improve flexibility and reduce nerve compression.

If comfortable, you may try pulling both knees to your chest at the same time for a deeper stretch.


2. Piriformis Stretch (Figure-Four Stretch)

The piriformis muscle lies deep in the buttocks and sits very close to the sciatic nerve. When this muscle becomes tight or inflamed, it can irritate the nerve — a condition sometimes called piriformis syndrome.

How to Do It:

  1. Lie on your back with knees bent and feet flat.

  2. Cross your right ankle over your left knee.

  3. Thread your hands behind your left thigh.

  4. Gently pull your left leg toward your chest.

  5. Hold for 20–30 seconds.

  6. Switch sides.

  7. Repeat 3 times per side.

Why It Works:

This stretch directly targets the piriformis muscle, helping release tension that may be pressing on the sciatic nerve. Many people who sit for long hours find this exercise particularly helpful.

Keep your head relaxed on the floor and avoid straining your neck during the movement.


3. Cat-Cow Stretch

This gentle spinal mobility exercise improves circulation to the spine and promotes flexibility in the lower back.

How to Do It:

  1. Start on your hands and knees in a tabletop position.

  2. Inhale and arch your back, lifting your head and tailbone upward (Cow position).

  3. Exhale and round your spine toward the ceiling, tucking your chin to your chest (Cat position).

  4. Move slowly and fluidly between these two positions.

  5. Repeat 10–15 times.

Why It Works:

The Cat-Cow movement increases spinal mobility and reduces stiffness. Gentle movement can help decrease inflammation and encourage proper nerve function. Controlled spinal motion also supports core engagement, which helps stabilize the lower back.

Move within a pain-free range and avoid forcing the arch.


Additional Tips for Managing Sciatica

Exercise is most effective when combined with healthy habits:

  • Avoid prolonged sitting. Stand and stretch every 30–60 minutes.

  • Use supportive seating with proper lumbar support.

  • Apply heat to relax tight muscles or cold packs to reduce inflammation.

  • Maintain a healthy weight to reduce spinal stress.

  • Practice gentle walking daily to keep circulation moving.

Consistency is key. Performing these exercises once may provide temporary relief, but practicing them daily can gradually improve flexibility and reduce flare-ups.


When to See a Doctor

While many cases of sciatica improve with conservative care, seek medical attention if you experience:

  • Severe or worsening pain

  • Weakness in the leg

  • Loss of bladder or bowel control

  • Numbness that spreads

These symptoms require immediate evaluation.


Final Thoughts

Sciatica pain in the leg can be uncomfortable and limiting, but gentle stretching and mobility exercises can make a meaningful difference. The Knee-to-Chest Stretch, Piriformis Stretch, and Cat-Cow Stretch are simple, low-impact movements that help reduce tension, improve flexibility, and support spinal health.

Start slowly, listen to your body, and stay consistent. With regular practice, many people experience reduced pain and improved mobility — allowing them to return to daily activities with greater comfort and confidence.


Two spoonfuls in the morning and goodbye to bone pain, nervous problems, anxiety, depression

Many people wake up with stiff joints, aching bones, low energy, or a sense of nervous tension that lingers throughout the day. Over time, bone discomfort, anxiety, and mood swings can become part of daily life — especially as we age. While serious or persistent symptoms should always be discussed with a healthcare professional, there is a gentle, nourishing morning blend you can add to your routine to support bone health, calm the nervous system, and encourage emotional balance.

This simple “two spoonfuls in the morning” recipe combines nutrient-dense ingredients that work together to support your body naturally. It’s easy to prepare, affordable, and can be taken daily as part of a healthy lifestyle.


Why This Morning Blend Works

Bone pain and nervous system discomfort are often linked to nutrient deficiencies — especially magnesium, calcium, vitamin D, omega-3 fatty acids, and certain antioxidants. Chronic stress can also drain the body of essential minerals, making anxiety and mood imbalances worse.

This recipe includes ingredients rich in:

  • Natural anti-inflammatory compounds

  • Healthy fats for brain and nerve function

  • Minerals that support bone density

  • Antioxidants that reduce oxidative stress

Taken consistently, this blend can help nourish your body from within.


🌿 Morning Bone & Nerve Support Blend

Ingredients:

  • 2 tablespoons raw honey

  • 1 tablespoon ground flaxseeds

  • 1 tablespoon chia seeds

  • 1 tablespoon sesame seeds (lightly toasted and ground)

  • ½ teaspoon turmeric powder

  • A pinch of black pepper

  • 1 tablespoon almond butter or crushed almonds

  • Optional: 1 teaspoon coconut oil


How to Prepare:

  1. Lightly toast the sesame seeds in a dry pan for 1–2 minutes until fragrant. Let cool and grind into a fine powder.

  2. In a small bowl, mix honey, ground flaxseeds, chia seeds, and ground sesame.

  3. Add turmeric and a pinch of black pepper (this improves turmeric absorption).

  4. Stir in almond butter and coconut oil if using.

  5. Mix until you get a smooth paste.

  6. Store in a glass jar in the refrigerator for up to 5 days.


How to Take It:

Take two spoonfuls every morning on an empty stomach. You can eat it directly or mix it into warm (not boiling) water or milk.

Consistency is key. Use daily for at least 3–4 weeks to notice improvements.


How Each Ingredient Helps

1. Sesame Seeds – Natural Calcium Power

Sesame seeds are one of the richest plant-based sources of calcium and magnesium. These minerals are essential for maintaining bone density and preventing discomfort associated with aging bones.

2. Chia & Flaxseeds – Omega-3 for Nerves and Mood

Both seeds are high in omega-3 fatty acids, which help reduce inflammation and support brain function. Omega-3s have been linked to improved mood stability and reduced symptoms of anxiety.

3. Turmeric – Natural Anti-Inflammatory

Turmeric contains curcumin, a compound known for its powerful anti-inflammatory and antioxidant properties. It may help relieve joint stiffness and support overall brain health.

4. Honey – Energy & Immune Support

Raw honey provides natural energy and contains antioxidants that support immunity and overall vitality.

5. Almonds – Magnesium for Calmness

Almonds are rich in magnesium, a mineral crucial for muscle relaxation and nervous system balance. Magnesium deficiency has been linked to increased anxiety and sleep disturbances.


Extra Tips for Better Results

While this blend is powerful, lifestyle matters too. For stronger bones and a calmer mind:

  • Spend 15–20 minutes daily in sunlight for natural vitamin D.

  • Stay hydrated throughout the day.

  • Include leafy greens, eggs, and fatty fish in your diet.

  • Practice deep breathing or light stretching in the morning.

  • Limit excess sugar and processed foods.

Gentle exercises like walking or yoga can also support joint flexibility and emotional balance.


Important Note

This natural blend supports general wellness but is not a cure for serious medical conditions such as osteoporosis, major depressive disorder, or nerve disorders. If you experience severe bone pain, chronic anxiety, numbness, or persistent depression, consult a qualified healthcare professional.

If you are taking medication — especially blood thinners, antidepressants, or anti-inflammatory drugs — speak with your doctor before adding turmeric or large amounts of seeds to your diet.


What to Expect

When taken regularly, many people report:

  • Reduced morning stiffness

  • Improved digestion

  • Better mood stability

  • Increased energy

  • Less nervous tension

Results vary from person to person, but natural remedies often work best when combined with healthy habits and patience.

Final Thoughts

Sometimes, small daily rituals can make a big difference. Two spoonfuls of this nutrient-rich blend each morning can gently support your bones, calm your nerves, and help you start your day feeling stronger and more balanced.

What Happens When You Take Magnesium Before Bed — A Natural Way to Support Better Rest

In today’s fast-paced world, falling asleep can feel like a nightly struggle. Racing thoughts, muscle tension, and restless legs often make it hard to truly relax. While many people turn to sleep aids, there’s a natural mineral that has quietly earned a reputation for promoting better rest: magnesium.

Magnesium is an essential mineral involved in more than 300 biochemical reactions in the body. It supports nerve function, muscle relaxation, heart rhythm, and even blood sugar control. But what happens when you take magnesium before bed? Let’s explore how this simple nighttime habit may support deeper, more restorative sleep.

How Magnesium Supports Relaxation

One of magnesium’s most important roles is calming the nervous system. It helps regulate neurotransmitters that send signals throughout the brain and body. In particular, magnesium supports gamma-aminobutyric acid (GABA), a neurotransmitter that promotes relaxation and reduces nerve activity.

When GABA levels are balanced, your brain shifts into a calmer state. This can make it easier to wind down at night, reduce racing thoughts, and prepare your body for sleep. That’s why magnesium is often associated with a more peaceful transition from wakefulness to rest.

May Help You Fall Asleep Faster

Some people struggle with sleep latency — the time it takes to fall asleep after getting into bed. Magnesium may help shorten this period by encouraging both mental and physical relaxation.

By relaxing muscles and calming nerve signals, magnesium can reduce the “wired but tired” feeling that keeps many people awake. When taken 30–60 minutes before bedtime, it may gently signal to your body that it’s time to rest.

Supports Deeper, More Restorative Sleep

Quality sleep isn’t just about falling asleep quickly — it’s about staying asleep and reaching deeper stages of rest. Magnesium may help improve overall sleep quality by supporting healthy circadian rhythms and balanced stress hormones.

It also plays a role in regulating melatonin, the hormone that controls your sleep-wake cycle. Balanced melatonin levels help your body maintain a natural rhythm, making it easier to stay asleep throughout the night.

May Reduce Nighttime Muscle Cramps

If you’ve ever been awakened by a leg cramp or muscle twitch, you know how disruptive it can be. Magnesium helps regulate muscle contractions and relaxation. A deficiency can contribute to muscle tightness, spasms, or restless legs.

Taking magnesium before bed may help reduce nighttime cramps and support smoother muscle function, leading to fewer interruptions during sleep.

Helps Ease Stress and Tension

Chronic stress is one of the biggest enemies of restful sleep. Magnesium supports the body’s stress response system and may help regulate cortisol, often referred to as the “stress hormone.”

When cortisol levels remain elevated at night, it can interfere with your ability to fall and stay asleep. By supporting a balanced stress response, magnesium may help create a calmer internal environment that’s more conducive to rest.

Supports Heart and Blood Pressure Health

Magnesium contributes to healthy heart rhythm and blood vessel relaxation. For some individuals, this may help promote a steady, relaxed state at night. A calm cardiovascular system supports overall nighttime comfort and may reduce sensations like heart pounding that sometimes disrupt sleep.

Different Forms of Magnesium for Sleep

Not all magnesium supplements are the same. Some forms are better suited for relaxation and sleep support:

  • Magnesium glycinate: Often recommended for sleep because it’s gentle on the stomach and contains glycine, an amino acid that also promotes calmness.

  • Magnesium citrate: Well absorbed but may have a mild laxative effect in some people.

  • Magnesium oxide: Contains more elemental magnesium but is less easily absorbed.

  • Magnesium threonate: Known for its ability to cross the blood-brain barrier, sometimes chosen for cognitive support.

Choosing the right form depends on your individual needs and tolerance.

How to Take Magnesium Before Bed

Most people take magnesium 30 to 60 minutes before bedtime. It can be taken with a small snack if you have a sensitive stomach. Dosage varies depending on age, sex, and individual health factors, but many adults use between 200–400 mg daily.

It’s important not to exceed recommended amounts unless guided by a healthcare professional. Too much magnesium can cause digestive discomfort, including diarrhea.

Who May Benefit Most?

Magnesium before bed may be especially helpful for:

  • People with difficulty falling asleep

  • Individuals experiencing high stress

  • Those with frequent muscle cramps

  • Adults over 50, who may be more prone to magnesium deficiency

  • Anyone with a diet low in leafy greens, nuts, seeds, and whole grains

However, individuals with kidney disease or certain medical conditions should consult a healthcare provider before starting supplementation.

A Simple Nighttime Magnesium Drink Recipe

If you prefer a more natural approach, you can create a calming magnesium bedtime drink.

Ingredients:

  • 1 cup warm water or herbal tea (like chamomile)

  • 200–300 mg magnesium glycinate powder (follow product instructions)

  • 1 teaspoon raw honey (optional)

  • A squeeze of fresh lemon (optional)

Instructions:
Warm your water or tea until comfortably hot. Stir in the magnesium powder until fully dissolved. Add honey and lemon if desired. Sip slowly about 30 minutes before bedtime while practicing deep breathing or quiet reflection.

Final Thoughts

Taking magnesium before bed is a simple and natural strategy that may support relaxation, ease stress, reduce muscle tension, and improve overall sleep quality. While it’s not a magic cure, consistent use combined with healthy sleep habits — such as limiting screen time and keeping a regular bedtime — can make a noticeable difference.

A Mixture of Ginger, Garlic, Onion and Lemon: Purify Your Body and Lungs

In today’s world, our bodies are constantly exposed to pollution, processed foods, stress, and environmental toxins. While the body naturally detoxifies itself through organs like the liver, kidneys, and lungs, certain natural ingredients can help support these systems. A powerful traditional combination of ginger, garlic, onion, and lemon has long been used in natural wellness practices to help cleanse the body, support respiratory health, and strengthen immunity.

This simple yet potent mixture combines anti-inflammatory, antibacterial, and antioxidant properties in one easy homemade remedy. Let’s explore why this blend works and how to prepare it properly at home.


Why These Ingredients Work Together

1. Ginger

Ginger is well known for its anti-inflammatory and antioxidant properties. It helps improve circulation, supports digestion, and may assist in clearing mucus from the respiratory tract. Ginger’s warming nature can soothe the throat and promote easier breathing, especially during seasonal changes.

2. Garlic

Garlic contains allicin, a powerful compound with antimicrobial and immune-boosting properties. Garlic has been traditionally used to support lung health and help the body fight infections. It may also support cardiovascular health by promoting healthy blood flow.

3. Onion

Onion is rich in quercetin, a strong antioxidant that may help reduce inflammation and support respiratory function. Onions have natural expectorant properties, meaning they may help loosen mucus and clear the airways.

4. Lemon

Lemon is packed with vitamin C and antioxidants. It supports immune function, helps alkalize the body, and assists in flushing toxins. Lemon also enhances the absorption of beneficial compounds from the other ingredients.

Together, these four ingredients create a natural tonic that supports detoxification, strengthens immunity, and promotes clearer breathing.


UNIE Ginger-Garlic-Lemon Lung Cleanse Recipe

Ingredients:

  • 1 medium fresh ginger root (about 2 inches)

  • 4 cloves fresh garlic

  • 1 medium onion

  • Juice of 1 large lemon

  • 2 cups water

  • 1 tablespoon raw honey (optional, for taste)


Instructions:

Step 1: Prepare the Ingredients

Peel and slice the ginger into thin pieces. Crush the garlic cloves slightly to activate their beneficial compounds. Chop the onion into small pieces.

Step 2: Boil the Mixture

In a small pot, add 2 cups of water. Add the ginger, garlic, and onion. Bring to a gentle boil and let simmer for 10–15 minutes.

Step 3: Cool and Strain

Remove from heat and allow the mixture to cool slightly. Strain the liquid into a cup or jar.

Step 4: Add Lemon

Once the mixture is warm (not hot), add freshly squeezed lemon juice. Avoid adding lemon while boiling, as high heat can reduce vitamin C content.

Step 5: Sweeten (Optional)

Add a tablespoon of raw honey if desired. Stir well.


How to Use

Drink one small cup (about ½ cup) once daily, preferably in the morning on an empty stomach or before bedtime. Use for 7–10 days during seasonal transitions or when feeling congested.


Potential Benefits

Supports Lung Health

This mixture may help loosen mucus, reduce throat irritation, and promote easier breathing.

Boosts Immunity

The combination of antioxidants and antimicrobial compounds helps strengthen the immune system.

Aids Digestion

Ginger and lemon support digestion, which plays a key role in overall detoxification.

Promotes Circulation

Garlic and ginger may improve blood flow, supporting oxygen delivery throughout the body.

Natural Anti-Inflammatory

All four ingredients contain compounds that may help reduce inflammation in the body.


Important Notes

While this remedy uses natural ingredients, it is not a substitute for medical treatment. If you have asthma, chronic lung conditions, ulcers, or are taking blood-thinning medications, consult your healthcare provider before using this mixture. Garlic and ginger can thin the blood, so caution is important.

Pregnant women and individuals with sensitive stomachs should start with small amounts to see how their body responds.


Extra Tip: Steam Version for Lung Support

For additional respiratory relief, you can also use these ingredients for steam inhalation:

  • Boil ginger and onion in water.

  • Remove from heat.

  • Lean over the pot with a towel over your head and inhale the steam carefully for 5–7 minutes.

This may help open nasal passages and soothe congestion.


Final Thoughts

The ginger, garlic, onion, and lemon mixture is a time-tested natural remedy that supports your body’s natural cleansing processes. Simple, affordable, and made from everyday kitchen ingredients, this tonic can be a helpful addition to your wellness routine.

Remember, true “detox” comes from consistent healthy habits: drinking enough water, eating whole foods, getting fresh air, exercising, and sleeping well. This natural blend simply works as supportive nourishment for your body and lungs.

10 Hiatal Hernia Signs and Symptoms You Should Know

A hiatal hernia is a condition many people have without even realizing it. It happens when part of the stomach pushes up through the diaphragm and into the chest cavity. The diaphragm is the muscle that helps you breathe and separates your chest from your abdomen. Normally, the esophagus passes through a small opening in the diaphragm called the hiatus before connecting to the stomach. When that opening weakens or widens, a hiatal hernia can develop.

Hiatal hernias are especially common in adults over 50 and are often associated with acid reflux and heartburn. While some people experience no symptoms at all, others may struggle with discomfort that affects their daily lives. Here are 10 important signs and symptoms you should know.

  1. Frequent Heartburn
    One of the most common signs of a hiatal hernia is persistent heartburn. This burning sensation in the chest often occurs after eating or when lying down. Because the stomach is partially displaced, acid can more easily flow back into the esophagus, causing irritation and discomfort.

  2. Acid Reflux
    Acid reflux happens when stomach acid moves upward into the esophagus. A hiatal hernia can weaken the lower esophageal sphincter, the valve that normally keeps acid in the stomach. As a result, you may experience a sour taste in your mouth, burning in your throat, or regurgitation of food and liquid.

  3. Chest Pain
    Chest pain related to a hiatal hernia can sometimes feel alarming. It may mimic the symptoms of a heart problem. The pain is usually caused by acid irritation or muscle strain in the esophagus. However, because chest pain can signal serious conditions, it is important to seek medical attention to rule out heart issues.

  4. Difficulty Swallowing
    Some people with a hiatal hernia notice that food feels stuck in their throat or chest. This condition, known as dysphagia, can happen if inflammation narrows the esophagus. Over time, chronic acid exposure can lead to scarring and further swallowing difficulties.

  5. Chronic Cough
    A persistent cough that does not seem linked to a cold or respiratory infection could be related to acid reflux from a hiatal hernia. Acid irritating the throat and airways can trigger coughing, especially at night.

  6. Hoarseness or Sore Throat
    When stomach acid reaches the throat, it can cause irritation and inflammation. This may lead to a raspy voice, frequent throat clearing, or a sore throat that lingers without signs of infection.

  7. Feeling Full Quickly
    A hiatal hernia can sometimes cause early satiety, meaning you feel full after eating only a small amount of food. The altered position of the stomach may interfere with normal digestion and create a sensation of pressure.

  8. Bloating and Burping
    Excessive burping and bloating are also common symptoms. When the stomach shifts upward, trapped air and digestive gases can build up more easily, leading to discomfort and frequent belching.

  9. Nausea
    Some individuals experience nausea, especially after meals. The pressure caused by the hernia and reflux may upset the stomach and make you feel queasy.

  10. Shortness of Breath
    In larger hiatal hernias, the stomach pressing into the chest cavity can interfere with lung expansion. This may lead to shortness of breath, particularly during physical activity or when bending over.

When to See a Doctor

While mild symptoms may be managed with lifestyle changes, it is important to seek medical advice if you experience severe chest pain, difficulty swallowing, unexplained weight loss, vomiting blood, or black stools. These could signal complications such as bleeding or significant esophageal damage.

Risk Factors

Several factors increase the likelihood of developing a hiatal hernia. Aging naturally weakens muscle tissue. Obesity puts extra pressure on the abdomen. Heavy lifting, chronic coughing, pregnancy, and frequent straining during bowel movements can also contribute.

Management and Treatment

Treatment often focuses on reducing acid reflux. Doctors may recommend smaller meals, avoiding trigger foods, losing excess weight, and not lying down immediately after eating. Elevating the head of the bed can also help reduce nighttime symptoms.

Medications such as antacids, H2 blockers, or proton pump inhibitors may be prescribed to reduce acid production and protect the esophagus. In severe cases or when complications occur, surgical repair may be necessary to reposition the stomach and tighten the diaphragm opening.

Final Thoughts

A hiatal hernia is a common but often overlooked condition. Recognizing the signs early can help you take steps to manage symptoms and prevent complications. If you frequently experience heartburn, chest discomfort, or swallowing issues, it is worth discussing these symptoms with a healthcare professional. With proper care and lifestyle adjustments, most people can successfully control their symptoms and maintain a good quality of life.

The Vinegar Trick to Make Crispy Fries – The Secret Most People Miss

If you’ve ever tried making homemade fries and ended up with limp, soggy potatoes instead of golden, crunchy perfection, you’re not alone. The secret to restaurant-style crispiness isn’t expensive equipment or complicated techniques — it’s a simple splash of vinegar.

Yes, vinegar.

Professional kitchens have quietly used this method for years. Adding a small amount of vinegar to the soaking or boiling water changes the structure of the potato’s surface, helping it stay intact while creating a crisp, crackly exterior once fried or baked. The result? Fries that are fluffy inside and perfectly crisp outside — every single time.

Let’s break down why it works and how you can do it at home.

Why Vinegar Makes Fries Crispier

Potatoes are full of starch. When exposed to heat, the outer layer softens quickly. Without structure, the surface can break down, leading to soggy fries.

Vinegar, a mild acid, strengthens the pectin in the potato’s outer layer. This keeps the surface firm during boiling or soaking. When fried, that firm exterior turns beautifully golden and crisp instead of falling apart.

The key is balance — too much vinegar affects flavor. The right amount enhances texture without leaving a sour taste.

Choosing the Right Potatoes

For the crispiest fries, use starchy potatoes like:

  • Russet potatoes

  • Idaho potatoes

These varieties have high starch and low moisture, which creates that fluffy interior everyone loves.

Avoid waxy potatoes (like red or new potatoes) because they hold moisture and won’t crisp as well.

The Ultimate Vinegar Crispy Fries Recipe

Ingredients

  • 4 large Russet potatoes

  • 2 tablespoons white vinegar

  • 8 cups water

  • 1 tablespoon salt (plus more for seasoning)

  • Oil for frying (vegetable or peanut oil works best)

Step 1: Cut the Potatoes

Peel if desired, though leaving the skin on adds texture and flavor. Slice into evenly sized sticks — about ¼ inch thick for classic fries.

Uniform size is important for even cooking.

Step 2: The Vinegar Soak

In a large bowl, combine:

  • 8 cups cold water

  • 2 tablespoons white vinegar

  • 1 tablespoon salt

Add the cut potatoes and soak for at least 30 minutes (up to 2 hours for best results).

This step removes excess starch while the vinegar strengthens the surface.

Step 3: Optional Parboil for Extra Crisp

For ultra-crispy fries, take it one step further.

  1. Drain the soaking water.

  2. Bring fresh water to a boil.

  3. Add 1 tablespoon vinegar.

  4. Gently boil potatoes for 5 minutes.

They should be slightly tender but not falling apart.

Drain carefully and let them steam dry completely. This drying step is critical — moisture causes oil splatter and sogginess.

Step 4: First Fry (Blanching)

Heat oil to 325°F (160°C).

Fry the potatoes in batches for 4–5 minutes. They should look pale and soft, not browned.

Remove and place on a rack or paper towels. Let them rest for 10–15 minutes.

This first fry cooks the inside.

Step 5: Second Fry (Crisping)

Increase oil temperature to 375°F (190°C).

Return fries to the oil and fry until golden brown — about 2–4 minutes.

You’ll immediately notice the difference: the outside turns crisp and blistered while the inside stays fluffy.

Remove and salt immediately while hot.

Oven Method (Healthier Option)

If you prefer baking:

  1. After soaking and drying, toss fries with 2–3 tablespoons oil.

  2. Spread on a parchment-lined baking sheet.

  3. Bake at 425°F (220°C) for 30–40 minutes, flipping halfway.

They won’t be quite as crunchy as deep-fried, but the vinegar trick still gives noticeable crispiness.

Air Fryer Method

Air fry at 380°F (193°C) for 15–20 minutes, shaking halfway.

For extra crunch, spray lightly with oil before cooking.

Flavor Variations

Once you master the crispy base, try:

  • Garlic parmesan fries

  • Paprika and chili powder

  • Truffle oil and sea salt

  • Cajun seasoning

  • Fresh rosemary and flaky salt

Common Mistakes to Avoid

Skipping the drying step – Wet potatoes = soggy fries.

Overcrowding the fryer – This lowers oil temperature and steams instead of fries.

Using low oil temperature – Always use a thermometer.

Too much vinegar – Stick to 1–2 tablespoons per large batch.

Why This Trick Works Better Than Cornstarch

Some recipes suggest coating fries in cornstarch. While that can help, it often creates a crust that feels separate from the potato.

The vinegar method works from within — strengthening the natural structure of the potato instead of adding an external coating.

The result is more natural, restaurant-style crispiness.

Final Thoughts

The vinegar trick is simple, inexpensive, and incredibly effective. Once you try it, you’ll never go back to plain soaking water again.

Crispy fries aren’t about luck — they’re about science. A small splash of vinegar transforms an everyday potato into golden perfection.

Nighttime Detox Juice – The Secret No One Will Ever Tell You

There’s something comforting about ending the day with a calming ritual. For some, it’s a warm shower. For others, it’s a quiet cup of tea. But if you’re looking for something refreshing, nourishing, and simple, this Nighttime Detox Juice might become your new favorite habit.

Now let’s clear something up first. Your body already has a powerful detox system built in — your liver, kidneys, and digestive system do the hard work every single day. This juice isn’t a “magic cleanse.” The real secret no one talks about? Consistency and simple ingredients that support your body naturally. That’s it. No extreme cleanses. No starvation. Just gentle support.

This recipe combines ingredients known for hydration, digestion support, and relaxation — making it perfect before bed.

Why Drink Juice at Night?

At night, your body shifts into repair mode. While you sleep, your system works on cellular repair, digestion, and hormone balance. Drinking something light, hydrating, and nutrient-rich instead of a heavy late-night snack can help you feel less bloated and more refreshed in the morning.

This juice is:

  • Light on the stomach

  • Naturally hydrating

  • Gently supportive for digestion

  • Slightly sweet with a refreshing kick

Nighttime Detox Juice Recipe

Ingredients:

  • 1 medium cucumber

  • 1 green apple

  • Juice of ½ lemon

  • 1-inch piece fresh ginger

  • A handful of fresh mint leaves

  • 1 cup cold water or coconut water

  • Optional: ½ teaspoon raw honey

Step-by-Step Instructions

  1. Prepare the produce.
    Wash everything thoroughly. Slice the cucumber and green apple. No need to peel unless you prefer to.

  2. Add to blender.
    Place cucumber, apple, lemon juice, ginger, mint, and water into a blender.

  3. Blend until smooth.
    Blend for 30–45 seconds until completely smooth.

  4. Strain (optional).
    If you prefer a smoother juice, strain through a fine mesh sieve or cheesecloth.

  5. Sweeten lightly (optional).
    Add honey if you like a slightly sweeter taste.

  6. Serve immediately.
    Drink about 30–60 minutes before bedtime.

What Makes This Juice Special?

Cucumber – The Hydration Hero

Cucumber is mostly water, helping your body stay hydrated overnight. Proper hydration supports kidney function and helps reduce morning puffiness.

Green Apple – Gentle Fiber Support

Green apples add a mild sweetness and contain fiber that supports digestion without feeling heavy before sleep.

Lemon – A Bright Boost

Lemon juice adds vitamin C and a refreshing flavor. Some people enjoy lemon at night because it feels cleansing and light.

Ginger – The Digestive Soother

Ginger is widely used to ease bloating and support digestion. Just a small amount adds warmth without overpowering the drink.

Mint – The Calming Touch

Mint gives this juice its soothing, spa-like flavor. It may also help relax the digestive tract before bedtime.

the Real “Secret”

Here’s what most people won’t tell you: detox isn’t about dramatic overnight results. It’s about daily habits.

  • Drinking enough water

  • Eating whole foods

  • Sleeping 7–8 hours

  • Managing stress

  • Moving your body regularly

This juice simply fits into that bigger picture. It’s not a replacement for healthy living — it supports it.

Tips for Best Results

✔ Drink consistently 3–4 nights a week
✔ Avoid heavy, greasy meals late at night
✔ Pair with good sleep habits
✔ Don’t overdo ginger if you’re sensitive
✔ Use fresh ingredients for maximum flavor

Variations You Can Try

For Better Sleep:
Add a small pinch of turmeric.

For Extra Hydration:
Use coconut water instead of plain water.

For a Cooler Version:
Add a few ice cubes and blend.

For a Smoother Taste:
Peel the cucumber and apple before blending.

Who Should Be Cautious?

  • If you have acid reflux, lemon and ginger may need to be reduced.

  • If you’re on medication or have kidney conditions, consult a healthcare professional before making dietary changes.

  • Avoid large portions right before lying down to prevent discomfort.

How You Might Feel

Many people report:

  • Less bloating in the morning

  • Feeling lighter at night

  • Reduced late-night cravings

  • Improved hydration

  • A refreshing bedtime ritual

Remember, results vary from person to person.

Final Thoughts

This Nighttime Detox Juice isn’t a miracle cure — and it doesn’t need to be. The power lies in simple ingredients working together to gently support your body while you rest.

If you already enjoy natural health drinks like clove tea or banana blends, this juice can easily become part of your evening routine. It’s refreshing, easy to make, and requires no complicated steps.

My neighbor taught me this trick to clean green algae off siding with 0 effort.

My neighbor leaned over the fence one afternoon while I was scrubbing my siding with a stiff brush and said, “You’re working too hard.” I had been battling stubborn green algae stains that made my once-bright siding look dull and neglected. Living in a humid area means moisture clings to surfaces, and before long, that moisture invites algae to grow. I assumed the only solution was elbow grease and hours of scrubbing. But my neighbor shared a simple, low-effort method that completely changed the way I clean my home’s exterior.

If you’ve noticed green streaks creeping up your siding, especially on the north-facing side of your house where sunlight is limited, you’re likely dealing with algae. While it looks unpleasant, it’s usually harmless to the structure itself. Still, leaving it untreated can make your home look older and poorly maintained. The good news? You don’t need expensive equipment or professional services. This easy “recipe” uses common household ingredients and requires almost no scrubbing at all.

Here’s the simple mixture my neighbor swears by:

You will need:

  • 1 gallon of warm water

  • 1 cup of white vinegar

  • 2 tablespoons of liquid dish soap

  • A garden sprayer or spray bottle

That’s it. No harsh chemicals, no power washer, and no climbing ladders with buckets.

To prepare the solution, fill a garden sprayer with one gallon of warm water. Add one cup of white vinegar. Vinegar is mildly acidic, which helps break down algae and inhibit its regrowth. Then mix in two tablespoons of liquid dish soap. The dish soap helps the solution cling to the siding instead of running straight down, giving it more time to work on the algae.

Once mixed, gently shake the sprayer to combine everything.

Before spraying your entire house, choose a small hidden area and test the solution. This ensures your siding material reacts well. Most vinyl and painted siding handle this mixture just fine, but it’s always smart to check first.

Now comes the effortless part. On a dry, overcast day (avoid direct sunlight to prevent streaking), spray the solution generously onto the algae-covered areas. Start from the bottom and work your way up to prevent streaking. Make sure the green areas are thoroughly saturated.

Then walk away.

Let the mixture sit for 20–30 minutes. During this time, the vinegar and soap combination loosens and lifts the algae from the surface. You’ll often see the green color begin to fade on its own.

After the waiting period, use a garden hose with a gentle spray setting to rinse the siding from top to bottom. In most cases, the algae will wash right off with minimal effort. If a small patch remains stubborn, a light pass with a soft-bristle brush will finish the job—but you likely won’t need to scrub much at all.

One of the reasons this trick works so well is that algae thrive in damp, shaded conditions. Vinegar alters the surface environment temporarily, making it less friendly for regrowth. While this solution won’t permanently prevent algae from returning, it dramatically reduces buildup and keeps siding looking fresh for much longer.

For tougher infestations, my neighbor suggested slightly increasing the vinegar to 1½ cups per gallon. However, avoid using straight vinegar at full strength on painted surfaces, as prolonged exposure could dull the finish.

If you prefer a stronger alternative, some homeowners use diluted household bleach instead of vinegar. A common ratio is 1 part bleach to 4 parts water with a small amount of dish soap. However, bleach can harm nearby plants and discolor certain materials if not used carefully. If you choose that method, protect landscaping and rinse thoroughly.

To keep algae from coming back quickly, consider trimming back bushes or tree branches that block sunlight. Improving airflow around the house helps surfaces dry faster after rain. Cleaning your siding once or twice a year—especially in spring and early fall—can prevent heavy buildup.

What I love most about this method is how accessible it is. No renting power washers. No expensive specialty cleaners. No harsh fumes. Just a simple, budget-friendly mixture that gets the job done with very little physical effort.

Since trying this trick, I’ve made it part of my seasonal cleaning routine. The siding looks brighter, the house feels refreshed, and I no longer dread exterior cleaning days. Sometimes the best solutions really do come from friendly advice over the fence.

My sister begs for these gooey breakfast bombs every weekend. Only 3 ingredients and the smell wakes the whole house up

My sister literally starts asking for these gooey breakfast bombs on Friday night. By Saturday morning, she’s already hovering in the kitchen waiting for that buttery, sweet smell to fill the house. The best part? They only use 3 simple ingredients, take almost no effort, and taste like something straight from a bakery.

If you love quick comfort recipes like classic Cinnamon Roll treats, you’re going to adore this one. These breakfast bombs are soft on the outside, warm and gooey on the inside, and coated in buttery cinnamon sugar goodness. The smell alone is enough to wake up the entire house.

Let’s get into it.

Gooey 3-Ingredient Breakfast Bombs

Ingredients (Makes 8–10 bombs)

  • 1 can refrigerated biscuit dough (8-count, like Pillsbury Grands!)

  • ½ cup chocolate hazelnut spread (such as Nutella)

  • 4 tablespoons melted butter

That’s it. Three ingredients. Simple, affordable, and probably already in your kitchen.

Optional (But Highly Recommended)

If you want to take them over the top:

  • ¼ cup sugar

  • 1 teaspoon cinnamon

This creates a sweet, crispy coating that makes them irresistible.

Instructions

Step 1: Preheat the Oven

Preheat your oven to 375°F (190°C). Line a baking sheet with parchment paper or lightly grease it.

The oven needs to be hot so the outside gets golden while the inside stays gooey.

Step 2: Flatten the Biscuits

Open the biscuit can and separate each piece. Gently flatten each biscuit into a small circle using your hands or a rolling pin.

Don’t press too thin—you want enough dough to hold the filling.

Step 3: Add the Gooey Center

Place about 1 tablespoon of chocolate hazelnut spread in the center of each flattened biscuit.

Be careful not to overfill. Too much filling can leak out while baking (though even the messy ones taste amazing).

Step 4: Seal and Shape

Fold the edges of the dough up and around the filling. Pinch the seams tightly so the filling stays inside.

Roll gently in your hands to form a smooth ball.

Place seam-side down on the baking sheet.

Step 5: Butter Bath

Brush each dough ball generously with melted butter.

If you’re using cinnamon sugar, mix the sugar and cinnamon together in a small bowl, then roll each buttered bomb in the mixture.

This is where the magic happens—the butter caramelizes in the oven and creates that incredible smell that drifts through the house.

Step 6: Bake

Bake for 12–15 minutes, or until golden brown.

Keep an eye on them during the last few minutes. You want them deeply golden but not over-browned.

Step 7: Serve Warm

Let them cool for 3–5 minutes (the filling will be very hot!), then serve warm.

When you pull one apart, the center should be soft, melty, and perfectly gooey.

Why These Breakfast Bombs Are So Popular

  1. Only 3 ingredients – No complicated shopping list.

  2. Ready in under 20 minutes – Perfect for busy mornings.

  3. Kid-approved and adult-loved – Everyone grabs seconds.

  4. Smell factor: 10/10 – The buttery cinnamon aroma fills every room.

In my house, nobody even needs an alarm clock when these are baking.

Delicious Variations

Once you try the original version, you’ll want to experiment.

1. Cream Cheese Surprise

Replace the hazelnut spread with sweetened cream cheese for a cheesecake-style center.

2. Peanut Butter Bombs

Use peanut butter instead of chocolate spread for a salty-sweet twist.

3. Jam-Filled

Strawberry or raspberry jam works beautifully and gives a fruity breakfast vibe.

4. Caramel Apple

Mix tiny diced apples with caramel sauce before stuffing the dough.

Air Fryer Option

Yes, you can make these in the air fryer!

  • Preheat air fryer to 350°F (175°C)

  • Cook for 7–9 minutes

  • Check at 6 minutes to avoid over-browning

They come out slightly crispier on the outside but still perfectly gooey inside.

Storage Tips

If you somehow have leftovers (rare in my experience):

  • Store in an airtight container at room temperature for up to 2 days.

  • Reheat in the microwave for 10–15 seconds to bring back the gooey center.

They also freeze well. Just reheat in the oven for 5–7 minutes at 350°F.

The Secret to Extra Gooey Centers

If you want an even meltier middle:

  • Slightly warm the chocolate spread before adding it.

  • Chill the filled dough balls for 5 minutes before baking.

This helps the filling stay concentrated in the center.

Perfect for Any Occasion

These aren’t just for weekends.

They’re perfect for:

  • Holiday mornings

  • Sleepovers

  • Brunch gatherings

  • Quick dessert emergencies

  • After-school snacks

And since you love easy comfort-style recipes, this one fits right in with all those cozy favorites that make the kitchen smell like home.

Final Thoughts

There’s something special about simple recipes that feel indulgent. These gooey breakfast bombs prove you don’t need fancy ingredients or complicated steps to make something unforgettable.

Three ingredients.
Fifteen minutes.
One house filled with the smell of buttery sweetness.

And if your family is anything like mine, you’ll be hearing, “Can you make those again next weekend?” before the tray is even empty.

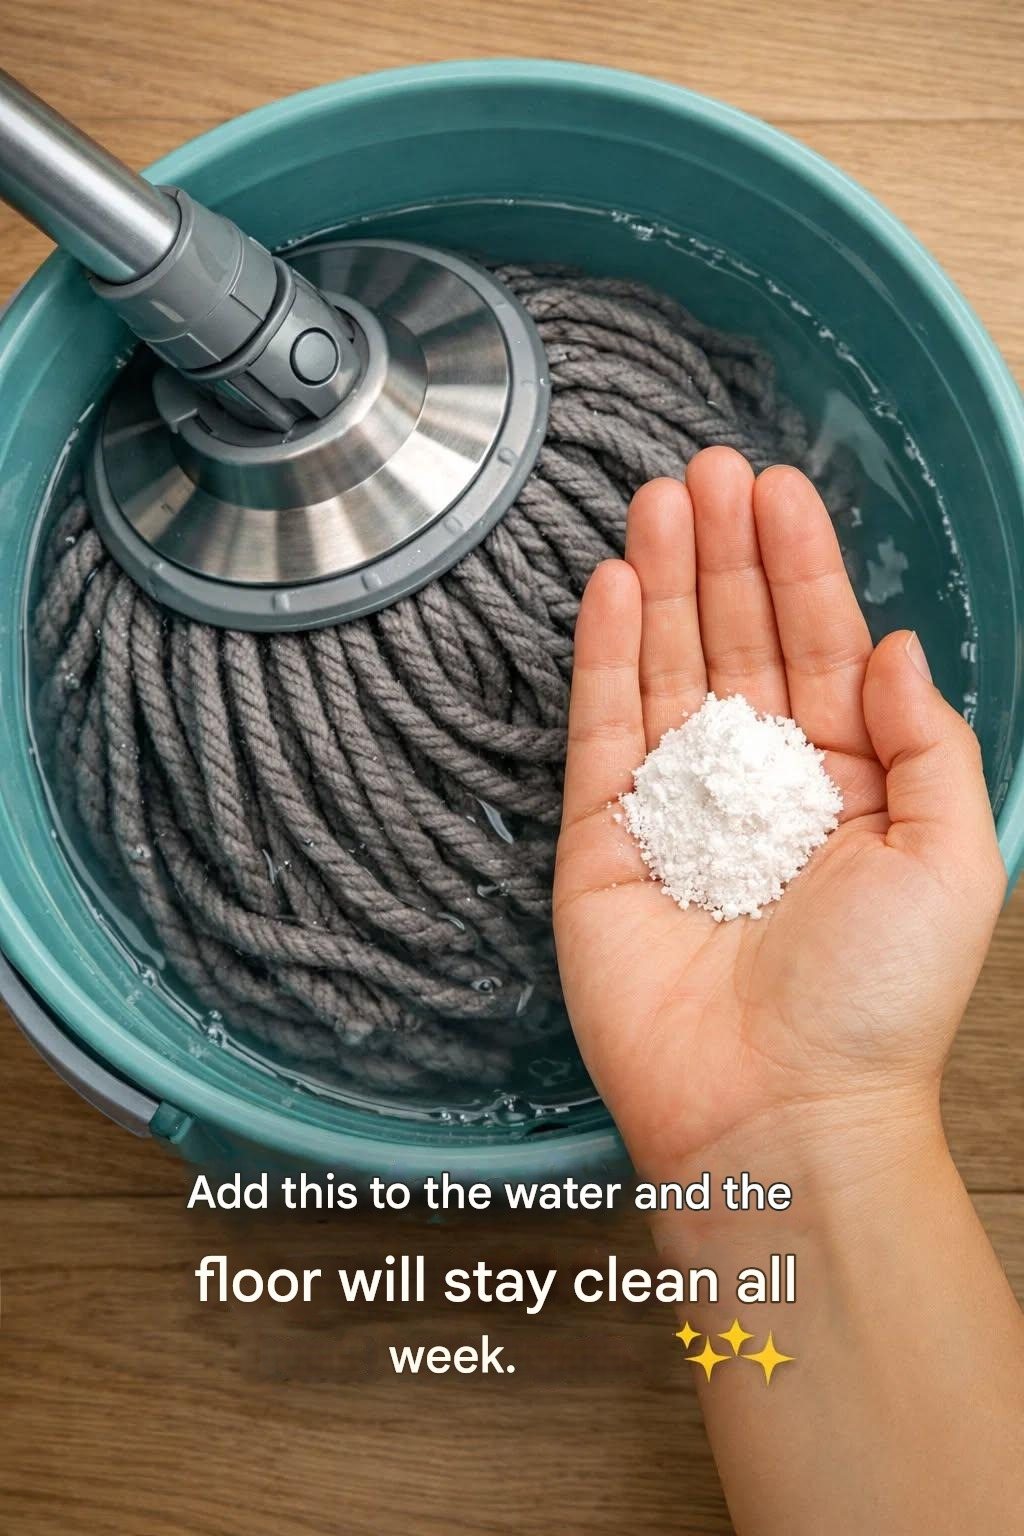
Put This One Ingredient in Your Bucket and Your Floor Will Stay Clean All Week

Keeping floors clean can feel like a never-ending task. No matter how often you mop, dust and dirt seem to return within hours. But what if one simple ingredient could help your floors stay cleaner for much longer? The secret is white vinegar — a powerful, natural cleaner that has been trusted in homes for generations.

Unlike many commercial floor cleaners filled with chemicals and artificial fragrances, vinegar is affordable, effective, and eco-friendly. When used correctly, it can cut through grease, remove odors, and even help prevent dust from sticking to your floors.

Let’s explore why vinegar works so well and how to use it properly.

Why White Vinegar Works So Well

White vinegar contains acetic acid, which gives it natural antibacterial and grease-cutting properties. It breaks down dirt, grime, and mineral deposits without leaving sticky residue behind. That residue is often the reason floors attract more dirt quickly.

Because vinegar evaporates quickly and leaves no film, your floors stay smoother and cleaner longer.

It’s also:

  • Safe for most sealed hard floors

  • Affordable and easy to find

  • Non-toxic compared to harsh chemical cleaners

  • Great at neutralizing odors

The Simple Weekly Floor Cleaning Recipe

Here’s the easy “bucket trick” that helps floors stay clean all week.

Ingredients:

  • 1 bucket of warm water (about 4–5 liters)

  • 1 cup white vinegar

  • Optional: 1 tablespoon dish soap (for extra greasy floors)

  • Optional: A few drops of essential oil (like lemon or lavender) for scent

Instructions:

  1. Fill your bucket with warm water.

  2. Add 1 cup of white vinegar.

  3. If your floor is very dirty or greasy, add a small squeeze of dish soap.

  4. Stir gently to combine.

  5. Dip your mop, wring it out well (avoid soaking the floor).

  6. Mop as usual.

  7. Allow the floor to air dry — no rinsing needed.

That’s it!

Why Floors Stay Cleaner Longer

When you use vinegar:

✔ It removes sticky buildup left behind by other cleaners.
✔ It breaks down grease that attracts dust.
✔ It neutralizes odors instead of masking them.
✔ It reduces streaks on tile and laminate.

Over time, you’ll notice less dullness and fewer footprints.

Best Floor Types for Vinegar Cleaning

This method works wonderfully on:

  • Ceramic tile

  • Porcelain tile

  • Vinyl flooring

  • Sealed laminate

  • Sealed hardwood (occasionally, not daily)

Floors to Avoid

Do NOT use vinegar on:

  • Natural stone (like marble or granite)

  • Unsealed wood

  • Waxed floors

The acidity can damage these surfaces.

Extra Tips for Long-Lasting Clean Floors

To make your cleaning even more effective:

1. Sweep or Vacuum First

Always remove loose dust and debris before mopping.

2. Wring Out Your Mop Well

Too much water can leave streaks and damage certain floors.

3. Change Mop Water If Very Dirty

Dirty water just spreads grime around.

4. Clean Your Mop After Use

A dirty mop head spreads bacteria the next time you clean.

Bonus: Add This for Extra Shine

If you want even more shine, you can add:

  • 1 tablespoon baking soda (for tough odors)

  • Or a splash of rubbing alcohol (helps floors dry faster)

But keep it simple for regular weekly cleaning.

Why Many People Are Switching to Vinegar

More homeowners are choosing natural cleaning solutions because they:

  • Reduce exposure to strong chemicals

  • Save money

  • Are environmentally friendly

  • Work just as well (or better) than store-bought products

And the best part? Vinegar costs only a fraction of commercial cleaners.

How Often Should You Mop?

For most homes:

  • High-traffic areas: 1–2 times per week

  • Low-traffic areas: Once per week

Using the vinegar method consistently can help maintain a fresh, clean surface without constant deep scrubbing.

Final Thoughts

Sometimes the simplest solutions are the most powerful. By adding one cup of white vinegar to your mop bucket, you can remove buildup, prevent sticky residue, and keep your floors cleaner for longer.