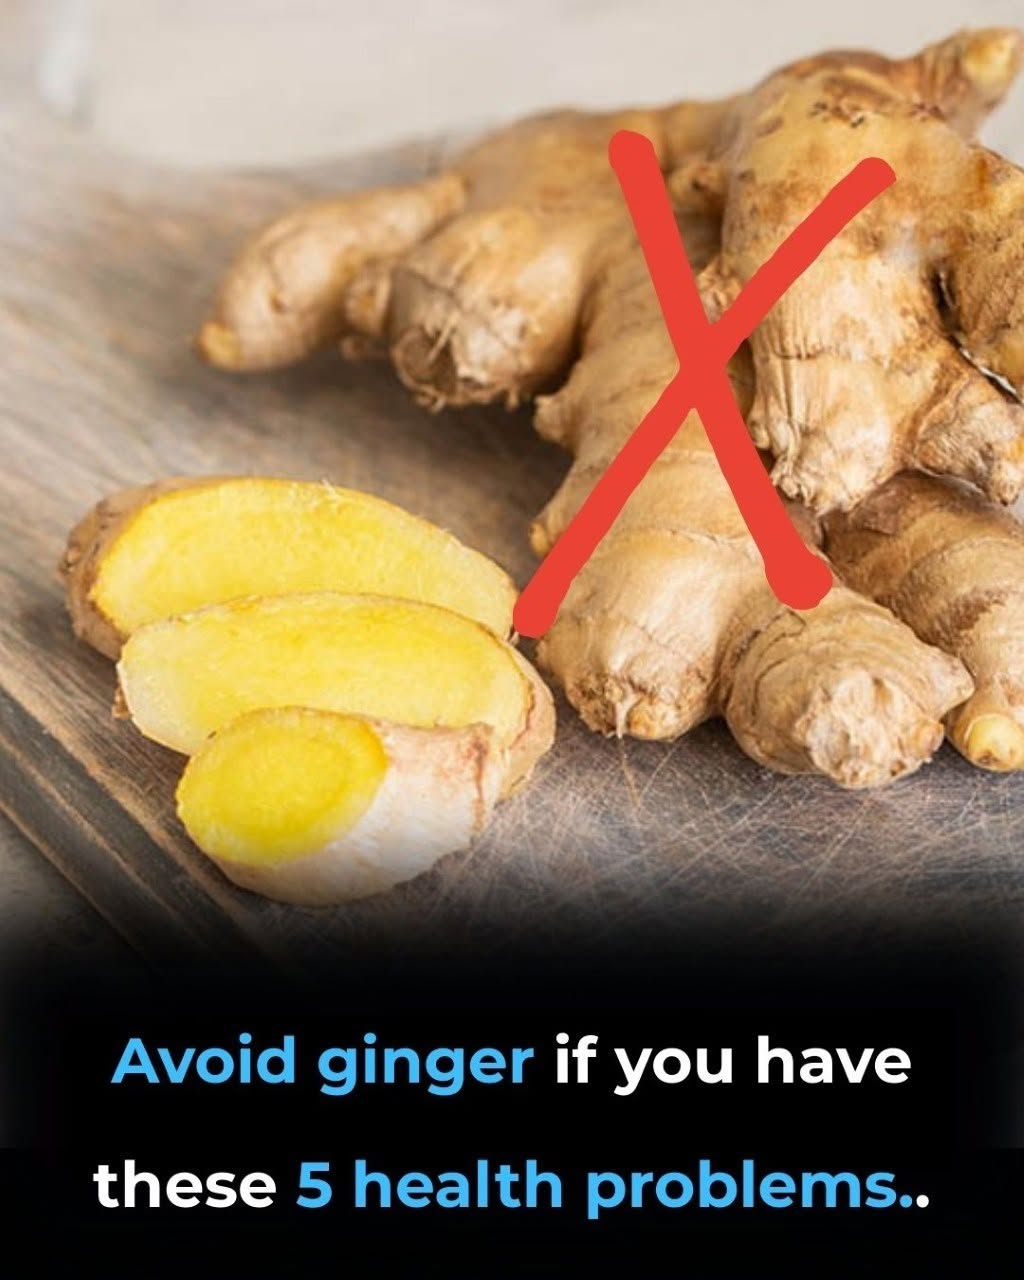
A Foolproof Italian Cream Cake Shortcut That Tastes Completely Homemade

A Foolproof Italian Cream Cake Shortcut That Tastes Completely Homemade

If you love rich, moist cakes with creamy frosting and crunchy pecans, this easy Italian Cream Cake recipe is about to become your new favorite dessert. This shortcut version delivers all the flavor of a traditional Southern Italian Cream Cake without spending hours in the kitchen. Using a few smart baking hacks, you can create a bakery-style cake that tastes completely homemade.

Perfect for birthdays, holidays, potlucks, or weekend baking, this cake combines fluffy layers, sweet coconut, chopped pecans, and silky cream cheese frosting in every bite. Best of all, even beginner bakers can make it successfully.

Why You’ll Love This Italian Cream Cake Recipe

This easy Italian Cream Cake is:

  • Moist and fluffy
  • Packed with coconut and pecans
  • Covered in rich cream cheese frosting
  • Made with simple shortcut ingredients
  • Perfect for special occasions
  • Beginner-friendly and foolproof

The secret shortcut is using a boxed cake mix while adding homemade ingredients to improve flavor and texture. Nobody will guess it started from a mix.


Ingredients for Italian Cream Cake

For the Cake

  • 1 box white cake mix
  • 1 cup buttermilk
  • 1/2 cup vegetable oil
  • 4 large eggs
  • 1 teaspoon vanilla extract
  • 1 cup sweetened shredded coconut
  • 1 cup chopped pecans

For the Cream Cheese Frosting

  • 2 packages cream cheese, softened
  • 1/2 cup unsalted butter, softened
  • 4 cups powdered sugar
  • 2 teaspoons vanilla extract
  • 1/2 cup chopped pecans for garnish
  • Extra coconut for decoration

How to Make Italian Cream Cake

Step 1: Prepare the Oven

Preheat your oven to 350°F (175°C). Grease and flour two 9-inch round cake pans or line them with parchment paper for easy removal.

Step 2: Mix the Batter

In a large mixing bowl, combine the white cake mix, buttermilk, vegetable oil, eggs, and vanilla extract. Beat until smooth and creamy.

Fold in the shredded coconut and chopped pecans using a spatula. These ingredients give the cake its classic Italian Cream Cake texture and flavor.

Step 3: Bake the Cake

Divide the batter evenly between the prepared cake pans.

Bake for 28–32 minutes or until a toothpick inserted into the center comes out clean. Let the cakes cool in the pans for about 10 minutes, then transfer to a wire rack to cool completely.

Step 4: Make the Frosting

In a large bowl, beat the softened cream cheese and butter until light and fluffy.

Gradually add powdered sugar, one cup at a time. Mix in vanilla extract and continue beating until smooth and creamy.

Step 5: Assemble the Cake

Place one cake layer on a serving plate. Spread a thick layer of cream cheese frosting on top.

Add the second cake layer and frost the top and sides of the cake.

Sprinkle chopped pecans and shredded coconut over the top for a beautiful homemade finish.


Tips for the Best Italian Cream Cake

Use Buttermilk

Buttermilk makes the cake extra moist and gives it a richer homemade flavor.

Toast the Pecans

Lightly toasting pecans before adding them enhances their nutty flavor and gives the cake a bakery-style taste.

Don’t Overmix

Mix the batter just until combined to keep the cake soft and fluffy.

Chill Before Serving

Refrigerating the cake for 30 minutes before slicing helps the frosting set perfectly.


What Does Italian Cream Cake Taste Like?

Italian Cream Cake has a rich buttery flavor balanced with tangy cream cheese frosting. The coconut adds sweetness and texture, while pecans provide a delicious crunch. Despite its name, this cake is actually more popular in the Southern United States than in Italy.

The combination of moist cake layers and creamy frosting creates a dessert that feels elegant but comforting at the same time.


Storage Tips

Store the cake covered in the refrigerator for up to 5 days. Because of the cream cheese frosting, refrigeration is recommended.

You can also freeze individual slices for up to 2 months. Simply wrap tightly in plastic wrap and place in a freezer-safe container.


Serving Ideas

This easy Italian Cream Cake pairs perfectly with:

  • Hot coffee
  • Vanilla ice cream
  • Fresh berries
  • Sweet tea
  • Holiday dessert tables

It’s ideal for Easter, Christmas, birthdays, bridal showers, and family gatherings.


Easy Italian Cream Cake Variations

Add Cinnamon

A small pinch of cinnamon gives the cake a warm flavor twist.

Use Walnuts

Swap pecans for walnuts if preferred.

Make Cupcakes

Turn the batter into cupcakes and bake for about 18–20 minutes.

Extra Coconut Flavor

Add coconut extract to the frosting for a stronger coconut taste.


Final Thoughts

This foolproof Italian Cream Cake shortcut recipe proves that delicious homemade desserts do not have to be complicated. With moist cake layers, crunchy pecans, sweet coconut, and creamy frosting, this dessert tastes like it came straight from a professional bakery.

Whether you are baking for a celebration or simply craving a rich Southern-style dessert, this easy Italian Cream Cake recipe delivers incredible flavor with minimal effort. One slice is never enough!

Now I make it every morning! Only 3 ingredients! A delicious and filling breakfast

Looking for a quick, healthy, and delicious breakfast? These easy banana pancakes are made with just 3 simple ingredients and take only minutes to prepare. They are naturally sweet, fluffy, gluten-free, and packed with protein and potassium — perfect for busy mornings, post-workout meals, or healthy snacks.

Ingredients

  • 1 ripe banana
  • 2 eggs
  • A pinch of cinnamon (optional, but highly recommended)

Why You’ll Love This Recipe

These healthy banana pancakes are:

  • Naturally sweet with no added sugar
  • Gluten-free and flour-free
  • High in protein
  • Soft and fluffy
  • Ready in under 10 minutes
  • Kid-friendly and budget-friendly

The ripe banana adds natural sweetness and moisture, while the eggs create a light, fluffy texture. Cinnamon gives the pancakes a warm flavor and aroma that makes them taste even more comforting.

How to Make Banana Pancakes

Step 1: Mash the Banana

Peel the ripe banana and place it in a medium bowl. Use a fork to mash it until smooth. A few small lumps are perfectly fine and add texture to the pancakes.

Step 2: Add the Eggs

Crack the two eggs into the bowl with the mashed banana. Whisk everything together until the mixture becomes smooth and fully combined.

Step 3: Add Cinnamon

Sprinkle in a pinch of cinnamon if desired. Stir gently to combine. Cinnamon not only enhances flavor but also pairs beautifully with the sweetness of the banana.

Step 4: Heat the Pan

Place a non-stick skillet or frying pan over medium-low heat. Lightly grease it with a small amount of butter, coconut oil, or cooking spray.

Step 5: Cook the Pancakes

Pour small amounts of batter into the pan to form mini pancakes. Smaller pancakes are easier to flip because the batter is soft and delicate.

Cook for about 1–2 minutes on one side until bubbles appear and the edges begin to set. Carefully flip and cook for another minute until golden brown.

Step 6: Serve and Enjoy

Transfer the pancakes to a plate and serve warm.

Delicious Topping Ideas

These banana pancakes taste amazing on their own, but you can also add healthy toppings like:

  • Fresh berries
  • Sliced bananas
  • Honey or maple syrup
  • Peanut butter or almond butter
  • Greek yogurt
  • Chopped nuts
  • Dark chocolate chips

Tips for Perfect Banana Pancakes

Use a Very Ripe Banana

The riper the banana, the sweeter and softer your pancakes will be. Brown spots on the peel are ideal.

Cook on Low Heat

Because these pancakes contain banana and no flour, they cook faster than regular pancakes. Medium-low heat prevents burning.

Make Small Pancakes

Mini pancakes hold together better and flip more easily.

Don’t Overmix

Mix just until combined to keep the pancakes fluffy.

Health Benefits

Bananas

Bananas are rich in potassium, fiber, and natural energy. They help support heart health and digestion.

Eggs

Eggs provide high-quality protein and healthy fats that help keep you full longer.

Cinnamon

Cinnamon contains antioxidants and adds flavor without extra calories or sugar.

Storage Tips

You can store leftover pancakes in an airtight container in the refrigerator for up to 2 days. Reheat them in a skillet or microwave before serving.

They can also be frozen for quick breakfasts during the week.

Final Thoughts

These 3-ingredient banana pancakes are proof that healthy eating can be simple and delicious. With only a banana, eggs, and a little cinnamon, you can create a nutritious breakfast in minutes. Whether you’re trying to eat healthier, avoid gluten, or simply use up ripe bananas, this easy pancake recipe is a must-try.

Enjoy your homemade healthy banana pancakes with your favorite toppings for the perfect quick breakfast!

Keto Cheese Cake Fluff

Keto Cheesecake Fluff Recipe (Low Carb, Sugar-Free, High Protein Dessert)

If you’re craving a rich, creamy dessert but want to stay in ketosis, this Keto Cheesecake Fluff is the perfect solution. It tastes like classic cheesecake filling but requires no baking, no complicated steps, and only a handful of simple low-carb ingredients. This sugar-free dessert is ideal for anyone following a keto, low-carb, diabetic-friendly, or weight-loss diet.

In this SEO-optimized recipe guide, you’ll learn how to make keto cheesecake fluff, its benefits, variations, storage tips, and pro tricks to make it extra creamy and delicious.


Why Keto Cheesecake Fluff is So Popular

Keto desserts are becoming extremely popular because they allow people to enjoy sweets without spiking blood sugar. This cheesecake fluff is especially loved because:

  • It takes only 5–10 minutes to prepare
  • It contains zero refined sugar
  • It is extremely low in carbs
  • It is rich, creamy, and satisfying
  • It can be used as dessert, snack, or even a keto dip

Unlike traditional cheesecake, there is no baking required, which makes it perfect for beginners.


Ingredients You Will Need

To make the best keto cheesecake fluff, gather these simple ingredients:

  • 200g cream cheese (softened)
  • 1 cup heavy whipping cream
  • 3–4 tablespoons powdered erythritol (or any keto sweetener)
  • 1 teaspoon vanilla extract
  • 1 tablespoon lemon juice (optional for tangy cheesecake flavor)
  • A pinch of salt

Optional toppings:

  • Fresh berries (strawberries, blueberries, raspberries)
  • Cocoa powder or sugar-free chocolate chips
  • Crushed nuts (almonds, walnuts, pecans)

Step-by-Step Method

Step 1: Prepare the Cream Cheese

Place softened cream cheese in a mixing bowl. Beat it using a hand mixer until smooth and fluffy. This ensures there are no lumps in your final dessert.

Step 2: Add Sweetener and Flavor

Add powdered erythritol, vanilla extract, lemon juice, and a pinch of salt. Mix again until everything is well combined. The lemon juice gives a classic cheesecake tang.

Step 3: Whip the Cream

In a separate bowl, whip the heavy cream until it forms stiff peaks. This step is important because it creates the “fluff” texture.

Step 4: Combine Mixtures

Gently fold the whipped cream into the cream cheese mixture. Do not overmix; folding keeps the mixture airy and light.

Step 5: Chill and Serve

Place the mixture in the refrigerator for 20–30 minutes before serving. This helps the flavors blend and improves texture.


Texture and Taste

Keto cheesecake fluff is smooth, airy, and rich at the same time. It has the creamy density of cheesecake but feels lighter like mousse. The flavor is mildly sweet with a slight tang, making it extremely addictive for dessert lovers.


Nutrition Benefits

This dessert is not only delicious but also supports a healthy keto lifestyle:

  • Low in carbohydrates (typically under 3–4g per serving)
  • High in healthy fats from cream cheese and whipping cream
  • Moderate protein content
  • No sugar spikes, making it diabetes-friendly
  • Helps reduce sugar cravings

Because of its fat content, it keeps you full longer, which helps in weight management.


Flavor Variations (SEO-Friendly Ideas)

You can easily customize keto cheesecake fluff into different flavors:

1. Chocolate Keto Fluff

Add 1–2 tablespoons of unsweetened cocoa powder.

2. Strawberry Cheesecake Fluff

Mix in crushed strawberries or sugar-free strawberry syrup.

3. Peanut Butter Fluff

Add 2 tablespoons of natural peanut butter for a rich nutty taste.

4. Coffee Cheesecake Fluff

Add 1 teaspoon instant coffee for a mocha-style dessert.


Pro Tips for Best Results

  • Always use softened cream cheese to avoid lumps
  • Chill the bowl before whipping cream for better volume
  • Use powdered sweetener, not granulated, for smooth texture
  • Do not overmix after combining cream and cheese
  • Serve cold for best taste and consistency

Storage Instructions

Store keto cheesecake fluff in an airtight container in the refrigerator. It stays fresh for up to 3–4 days. Before serving, lightly stir it to restore its creamy texture.


Final Thoughts

Keto Cheesecake Fluff is one of the easiest and most satisfying low-carb desserts you can make at home. Whether you are following a strict ketogenic diet or just trying to cut sugar, this recipe gives you the perfect balance of taste and health. With its rich creamy texture and endless flavor options, it can easily become your go-to keto dessert.

Try this recipe today and enjoy a guilt-free cheesecake experience without baking, sugar, or stress.

Suffering from poor circulation? Here’s how to fix it in just 20 minutes!

Suffering From Poor Circulation? Here’s How to Improve It in Just 20 Minutes

Poor circulation is a common health issue that affects millions of people worldwide. Many people experience cold hands and feet, numbness, tingling sensations, swollen legs, fatigue, or muscle cramps without realizing that poor blood flow may be the cause. The good news is that simple daily habits can help improve circulation naturally, and many people notice positive changes in as little as 20 minutes.

In this article, you will learn the common causes of poor circulation, warning signs to watch for, and effective ways to boost blood flow quickly and naturally.

What Is Poor Circulation?

Poor circulation happens when blood cannot flow properly through the body. Your circulatory system is responsible for delivering oxygen and nutrients to muscles, organs, and tissues. When circulation slows down, different parts of the body may not receive enough oxygen-rich blood.

This problem can affect anyone, but it is more common in older adults, people who sit for long hours, smokers, and individuals with health conditions like diabetes or high blood pressure.

Common Symptoms of Poor Blood Circulation

Many people ignore the early signs of poor circulation. Here are some common symptoms:

  • Cold hands and feet
  • Tingling or numbness
  • Swollen ankles and legs
  • Muscle cramps
  • Fatigue and low energy
  • Varicose veins
  • Slow healing wounds
  • Skin discoloration
  • Frequent leg pain

If these symptoms happen regularly, it may be time to improve your circulation habits.

Main Causes of Poor Circulation

Several lifestyle and health factors can reduce blood flow, including:

1. Sitting for Long Periods

Staying seated for hours can slow circulation, especially in the legs.

2. Lack of Exercise

Physical activity helps pump blood through the body. Without movement, circulation becomes sluggish.

3. Smoking

Smoking damages blood vessels and restricts healthy blood flow.

4. Dehydration

Water helps maintain healthy blood volume. Dehydration can make circulation worse.

5. High Cholesterol

Fatty deposits in arteries can block normal blood flow.

6. Stress

Chronic stress may tighten blood vessels and increase blood pressure.

How to Improve Circulation in Just 20 Minutes

The following simple routine may help improve circulation naturally in about 20 minutes.

1. Take a Brisk Walk for 10 Minutes

Walking is one of the best natural ways to improve blood circulation. A quick walk increases heart rate and helps move blood efficiently throughout the body.

Even a short walk can:

  • Warm cold hands and feet
  • Reduce leg swelling
  • Improve oxygen flow
  • Boost energy levels

Walking after meals may also support heart health and better circulation.

2. Stretch Your Legs and Feet

Simple stretches help activate muscles and improve blood flow. Focus on your calves, ankles, and feet.

Try these easy exercises:

  • Ankle circles
  • Toe raises
  • Leg lifts
  • Gentle calf stretches

Stretching may reduce stiffness and improve flexibility while encouraging better circulation.

3. Drink Water Immediately

Hydration is extremely important for healthy blood flow. Drinking a large glass of water may help your body maintain proper circulation and oxygen delivery.

Add lemon slices for extra freshness and antioxidants.

4. Elevate Your Legs for 5 Minutes

Raising your legs above heart level may reduce swelling and help blood return more efficiently from the lower body.

Lie down comfortably and place your legs on a pillow or wall for a few minutes. This method is especially helpful for people who stand or sit all day.

5. Practice Deep Breathing

Deep breathing exercises can improve oxygen supply and reduce stress-related tension in blood vessels.

Try this simple technique:

  • Inhale deeply for 4 seconds
  • Hold for 4 seconds
  • Exhale slowly for 6 seconds

Repeat for several minutes to help relax the body and support healthy circulation.

Best Foods for Better Circulation

Diet also plays an important role in blood flow. Certain foods may help support healthy circulation naturally.

Foods That May Improve Blood Flow

  • Garlic
  • Ginger
  • Salmon
  • Leafy green vegetables
  • Citrus fruits
  • Nuts and seeds
  • Dark chocolate
  • Beets

These foods contain nutrients that support heart and blood vessel health.

Habits That Can Make Circulation Worse

Avoid these unhealthy habits if you want to improve circulation:

  • Smoking cigarettes
  • Sitting too long without movement
  • Eating excessive processed foods
  • Drinking too much alcohol
  • Lack of sleep
  • High stress levels

Small lifestyle changes can make a big difference over time.

When to See a Doctor

While mild circulation problems can often improve with healthy habits, severe symptoms may require medical attention.

See a healthcare professional if you experience:

  • Severe leg pain
  • Chest pain
  • Difficulty breathing
  • Sudden numbness
  • Persistent swelling
  • Skin ulcers or wounds that do not heal

These may be signs of serious circulation or heart-related conditions.

Final Thoughts

Poor circulation can affect your energy, comfort, and overall health, but simple daily habits may help improve blood flow naturally. A quick 20-minute routine that includes walking, stretching, hydration, leg elevation, and deep breathing can support healthier circulation and help you feel more active.

Consistency is important. Regular movement, healthy eating, stress management, and staying hydrated can all contribute to better circulation and improved well-being over time.

If symptoms continue or worsen, consult a medical professional for proper diagnosis and treatment.

Crispy Bacon Wrapped Cheddar Bites

Crispy Bacon Wrapped Cheddar Bites – The Ultimate Cheesy Appetizer Recipe

If you are looking for the perfect party snack, Crispy Bacon Wrapped Cheddar Bites are a delicious and crowd-pleasing option. These bite-sized appetizers combine smoky bacon, melted cheddar cheese, and a crispy texture that makes them irresistible. Whether you are preparing snacks for game night, family gatherings, holiday parties, or weekend treats, this easy recipe will quickly become a favorite.

These cheesy bacon bites are simple to prepare, packed with flavor, and made with everyday ingredients. The crispy bacon perfectly complements the creamy cheddar cheese, creating a savory appetizer everyone will love.

Why You’ll Love Crispy Bacon Wrapped Cheddar Bites

There are many reasons why these bacon cheddar bites are so popular:

  • Easy and quick recipe
  • Perfect for parties and gatherings
  • Crispy outside with gooey cheese inside
  • Great low-carb appetizer option
  • Kid-friendly and family-friendly
  • Made with simple ingredients

The combination of crispy bacon and melted cheddar cheese creates a mouthwatering flavor that is hard to resist.

Ingredients for Bacon Wrapped Cheddar Bites

To make these delicious crispy cheddar bites, you will need:

  • 1 pound bacon strips
  • 8 ounces sharp cheddar cheese block
  • 1 teaspoon garlic powder
  • 1 teaspoon smoked paprika
  • ½ teaspoon black pepper
  • Toothpicks for securing

Optional ingredients for extra flavor:

  • Jalapeño slices
  • Brown sugar
  • Cream cheese
  • Green onions

Using high-quality cheddar cheese and thick-cut bacon gives the best results.

How to Make Crispy Bacon Wrapped Cheddar Bites

Step 1: Prepare the Cheese

Cut the cheddar cheese block into small bite-sized cubes. Try to keep the cubes even in size so they cook evenly.

Step 2: Season the Cheese

Place the cheese cubes into a bowl and sprinkle with garlic powder, smoked paprika, and black pepper. Toss gently to coat all sides.

Step 3: Wrap with Bacon

Cut each bacon strip into halves or thirds depending on the size. Wrap one piece of bacon around each cheddar cube tightly. Secure with a toothpick.

Step 4: Bake Until Crispy

Preheat your oven to 400°F (200°C). Line a baking tray with parchment paper or a wire rack.

Arrange the bacon-wrapped cheddar bites evenly on the tray. Bake for 15 to 20 minutes or until the bacon becomes crispy and golden brown.

Step 5: Cool Slightly and Serve

Remove from the oven and let them cool for a few minutes before serving. The cheese inside will be hot and melted.

Serve immediately for the best flavor and texture.

Tips for the Best Crispy Bacon Wrapped Cheese Bites

Use Cold Cheese

Cold cheddar cheese holds its shape better during baking and prevents excessive melting.

Choose Thick Bacon

Thicker bacon creates a crispier texture and wraps around the cheese more effectively.

Use a Wire Rack

Baking on a wire rack allows excess grease to drip away, helping the bacon become extra crispy.

Don’t Overcook

Bake just until the bacon is crispy. Overcooking may cause too much cheese to leak out.

Delicious Variations

One of the best things about crispy bacon cheddar bites is how customizable they are.

Spicy Jalapeño Bacon Bites

Add a small jalapeño slice between the cheese and bacon for a spicy kick.

Sweet and Savory Version

Sprinkle a little brown sugar on top before baking for a sweet smoky flavor.

Cream Cheese Stuffed Bites

Mix cream cheese with cheddar for an extra creamy filling.

BBQ Bacon Cheddar Bites

Brush lightly with barbecue sauce during the last few minutes of baking.

Best Dipping Sauces

These crispy bacon wrapped appetizers pair perfectly with many dipping sauces, including:

  • Ranch dressing
  • Spicy mayo
  • Honey mustard
  • Barbecue sauce
  • Garlic aioli
  • Chipotle sauce

Adding a dipping sauce makes these cheesy bacon snacks even more flavorful.

Perfect Occasions for Bacon Wrapped Cheddar Bites

These easy appetizers are ideal for:

  • Game day snacks
  • Birthday parties
  • Family movie nights
  • Holiday celebrations
  • BBQ gatherings
  • Potluck dinners

Because they are bite-sized and easy to serve, they work well for almost any occasion.

Storage and Reheating Tips

If you have leftovers, store them in an airtight container in the refrigerator for up to 3 days.

To reheat:

  • Oven: Bake at 350°F for 5–7 minutes
  • Air fryer: Heat for 3–4 minutes
  • Avoid microwaving if possible because the bacon may become soft

Reheating in the oven or air fryer keeps the bacon crispy.

Nutrition Benefits

Although these bacon cheddar bites are indulgent, they are also high in protein and low in carbohydrates, making them popular for low-carb and keto-friendly diets.

Cheddar cheese provides calcium and protein, while bacon adds rich smoky flavor and satisfying texture.

Final Thoughts

Crispy Bacon Wrapped Cheddar Bites are the ultimate cheesy appetizer recipe for bacon lovers. They are crispy, savory, cheesy, and incredibly easy to make. With simple ingredients and endless flavor variations, these bacon-wrapped snacks are guaranteed to impress your guests.

Whether you serve them for parties, holidays, or casual snacking, these crispy cheddar bites deliver restaurant-quality flavor at home. Try this easy recipe today and enjoy the perfect combination of melted cheddar cheese and crispy bacon in every delicious bite.

High Protein Chocolate ice cream

High Protein Chocolate Ice Cream Recipe – Healthy, Creamy & Easy Homemade Dessert

If you love chocolate desserts but also want to stay healthy and fit, this high protein chocolate ice cream recipe is the perfect treat. It is rich, creamy, packed with protein, and made with simple ingredients you can easily find at home. This homemade protein ice cream is ideal for fitness lovers, gym-goers, weight-loss diets, or anyone craving a healthy chocolate dessert without too much sugar.

Unlike store-bought ice cream loaded with preservatives and extra calories, this healthy chocolate protein ice cream gives you the perfect balance of flavor and nutrition. It is smooth, chocolaty, satisfying, and can be prepared in just a few simple steps.

Why You Will Love This High Protein Chocolate Ice Cream

  • High in protein
  • Low in sugar
  • Rich chocolate flavor
  • Perfect post-workout dessert
  • Easy homemade recipe
  • Great for weight loss goals
  • No ice cream machine required
  • Healthy alternative to traditional ice cream

Ingredients for High Protein Chocolate Ice Cream

Here are the ingredients you need for this delicious homemade protein dessert:

  • 2 frozen bananas
  • 1 cup Greek yogurt
  • 1 scoop chocolate protein powder
  • 2 tablespoons unsweetened cocoa powder
  • 2 tablespoons peanut butter
  • 1 tablespoon honey or maple syrup
  • 1 teaspoon vanilla extract
  • 2 to 3 tablespoons milk
  • Dark chocolate chips for topping

Optional Add-Ins

You can customize your healthy chocolate ice cream with these tasty extras:

  • Crushed almonds
  • Chia seeds
  • Oreo crumbs
  • Coconut flakes
  • Chocolate syrup
  • Fresh strawberries
  • Protein granola

How to Make High Protein Chocolate Ice Cream

Step 1: Freeze the Bananas

Peel and slice the bananas before freezing them for at least 4 hours. Frozen bananas create the creamy texture that makes this protein ice cream soft and smooth.

Step 2: Blend the Ingredients

Add the frozen bananas, Greek yogurt, chocolate protein powder, cocoa powder, peanut butter, honey, vanilla extract, and milk into a blender or food processor.

Blend until the mixture becomes creamy and smooth. If the mixture is too thick, add a little more milk.

Step 3: Taste and Adjust

Taste the mixture and adjust sweetness if needed. Add extra honey or cocoa powder depending on your preference.

Step 4: Freeze Again

Transfer the mixture into an airtight container. Freeze for 1 to 2 hours for a firmer ice cream texture.

Step 5: Serve and Enjoy

Scoop the ice cream into bowls or cones. Add dark chocolate chips or your favorite toppings before serving.

Nutrition Benefits of Protein Chocolate Ice Cream

This healthy ice cream recipe is not only delicious but also nutritious.

High Protein Content

Protein helps support muscle recovery and keeps you full longer. Using Greek yogurt and protein powder makes this dessert a great post-workout snack.

Lower Sugar Than Regular Ice Cream

Traditional chocolate ice cream contains large amounts of refined sugar. This recipe uses natural sweetness from bananas and honey.

Rich in Healthy Fats

Peanut butter adds healthy fats and makes the ice cream extra creamy and satisfying.

Good Source of Calcium

Greek yogurt provides calcium, which supports strong bones and teeth.

Best Protein Powder for Ice Cream

For the best flavor and texture, choose a good-quality chocolate whey protein powder or plant-based protein powder.

Popular choices include:

  • Whey chocolate protein
  • Casein protein powder
  • Vegan chocolate protein
  • Low-carb protein powder

Choose a protein powder with minimal added sugar for a healthier dessert.

Tips for the Perfect Protein Ice Cream

Use Frozen Bananas

Frozen bananas are the secret to creamy homemade protein ice cream.

Blend Slowly

Blend slowly at first to avoid lumps and achieve a smooth texture.

Avoid Too Much Protein Powder

Too much protein powder can make the ice cream dry or chalky.

Add Milk Carefully

Start with a small amount of milk and add more only if needed.

How to Store Homemade Protein Ice Cream

Store your chocolate protein ice cream in an airtight container in the freezer for up to one week.

Before serving, let it sit at room temperature for 5 minutes to soften slightly.

Variations of High Protein Ice Cream

Chocolate Peanut Butter Protein Ice Cream

Add extra peanut butter and swirl it through the mixture before freezing.

Mint Chocolate Protein Ice Cream

Add a few drops of peppermint extract for a refreshing mint flavor.

Mocha Protein Ice Cream

Mix in 1 teaspoon instant coffee for a delicious mocha dessert.

Keto Protein Ice Cream

Use low-carb sweetener instead of honey and choose keto-friendly protein powder.

Final Thoughts

This high protein chocolate ice cream recipe is the perfect healthy dessert for chocolate lovers. It is creamy, rich, easy to make, and packed with protein to support your fitness and health goals. Whether you want a post-workout snack, low-calorie dessert, or healthy summer treat, this homemade chocolate protein ice cream is a delicious option.

WARNING: A woman’s chin hair is a sign of

Warning: A Woman’s Chin Hair Can Be a Sign of Hormonal Changes — What You Should Know

Many women notice small facial hairs from time to time, especially around the chin. While a few stray hairs can be completely normal, excess chin hair in women may sometimes be a sign of underlying hormonal changes, lifestyle factors, or certain health conditions. Understanding why this happens can help women make informed decisions about their health and when to seek medical advice.

Why Chin Hair Appears in Women

Facial hair growth in women is often linked to hormones, particularly androgens. Androgens are often called “male hormones,” but women naturally produce them too — just in smaller amounts. When androgen levels rise or become imbalanced, they can trigger thicker, darker hair growth on the chin, upper lip, or jawline.

This condition is called hirsutism, which means excessive hair growth in women in areas where men commonly grow hair. It can affect confidence, self-esteem, and may point to an underlying issue that should be checked.

Common Causes of Chin Hair in Women

Here are some of the most common reasons women develop chin hair:

1. Hormonal Imbalance

Hormonal shifts are the leading cause of chin hair. These changes can happen due to age, stress, or health conditions. During puberty, pregnancy, and menopause, many women notice changes in body and facial hair because hormone levels fluctuate.

Polycystic Ovary Syndrome is one of the most common conditions linked to unwanted facial hair. It can cause irregular periods, acne, weight gain, and increased androgen levels.

2. Menopause

As women age, estrogen levels naturally decline. This can make androgen effects more noticeable, leading to chin hair growth. Many women over 40 or 50 experience this as part of natural aging.

3. Genetics

Sometimes chin hair is simply hereditary. If your mother or grandmother had facial hair, there is a good chance genetics play a role. Women from certain ethnic backgrounds may naturally have more visible facial hair.

4. Certain Medications

Some medications may trigger unwanted hair growth as a side effect. Hormone-related treatments, steroids, and some medications for other conditions may contribute.

Is Chin Hair Always a Problem?

Not necessarily. A few chin hairs are usually harmless. Many women occasionally pluck or remove them and never have a medical issue. However, if chin hair appears suddenly, grows quickly, or comes with other symptoms, it may be worth discussing with a doctor.

Watch for signs such as:

  • Irregular periods
  • Sudden weight gain
  • Acne outbreaks
  • Hair thinning on the scalp
  • Deepening voice
  • Increased body hair

These symptoms may suggest hormone imbalance and should be checked by a healthcare professional.

How to Reduce Chin Hair Naturally

Many women search for natural remedies for chin hair. While these may not solve hormone issues, they may help manage appearance.

Spearmint Tea

Some small studies suggest spearmint tea may help reduce androgen levels over time. Drinking it regularly may help some women with mild hormonal facial hair.

Healthy Diet

A balanced diet can support hormone health. Focus on:

  • Fresh vegetables
  • Lean proteins
  • Whole grains
  • Reduced processed sugar

Managing insulin levels is especially important for women with PCOS.

Weight Management

Even modest weight loss can improve hormone balance in some women, especially those with insulin resistance.

Hair Removal Options

Women often use different methods to manage chin hair:

  • Tweezing
  • Waxing
  • Threading
  • Shaving
  • Laser hair removal
  • Electrolysis

Laser Hair Removal is popular for long-term reduction, though it may require several sessions.

When to See a Doctor

If you suddenly develop thick chin hair, especially along with other changes in your menstrual cycle or skin, a medical evaluation can help. A doctor may check hormone levels or investigate conditions such as PCOS or thyroid issues.

Hypothyroidism can sometimes affect hair growth patterns, though it is not the most common cause of chin hair.

Emotional Impact

Unwanted facial hair can affect confidence. Many women feel embarrassed, but it is far more common than many realize. Talking to a healthcare provider can provide reassurance and help identify treatment options.

Final Thoughts

A woman’s chin hair is not always a warning sign, but excessive chin hair in women can sometimes indicate hormonal imbalance, especially conditions like PCOS or natural changes during menopause. Paying attention to other symptoms can help determine whether it is simply genetics or something worth checking.

If facial hair growth changes suddenly, becomes excessive, or causes concern, speaking with a doctor is the best next step. Early understanding can make treatment easier and help support long-term health.

Doctors reveal that eating okra causes

Doctors Reveal What Happens When You Eat Okra Regularly

Okra, often known as “lady finger” in many countries, is a green vegetable that has been used in traditional diets for centuries. Recently, nutrition experts and doctors have taken a closer look at its health effects. While headlines sometimes exaggerate claims like “doctors reveal eating okra causes…” the real story is more balanced and interesting. According to modern nutritional science, eating okra regularly can support several areas of health when included as part of a balanced diet.

Rich in Nutrients That Support the Body

Doctors often highlight okra as a nutrient-dense vegetable. It contains vitamin C, vitamin K, folate, magnesium, and fiber. These nutrients work together to support immunity, bone strength, and digestion. Vitamin C helps protect the body from infections, while vitamin K plays an important role in blood clotting and bone health.

The fiber in okra is especially important. It helps regulate bowel movements and supports a healthy gut. Many healthcare professionals recommend fiber-rich foods like okra to prevent constipation and improve overall digestive comfort.

May Help Manage Blood Sugar Levels

One of the most discussed benefits of okra in medical nutrition studies is its potential effect on blood sugar. Some doctors and researchers suggest that the soluble fiber in okra may help slow down sugar absorption in the intestines. This can help reduce sudden spikes in blood glucose after meals.

For people managing diabetes or prediabetes, this makes okra a potentially helpful vegetable. However, doctors always emphasize that it is not a cure or replacement for medication. Instead, it should be part of a controlled diet plan approved by a healthcare provider.

Supports Heart Health

Heart health is another area where okra may play a supportive role. The fiber content can help reduce cholesterol levels, especially LDL (bad cholesterol). Lower cholesterol is associated with reduced risk of heart disease and stroke.

Additionally, okra contains antioxidants such as polyphenols and flavonoids. These compounds help reduce inflammation and oxidative stress in the body, both of which are linked to cardiovascular problems. Doctors often recommend antioxidant-rich vegetables as part of a heart-healthy diet.

Good for Digestion and Gut Health

One of the most immediate effects people notice when eating okra is improved digestion. The mucilage (gel-like substance) in okra helps soothe the digestive tract. It can make bowel movements smoother and reduce irritation in the stomach lining.

Some traditional medicine systems even use okra water (soaked okra overnight) as a remedy for digestive discomfort. While scientific evidence is still developing, doctors agree that okra’s fiber and water content are beneficial for gut health.

May Support Weight Management

Because okra is low in calories and high in fiber, it can help people feel full for longer. This reduces overeating and unnecessary snacking. Nutrition experts often recommend adding vegetables like okra to weight-loss meal plans because they increase satiety without adding excess calories.

However, doctors remind patients that weight management depends on overall lifestyle, not a single food. Exercise, hydration, and balanced meals all play key roles.

Antioxidant Protection for the Body

Okra contains several plant compounds that act as antioxidants. These compounds help protect cells from damage caused by free radicals. Over time, this may reduce the risk of chronic diseases such as diabetes, heart disease, and certain inflammatory conditions.

Antioxidants are one reason why doctors encourage eating a variety of colorful vegetables, including green vegetables like okra.

Possible Side Effects or Considerations

While okra is generally safe for most people, doctors also mention a few considerations. In some individuals, it may cause mild bloating or gas due to its fiber content. Drinking enough water can help reduce this effect.

People taking blood-thinning medications should also be cautious because okra contains vitamin K, which can influence blood clotting. It is always best to consult a healthcare professional if there are any medical concerns.

Final Medical Perspective

In summary, doctors do not say that eating okra “causes” any harmful condition. Instead, they emphasize that it is a highly nutritious vegetable with several health benefits when eaten in moderation. From supporting digestion to helping with blood sugar control and heart health, okra is a valuable addition to a healthy diet.

Like most natural foods, the key is balance. Eating okra regularly as part of a varied diet can contribute positively to overall wellness, but it should never replace medical treatment or professional advice.

Watermelon Juice Recipe: A Refreshing Summer Drink You’ll Love

Watermelon Juice is one of the most refreshing and healthy drinks you can enjoy during hot weather. It is naturally sweet, hydrating, and packed with nutrients. This simple homemade juice recipe is perfect for summer days, family gatherings, or anytime you need a quick healthy drink. Watermelon contains a high amount of water, making it ideal for staying cool and refreshed.

Why Watermelon Juice Is So Popular

Watermelon juice has become a favorite healthy drink because it is easy to make and naturally delicious. Fresh watermelon is rich in vitamins A, C, and antioxidants. It also contains lycopene, which may support heart health and overall wellness. Many people search for easy watermelon juice recipes because it requires only a few ingredients and tastes much better when made fresh at home.

https://images.openai.com/static-rsc-4/vHPN0bBBv5kng6AASoUnIF8JwFMH46Pv8xnfFUEu3n5f0mpA1rfH8DuJWupl4GuLOgYY_wl_4ohCpIrthF77usDP7m9jZmvdlLwb55oWijwMDZb---6rjDTg3OBTFGPkkAMN_bDo3uAiM4bHio3m-4BGx1VQAQIxJUNvqhywCamYIHOVHAHZXKXSn2nkpHfb?purpose=fullsize
https://images.openai.com/static-rsc-4/WnD175j_1Fe3QnHgcanR3w1IW8Fa8dg3vO2YMIIUo-w2i131HwWjJNe1api5r8kXMKL5jybBIOMwqyZcCw2zpLkUrLHv211EVE9OEYeawZeHklEw0igw1AnQdQqUK7N2-emjwnrw5ltsiea3MjB0KpUNf5cTz7Ufgl-nRvvWwS2MZ9P5rYPHbEmGKz1uaoZM?purpose=fullsize
6

Ingredients for Watermelon Juice

To prepare this delicious drink, you only need simple ingredients:

  • 4 cups fresh watermelon cubes (seedless preferred)
  • 1 tablespoon fresh lemon juice
  • 1 tablespoon honey or sugar (optional)
  • 4 to 5 ice cubes
  • Fresh mint leaves for garnish
  • A pinch of black salt (optional for extra flavor)

These ingredients make a naturally sweet and refreshing beverage. The lemon adds brightness, while mint gives it a cooling touch.

How to Make Watermelon Juice

Step 1: Prepare the Watermelon

Cut a ripe watermelon into cubes. Remove any black seeds if present. Using chilled watermelon will make the juice even more refreshing.

Step 2: Blend the Ingredients

Add the watermelon cubes to a blender. Pour in the lemon juice and add honey if you prefer extra sweetness. Blend until smooth.

Step 3: Strain (Optional)

If you like smoother juice, strain it through a fine sieve. Some people enjoy the natural pulp, so this step is optional.

Step 4: Serve Cold

Pour into glasses over ice cubes. Garnish with fresh mint leaves and serve immediately.

Health Benefits of Watermelon Juice

Drinking watermelon juice can provide several benefits:

  • Helps keep the body hydrated
  • Supports digestion
  • Rich in vitamin C for immunity
  • Contains antioxidants for skin health
  • May support heart wellness

This natural fruit drink is often chosen as a healthy alternative to sugary sodas.

Tips for the Best Watermelon Juice

  • Use a fully ripe watermelon for natural sweetness.
  • Chill the fruit before blending.
  • Add a few mint leaves during blending for extra freshness.
  • Serve immediately to enjoy the best taste.
  • Avoid storing for too long because fresh juice tastes best on the same day.

Variations You Can Try

There are many ways to customize watermelon juice:

  • Add strawberries for a mixed fruit flavor.
  • Blend with coconut water for extra hydration.
  • Add ginger for a slight spicy twist.
  • Mix with lime instead of lemon.

These variations make the recipe even more exciting and healthy.

Final Thoughts

Homemade Watermelon Juice is one of the easiest summer drinks you can make. It is naturally sweet, nutritious, and perfect for staying cool. With only a few ingredients and a blender, you can prepare a refreshing beverage in minutes. Try this recipe today and enjoy a healthy homemade drink that the whole family will love.

Zero Point Cucumber

Zero Point Cucumber: A Healthy, Refreshing Food for Weight Loss and Better Wellness

If you are looking for a simple, healthy food that supports weight loss, hydration, and better eating habits, zero point cucumber is one of the best choices. Many people include cucumber in their daily diet because it is low in calories, high in water, and naturally refreshing. Whether you are following a weight loss program, healthy eating plan, or simply trying to improve your nutrition, cucumber is a smart addition to your meals.

Zero point cucumber is popular in many healthy diet plans because it can be eaten freely without adding many calories. It helps control hunger, supports digestion, and gives your body important nutrients. Let’s explore why cucumber is considered a healthy food and how you can use it in your daily routine.

What Is Zero Point Cucumber?

Zero point cucumber refers to cucumber being counted as a very low-calorie food in many wellness and diet programs. Because cucumber contains mostly water and very few calories, it is often seen as a food you can eat without worrying too much about weight gain.

A fresh cucumber is about 95% water. This means it helps keep the body hydrated while providing a crisp, satisfying snack. It is also naturally low in sugar, fat, and carbohydrates, making it ideal for healthy meal plans.

Nutritional Benefits of Cucumber

Cucumber may look simple, but it offers many health benefits. It contains small amounts of vitamins and minerals that support overall wellness.

Some key nutrients in cucumber include:

  • Vitamin K for bone health
  • Vitamin C for immune support
  • Potassium for heart function
  • Magnesium for muscle support
  • Antioxidants that protect cells

Because cucumber has so much water, it also helps the body stay hydrated. Proper hydration is important for energy, digestion, skin health, and weight management.

Why Cucumber Is Great for Weight Loss

One of the top reasons people search for zero point cucumber is its role in weight loss. It is filling, crunchy, and naturally satisfying without adding excess calories.

A whole medium cucumber contains only around 30 calories. That means you can enjoy a large serving while staying within your healthy eating goals.

Benefits for weight management:

  • Low calorie snack
  • Helps reduce cravings
  • Supports hydration
  • Adds volume to meals
  • Encourages healthy eating habits

When people feel hungry between meals, cucumber can be a better option than processed snacks. It gives crunch and freshness without unhealthy fats or sugars.

How to Eat Zero Point Cucumber

Cucumber is easy to include in your diet. You can eat it in many simple ways depending on your preferences.

Fresh snack

Slice cucumber and eat it plain. This is the easiest and healthiest option.

Salad ingredient

Add cucumber to salads with tomatoes, onions, and lemon juice for a refreshing meal.

Infused water

Place cucumber slices in water with mint for a healthy drink that supports hydration.

Sandwich topping

Add cucumber slices to sandwiches or wraps for extra crunch.

Yogurt mix

Combine chopped cucumber with plain yogurt to make a healthy side dish.

Cucumber and Hydration

Many people underestimate the importance of hydration. Since cucumber is mostly water, it can help your body stay refreshed throughout the day.

Hydration supports:

  • Better digestion
  • Improved skin
  • Healthy kidneys
  • More energy
  • Appetite control

People who eat water-rich foods often feel more satisfied and less likely to overeat. This makes cucumber a valuable food for people trying to lose weight naturally.

Cucumber for Skin Health

Cucumber is also known for skin benefits. It contains antioxidants and water that support healthy skin from the inside out.

Some people use cucumber slices on their face, but eating cucumber regularly can also help improve skin hydration. Better hydration may make skin look fresher and healthier.

Best Time to Eat Cucumber

You can eat cucumber at any time of day. However, many people prefer it:

  • Before meals to control appetite
  • As a snack between meals
  • In the evening as a light food
  • After exercise for hydration

Adding cucumber before meals may help you eat less because it creates a feeling of fullness.

Tips for Using Cucumber Daily

To get the most benefits from zero point cucumber, follow these simple tips:

Choose fresh cucumbers

Look for firm, green cucumbers with smooth skin.

Eat the peel

The peel contains extra fiber and nutrients. Wash well before eating.

Avoid heavy sauces

Creamy dressings can add unnecessary calories. Use lemon, herbs, or light yogurt instead.

Store properly

Keep cucumber refrigerated to maintain freshness and crispness.

Final Thoughts

Zero point cucumber is one of the easiest foods to add to a healthy lifestyle. It is low in calories, rich in water, and perfect for weight loss support. Whether you enjoy it in salads, snacks, or flavored water, cucumber offers simple nutrition that fits almost any diet plan.

If your goal is healthy eating, better hydration, and natural weight management, zero point cucumber can be a helpful part of your daily routine. Small changes like adding more fresh vegetables can make a big difference over time.

Cucumber may seem simple, but sometimes the simplest foods are the most powerful for long-term health.