If you’ve ever wanted to bake bread that feels like it came straight from a countryside bakery — crusty on the outside, soft and airy within, with a hint of natural sweetness — this recipe is for you. What makes it truly magical is its simplicity: no kneading, no eggs, no butter, and no complicated techniques. Just mix, rest, and bake. It’s bread in its purest, most comforting form — minimalist, wholesome, and unbelievably good.
🚀 Make Money Online – Up to $50 Per Day!
Ingredients
-
3 cups (360 g) all-purpose flour or bread flour
-
1 ½ teaspoons salt
-
½ teaspoon instant or active dry yeast
-
1 ½ cups (360 ml) warm water (about 100°F / 38°C)
-
1 teaspoon sugar or honey (optional, helps activate yeast)
-
1 tablespoon olive oil (optional, for a slightly richer texture)
-
Extra flour for dusting
Equipment
-
Large mixing bowl
-
Wooden spoon or silicone spatula
-
Plastic wrap or kitchen towel
-
Dutch oven or heavy lidded oven-safe pot (you can also use a baking sheet and water pan)
-
Parchment paper (optional but helpful)
Step-by-Step Directions
1. Mix the Dough (5 minutes)
In a large bowl, combine the flour, salt, and yeast. Stir with a spoon to evenly distribute the dry ingredients. Add warm water and, if using, sugar or honey. Mix until the dough comes together — it will look rough, sticky, and shaggy. That’s perfect! You’re not aiming for a smooth dough here.
Drizzle in the olive oil (if using) and give it one final stir. The dough should feel tacky and wet but not liquid. If it’s too dry, add a tablespoon of water; if too wet, sprinkle in a touch more flour.
Why it works:
The long resting period ahead allows the yeast to slowly ferment and develop gluten naturally — so no kneading is needed. Time does the hard work for you.
2. Rest and Rise (12 to 18 hours)
Cover the bowl tightly with plastic wrap or a damp towel. Let it rest at room temperature (ideally between 68–75°F / 20–24°C). Over the next 12 to 18 hours, the dough will double or even triple in size. You’ll see bubbles form on the surface — that’s the yeast creating flavor and structure.
Tip:
If your kitchen is cold, place the bowl inside an unheated oven with the light on for gentle warmth.
What’s happening:
The long fermentation gives this bread its signature flavor — mildly tangy, complex, and aromatic — much like artisan sourdough. It’s the secret to turning three humble ingredients into bakery-quality bread.
3. Shape the Dough (5 minutes)
After the rise, your dough will be soft, bubbly, and delicate. Lightly flour your hands and a clean surface. Gently scrape the dough out of the bowl — don’t punch it down or knead it! You want to preserve all that beautiful air inside.
Sprinkle a bit more flour over the top and fold the dough over itself a few times to form a loose round shape. Place it on parchment paper, seam side down. Cover again and let it rest for about 30–45 minutes while you preheat the oven.
4. Preheat the Oven (30 minutes)
Place your Dutch oven (or heavy pot with lid) inside the oven and preheat to 450°F (230°C) for at least 30 minutes. This ensures the pot is blazing hot — essential for a crisp, professional crust.
If you don’t have a Dutch oven, preheat a baking sheet and place an empty metal pan on the lower rack. You’ll add water to it later to create steam.
5. Bake to Perfection
When ready to bake, carefully remove the hot Dutch oven from the oven. Use the parchment paper to lift your dough and gently lower it into the pot. Cover with the lid and bake for 30 minutes.
After 30 minutes, remove the lid and bake for another 10–15 minutes, until the top is deeply golden brown with a rustic crackled crust.
If using a baking sheet instead: place the dough on the preheated sheet, then pour 1 cup of hot water into the lower pan and quickly close the oven door. The steam will give the bread a crisp crust.
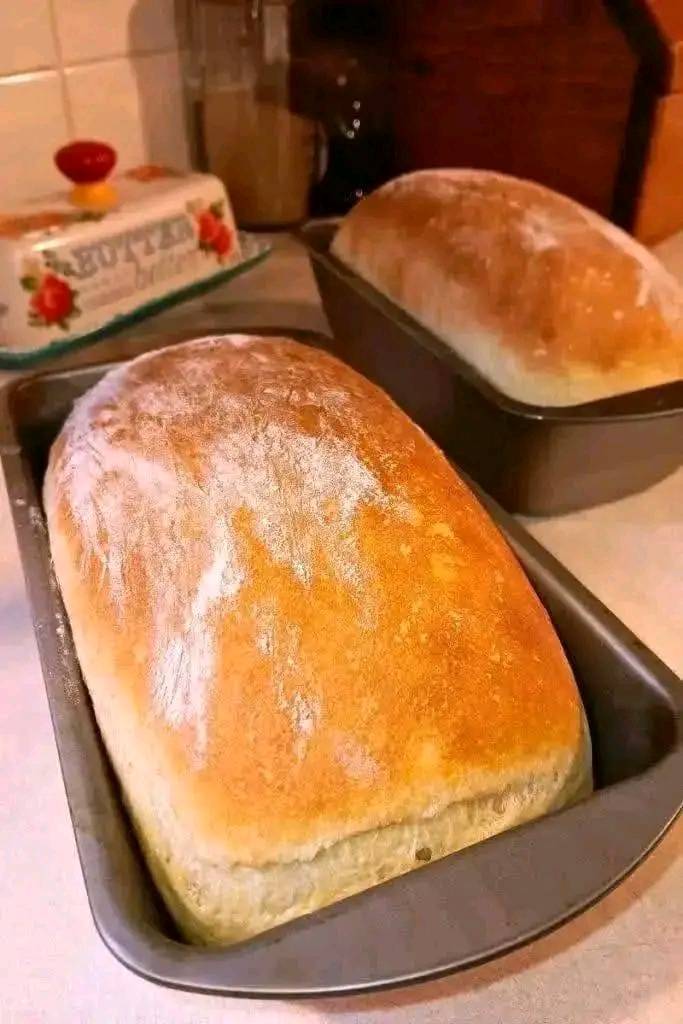
6. Cool and Admire
Transfer the baked loaf to a cooling rack. Wait at least 30 minutes before slicing — yes, patience matters! Cutting too soon releases the steam and can make the bread gummy inside.
Once cooled, slice into it and admire the open crumb — soft, airy holes, surrounded by a crisp, fragrant crust.
Why This Bread Is So Special
This recipe proves that great bread doesn’t need eggs, butter, or kneading. Instead, it relies on time and hydration to work magic. The yeast slowly digests the flour, producing natural flavor and structure. The result? A loaf that tastes as though it came from a stone oven in a small European village.
It’s naturally vegan and can easily be made with whole wheat flour or gluten-free flour blends. You can also customize it:
-
Add-ins: rosemary, garlic, olives, seeds, or dried fruit.
-
Toppings: brush the crust with olive oil or sprinkle sesame or sea salt before baking.
-
Texture tweaks: use slightly less water for a denser loaf or more for a more open crumb.
Bread Science: How It Works Without Kneading
Traditional bread recipes require kneading to develop gluten — the protein network that gives bread structure. But in this recipe, time replaces effort. The long fermentation allows enzymes to break down proteins, letting gluten form naturally. That’s why the dough transforms from shaggy to elastic overnight, all on its own.
Steam baking also plays a big role. The enclosed Dutch oven traps moisture, keeping the crust soft during the first half of baking so the loaf can expand fully. Once the lid is off, the crust hardens, creating that irresistible golden shell.
Serving Ideas
This no-knead loaf pairs beautifully with nearly anything. Try it:
-
Warm with olive oil, balsamic vinegar, and cracked pepper
-
Toasted with avocado, sea salt, and chili flakes
-
Alongside hearty soups, stews, or pasta
-
Topped with jam or honey for a rustic breakfast
-
As the base for gourmet sandwiches — think tomato, mozzarella, and basil
You can even transform stale slices into garlic croutons or bread pudding.
Storage Tips
-
Room Temperature: Store in a paper bag or wrapped in a clean kitchen towel for up to 2 days.
-
Longer Storage: Slice and freeze in a resealable bag for up to 2 months. Toast directly from frozen for fresh flavor.
-
Avoid plastic wrap for long storage — it traps moisture and softens the crust.
Final Thoughts
This no-knead, no-egg, no-butter bread isn’t just a recipe — it’s a reminder that the best food often comes from simplicity. With nothing more than flour, water, yeast, and salt, you can create something deeply satisfying, comforting, and timeless.
Whether you’re a beginner baker or a seasoned pro, this loaf invites you to slow down and trust the process. The result is a golden, crackly bread that fills your kitchen with warmth and your heart with pride — all without lifting a finger to knead.
