Discover a Natural Blend That Works Wonders for Your Joints, Legs, and Overall Circulation

In a world where long hours of sitting, daily stress, and inflammatory foods take a toll on our bodies, many people are searching for gentle, natural ways to support joint comfort, lighter legs, and healthy circulation. Nature, in its quiet wisdom, offers powerful allies that have been used for centuries to help the body restore balance. This unique tonic brings together three such ingredients in a simple, warming blend designed to support everyday mobility and well-being.

This recipe is not a miracle cure, but a nourishing ritual. When used consistently alongside a balanced lifestyle, it may help your body feel more fluid, energized, and supported from the inside out.

The Power of Three Natural Allies

What makes this tonic special is the thoughtful combination of ingredients that complement one another.

1. Turmeric Root
Turmeric is well known for its vibrant golden color and its long history in traditional wellness practices. It contains curcumin, a compound valued for its antioxidant properties. Turmeric is often used to support joint comfort and overall inflammation balance in the body. When gently heated and paired with the right ingredients, its benefits become easier for the body to absorb.

2. Fresh Ginger
Ginger brings warmth and gentle stimulation. Traditionally, it has been used to support digestion and circulation, especially in the legs and extremities. Its naturally warming nature makes it ideal for people who feel stiff, heavy, or sluggish, particularly in cooler weather or after long periods of inactivity.

3. Lemon and Raw Honey
Lemon adds brightness and supports hydration, while raw honey provides natural sweetness and a soothing quality. Together, they help balance the strong flavors of turmeric and ginger while offering their own supportive properties. Lemon is often associated with cleansing routines, and raw honey has long been valued for its comforting and nourishing qualities.

Unique Tonic Recipe (Serves 1–2)

Ingredients

  • 1 cup filtered water
  • 1 teaspoon freshly grated turmeric root (or ½ teaspoon turmeric powder)
  • 1 teaspoon freshly grated ginger root
  • Juice of ½ fresh lemon
  • 1 teaspoon raw honey (adjust to taste)
  • A pinch of black pepper (optional but recommended)

Why black pepper?
A small pinch of black pepper is traditionally used to help the body better utilize turmeric’s active compounds.

Preparation Method

  1. Pour the filtered water into a small saucepan and gently heat it over low to medium heat. Avoid boiling, as excessive heat can reduce the subtle qualities of the ingredients.
  2. Add the grated turmeric and ginger to the warm water. Stir gently and allow the mixture to simmer for 8 to 10 minutes.
  3. Remove the saucepan from heat and let it cool slightly.
  4. Strain the liquid into a mug.
  5. Add the lemon juice, raw honey, and a pinch of black pepper. Stir well.
  6. Sip slowly while warm.

How to Use This Tonic

For best results, enjoy this tonic once daily, preferably in the morning or early evening. Many people find it especially comforting after a long day on their feet or following gentle movement like walking or stretching.

Consistency is key. Think of this tonic as part of a broader self-care routine rather than a quick fix.

Supporting Your Results Naturally

While this blend can be a helpful addition, its effects are best supported by simple lifestyle habits:

  • Stay hydrated throughout the day
  • Move your body regularly with low-impact activities
  • Reduce highly processed, salty foods that may contribute to fluid retention
  • Elevate your legs when resting if you experience heaviness

A Gentle Reminder

This tonic is intended as a natural wellness drink, not a medical treatment. If you are pregnant, taking medication, or managing a medical condition, consult a qualified healthcare professional before adding new herbal routines to your day.

Final Thoughts

Sometimes the most powerful support comes not from complex solutions, but from simple, intentional rituals. This unique blend of turmeric, ginger, and lemon-honey water invites you to slow down, nourish your body, and reconnect with nature’s quiet strength. Over time, this warm, golden tonic may become a comforting ally for your joints, legs, and overall circulation, one soothing sip at a time.
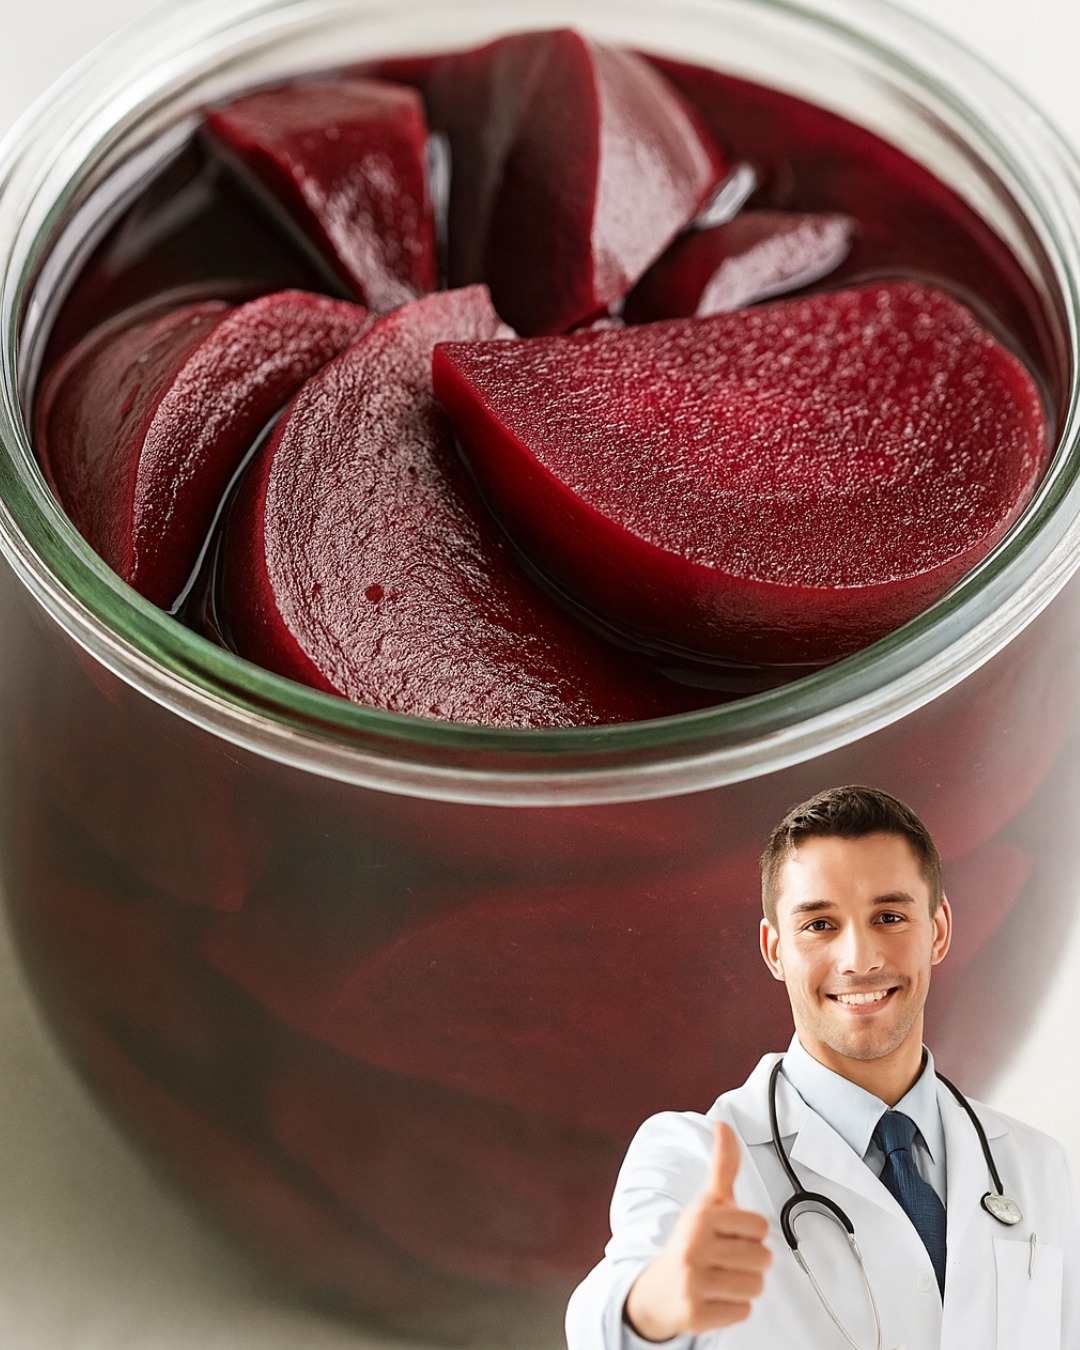

What Happens to Your Body When You Start Eating Beets Every Day: Doctors Explain the Real Changes

Beets may look humble, but this deep-red root vegetable has quietly earned a reputation as a nutritional powerhouse. Doctors and nutrition experts often point to beets as one of those foods that can create noticeable changes in the body when eaten regularly. If you start eating beets every day, here is what really happens inside your body, beyond the internet hype.

1. Your Blood Flow May Improve

One of the most studied benefits of beets comes from their high nitrate content. In the body, natural nitrates convert into nitric oxide, a compound that helps relax and widen blood vessels. Doctors explain that this can improve circulation and support healthier blood pressure levels. For many people, better blood flow translates into feeling warmer in the hands and feet, improved stamina, and better overall cardiovascular support.

2. Your Energy Levels Can Feel More Stable

Beets are popular among athletes for a reason. Improved blood flow means muscles may receive oxygen more efficiently. While beets are not a stimulant like caffeine, many people notice a steadier, more sustained sense of energy after adding them to daily meals. Doctors emphasize that this is not a sudden “energy rush” but a gradual improvement in endurance and reduced fatigue during physical activity.

3. Your Digestion Gets a Boost

Beets contain a good amount of dietary fiber, which supports healthy digestion. Eating them daily can help regulate bowel movements and support beneficial gut bacteria. Doctors often note that fiber-rich foods like beets may reduce bloating over time and help the digestive system work more smoothly. However, they also advise starting with moderate portions, as a sudden increase in fiber can cause temporary gas or discomfort.

4. Your Liver Gets Extra Support

The natural compounds in beets, including betaine, play a role in supporting liver function. Doctors explain that betaine helps the liver process fats more efficiently and supports natural detox pathways. While beets are not a “detox cure,” regularly eating them may help the liver do its job more effectively as part of a balanced diet.

5. Your Brain May Benefit

Improved circulation does not only help the heart and muscles. Better blood flow can also support brain health. Some doctors point out that nitric oxide production from beets may help maintain healthy blood flow to the brain, which is linked to mental clarity and focus. Over time, this may support cognitive function, especially as we age.

6. You Might Notice Color Changes

One of the most surprising effects of eating beets every day is something called beeturia. This harmless condition causes urine or stool to appear pink or red. Doctors stress that this is completely normal and not a cause for concern. It simply means your body is processing beet pigments, and it happens to a significant number of people.

7. Your Inflammation Levels May Decrease

Beets contain antioxidants called betalains, which help fight oxidative stress in the body. Doctors explain that these compounds may help reduce inflammation over time. Lower inflammation is linked to better joint comfort, improved recovery after exercise, and overall long-term health support.

8. Your Skin Can Look Healthier

Thanks to their vitamin C, iron, and antioxidant content, beets may also support skin health. Regular consumption can contribute to better oxygen delivery to skin cells and help protect against oxidative damage. While beets are not a skincare miracle, doctors agree they can support a healthy glow from the inside out.

A Unique Daily Beet Recipe: Warm Citrus Beet Bowl with Spiced Yogurt Drizzle

This recipe is designed to be flavorful, easy to digest, and enjoyable enough to eat regularly.

Ingredients

  • 2 medium beets, peeled and grated

  • 1 teaspoon olive oil

  • Zest and juice of ½ orange

  • ½ teaspoon ground cumin

  • ¼ teaspoon cinnamon

  • Salt to taste

  • ½ cup plain Greek yogurt

  • 1 teaspoon honey

  • Pinch of black pepper

  • Fresh parsley or mint for garnish

Instructions

  1. Heat olive oil in a pan over medium heat.

  2. Add grated beets and sauté for 5 to 7 minutes until tender.

  3. Stir in orange zest, orange juice, cumin, cinnamon, and salt. Cook for another 2 minutes.

  4. In a small bowl, mix yogurt, honey, and black pepper.

  5. Spoon warm beets into a bowl and drizzle with the spiced yogurt.

  6. Garnish with fresh herbs and serve warm.

Why This Recipe Works

Cooking the beets lightly makes them easier to digest while preserving nutrients. The citrus enhances iron absorption, and the yogurt adds protein and gut-friendly probiotics.

Final Thoughts

Doctors agree that eating beets every day can support heart health, digestion, energy, and overall wellness when included as part of a balanced diet. The key is consistency and moderation. Whether roasted, juiced, or gently sautéed, beets offer real, noticeable changes that go far beyond their bold color.

Why Soursop Leaves Continue to Spark Curiosity Worldwide

Across tropical gardens, backyard trees, and herbal markets, soursop leaves—harvested from the Annona muricata tree—have quietly maintained a reputation that stretches far beyond their native regions. From the Caribbean and Central America to West Africa and Southeast Asia, these deep-green leaves continue to spark curiosity, conversation, and careful study. What makes them so fascinating is not a single miracle claim, but a blend of tradition, culture, evolving science, and a growing global interest in plant-based wellness.

A Plant Rooted in Tradition

Long before modern laboratories showed interest, soursop leaves were already valued in traditional practices. In many cultures, elders passed down knowledge of boiling the leaves into teas or infusions as part of daily routines or seasonal rituals. These uses were never about quick fixes; they were tied to balance, comfort, and maintaining general well-being. This long-standing cultural trust is one of the main reasons the leaves continue to attract attention today.

The Rise of Natural Wellness Curiosity

In recent decades, people around the world have become more interested in natural remedies and plant-based lifestyles. As consumers began questioning synthetic ingredients and heavily processed products, attention shifted toward plants with a history of traditional use. Soursop leaves, with their distinctive aroma and bold appearance, naturally became part of this conversation. Social media, wellness blogs, and global travel further accelerated awareness, introducing the leaves to audiences who had never seen a soursop tree before.

What Makes the Leaves Unique

Botanically speaking, soursop leaves are rich in naturally occurring plant compounds such as acetogenins, flavonoids, and alkaloids. These substances are not unique to soursop alone, but their particular combination has drawn scientific interest. Researchers study these compounds to better understand how plants protect themselves in nature, and whether those same properties may offer benefits when used responsibly by humans. This intersection between traditional knowledge and scientific curiosity keeps soursop leaves firmly in the spotlight.

The Role of Research and Debate

One major reason soursop leaves continue to spark worldwide curiosity is the ongoing debate surrounding them. Some laboratory studies have explored how compounds in the leaves behave under controlled conditions, while health professionals urge caution against overstated claims. This contrast—between promising research and the need for responsible interpretation—keeps the topic alive. People are naturally curious about plants that sit at the crossroads of folklore and modern science.

A Symbol of Cultural Identity

For many communities, soursop leaves are more than a wellness trend; they are a symbol of heritage. Caribbean households, for example, often associate the scent of simmering leaves with family gatherings or comforting routines. In parts of Africa and Asia, the tree itself represents resilience and abundance. As globalization spreads food and wellness traditions across borders, soursop leaves become cultural ambassadors, telling stories of the regions they come from.

Global Accessibility Fuels Interest

Another reason for their rising popularity is accessibility. Dried soursop leaves are now sold in herbal shops and online marketplaces worldwide. This easy access invites experimentation and learning. People who may never taste fresh soursop fruit can still experience the leaves through teas or herbal blends. With accessibility comes curiosity—people want to know where the leaves come from, how they are used traditionally, and what role they might play in modern lifestyles.

The Importance of Responsible Use

Curiosity, however, comes with responsibility. While soursop leaves are widely discussed, experts consistently emphasize moderation and informed use. Traditional practices often involved occasional consumption rather than daily, long-term use. Modern conversations increasingly highlight the importance of consulting qualified professionals before incorporating any herbal product into regular routines, especially for individuals with existing health conditions.

Why the Fascination Endures

Soursop leaves continue to fascinate the world because they represent something deeper than a single benefit. They embody humanity’s enduring relationship with nature—the desire to learn from plants, respect ancestral wisdom, and explore possibilities without losing caution. Each cup of leaf infusion or bundle of dried leaves carries stories of tropical landscapes, family traditions, and ongoing scientific inquiry.

A Living Conversation

Ultimately, soursop leaves remain a living conversation rather than a closed chapter. As research evolves and cultural exchange continues, interest in these leaves is likely to grow rather than fade. They remind us that curiosity does not always come from certainty; sometimes it comes from the mystery itself. In a world increasingly drawn back to natural roots, soursop leaves stand as a symbol of how tradition and modern curiosity can coexist—quietly, persistently, and globally.

My nana swore by this: Mix 2 things to Vaseline & use it daily to erase wrinkles for good

My nana had the kind of skin that made people lean in closer. Even in her seventies, her face looked soft, smooth, and deeply cared for. She never used expensive creams, never chased trends, and never stepped foot in a beauty clinic. When asked about her secret, she would smile and say, “Use what works, and use it faithfully.”

Her favorite remedy was simple, affordable, and made from items she already had at home. While it is not a miracle cure or a way to permanently erase wrinkles, it is a deeply nourishing routine that can help soften the appearance of fine lines, support skin moisture, and give your face a healthier glow over time.

Here is the recipe she swore by.

The Three Ingredients

1. Vaseline (Petroleum Jelly)
Vaseline was the foundation of her routine. It is an occlusive, meaning it locks moisture into the skin and prevents water loss. Well-hydrated skin naturally looks plumper, smoother, and more youthful. Vaseline does not add moisture by itself, but it seals in whatever moisture or nutrients you apply underneath it.

2. Vitamin E Oil
Vitamin E is a powerful antioxidant. It helps protect the skin from environmental stress, supports skin barrier repair, and contributes to a smoother appearance. Nana believed vitamin E helped her skin “stay calm and soft,” especially as she aged.

3. Aloe Vera Gel
Fresh aloe vera gel or pure aloe gel adds hydration and soothing benefits. Aloe is known for calming irritation, improving skin comfort, and giving the skin a refreshed look. It also helps balance the heaviness of Vaseline so the mixture feels more wearable.

Nana’s Simple Recipe

You will need:

  • 1 tablespoon Vaseline

  • 1 teaspoon vitamin E oil (from capsules or a bottle)

  • 1 teaspoon pure aloe vera gel

How to prepare:

  1. Place the Vaseline in a clean bowl.

  2. Add the vitamin E oil and aloe vera gel.

  3. Mix slowly until fully blended and creamy.

  4. Store in a small, clean container with a lid.

This mixture should be kept in a cool, dry place and used within two to three weeks for freshness.

How Nana Used It

Nana always applied this at night. She believed nighttime was when skin did its best repair work.

  1. She gently cleansed her face and left it slightly damp.

  2. She warmed a pea-sized amount of the mixture between her fingers.

  3. She pressed it gently into her skin, focusing on areas prone to fine lines such as the forehead, around the mouth, and under the eyes.

  4. She never rubbed aggressively. “Kind hands make kind skin,” she would say.

She used it every night, consistently, without skipping days.

Why This Routine Can Help Skin Look Smoother

This recipe works because it focuses on hydration and protection rather than harsh treatments. Dry skin makes wrinkles appear deeper. By sealing in moisture, supporting the skin barrier, and soothing irritation, the skin can appear more supple and relaxed.

With regular use, many people notice:

  • Softer-looking fine lines

  • Improved skin comfort

  • A healthy, natural glow

  • Skin that feels nourished and resilient

It is important to understand that no topical remedy can permanently erase wrinkles. Aging is natural and beautiful. This routine helps the skin look its best at every stage.

Important Tips Nana Followed

  • Always patch test before using any new mixture.

  • Use a very small amount. More is not better.

  • Apply only at night, especially if you have oily or acne-prone skin.

  • Drink water and eat nourishing foods. Nana believed skin care started from within.

  • Be patient. Results come from consistency, not overnight miracles.

Who Should Avoid This

If you have very acne-prone skin or are sensitive to heavy occlusives, this mixture may feel too rich. In that case, use it only on targeted areas or once or twice a week.

Nana’s Real Secret

The truth is, her skin was not perfect. She had lines, stories, and years written on her face. What made her glow was care, patience, and consistency. This little jar was just one part of how she honored herself daily.

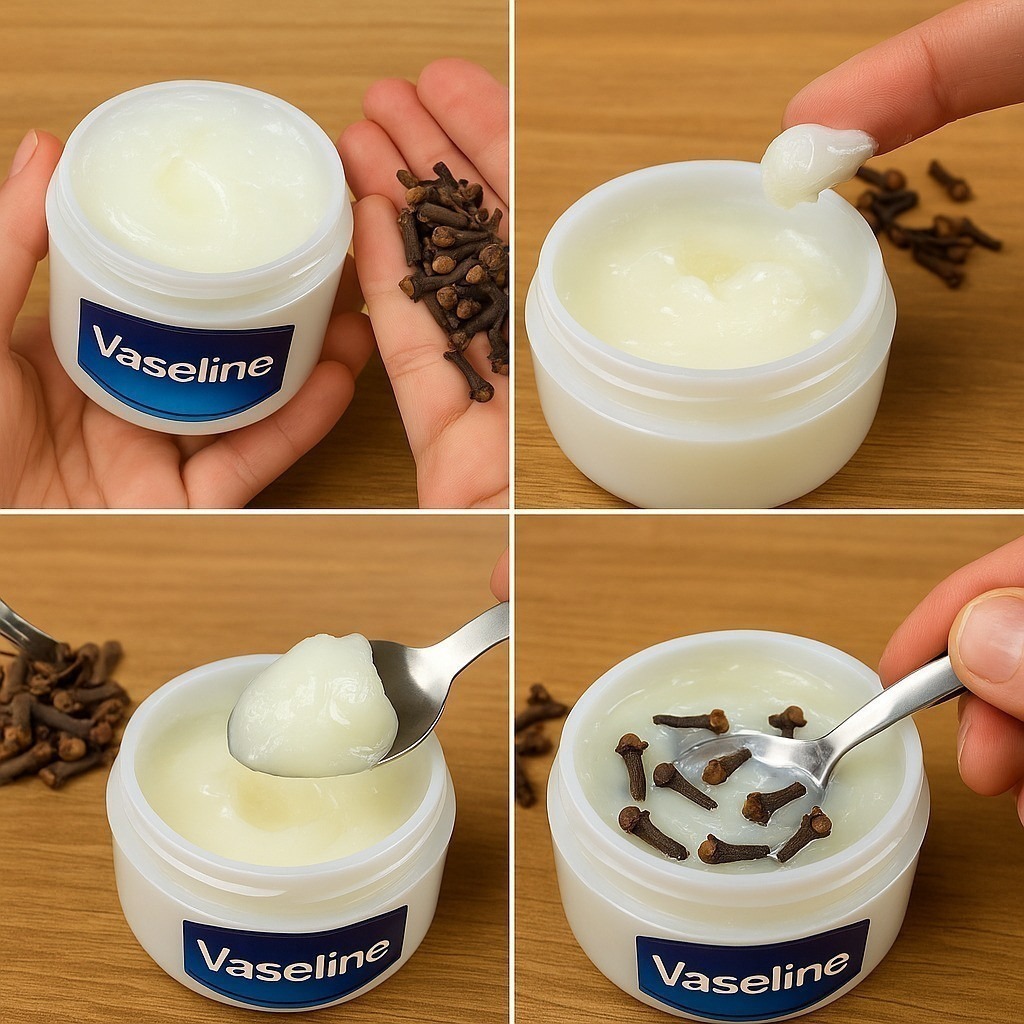
Mix cloves with petroleum jelly: a secret no one will ever tell you. You’ll thank me later

For centuries, natural ingredients have been the heart of home remedies. Among the most powerful is the humble clove—a spice packed with antimicrobial, antifungal, and anti-inflammatory properties. When combined with petroleum jelly, it transforms into a soothing balm known in traditional medicine for relieving aches, improving circulation, and softening rough skin. This remedy is simple, effective, and made with ingredients you likely already have in your kitchen and medicine cabinet.

Let’s explore this ancient blend, how to prepare it, and how to use it safely and effectively.

Why Cloves Work

Cloves are not just aromatic; they contain a natural compound called eugenol, which gives them their strong medicinal value. Eugenol is widely used in dental treatments for pain relief and infection prevention. In natural healing, cloves are prized for:

  • Reducing inflammation and swelling

  • Easing joint and muscle pain

  • Fighting bacteria and fungi

  • Improving blood circulation

  • Stimulating collagen and skin repair

This makes cloves an excellent choice for balms, oils, and natural skincare.

Why Petroleum Jelly Helps

Petroleum jelly is an occlusive moisturizer, meaning it forms a protective barrier on the skin to lock in moisture and prevent dryness. It is commonly used for:

  • Healing cracked heels and dry elbows

  • Protecting the skin from irritation

  • Enhancing absorption of herbal remedies

  • Acting as a base for medicinal balms

When infused with cloves, it becomes a natural healing ointment for multiple uses.

Clove & Petroleum Jelly Balm – Full Recipe

Ingredients

  • 1 tablespoon whole cloves (or 1 teaspoon clove powder)

  • 3 tablespoons petroleum jelly

  • 1 tablespoon olive oil (optional, for smoother texture)

Preparation Method

  1. Crush the cloves:
    Use a mortar and pestle or a spoon to crush the cloves into a fine powder. This helps release the natural oils.

  2. Melt the petroleum jelly:
    Place the petroleum jelly in a small heat-safe bowl. Warm it gently using a double boiler method or microwave for 15–20 seconds until it becomes liquid.

  3. Infuse the cloves:
    Add the crushed cloves into the melted jelly. Stir slowly and thoroughly.

  4. Optional smoothing:
    Mix in the olive oil if you want a softer, more spreadable balm.

  5. Strain (optional):
    For a smoother balm, strain out the clove particles using a fine cloth. If you prefer a stronger blend, keep them in.

  6. Cool and store:
    Allow the mixture to cool and solidify at room temperature. Store in a small airtight jar.

How to Use the Balm

1. For Joint & Muscle Pain

Rub a small amount onto sore knees, shoulders, wrists, or back. Massage gently for 5–10 minutes.
Use twice daily for best results.

The eugenol in cloves helps reduce inflammation and warms the area, improving blood flow and easing stiffness.

2. For Cracked Heels & Dry Skin

Apply before bed and wear socks overnight.
Repeat for 7 days to soften hard skin and repair cracks.

Petroleum jelly locks in moisture while cloves prevent infections and speed healing.

3. For Circulation Boost

Massage onto feet or legs for 10 minutes.
This stimulates circulation and reduces numbness or cold sensations.

Especially helpful for people who sit or stand for long hours.

4. For Nail and Cuticle Health

Apply lightly around the nails to prevent fungal growth and strengthen weak cuticles.

5. For Chest Congestion

Rub on the chest before sleep for mild respiratory relief.
The clove aroma helps open airways and soothe breathing.

Benefits of This Balm

  • Relieves pain naturally

  • Improves skin hydration

  • Protects against fungal and bacterial infections

  • Enhances circulation

  • Encourages faster healing of cracked skin

  • Promotes soft and healthy feet

This remedy is especially loved in traditional households for being affordable, natural, and multipurpose.

Safety Tips

While cloves are natural, they are potent. Follow these guidelines:

  • Do a patch test first to avoid irritation

  • Avoid using on open wounds

  • Do not apply near eyes

  • Not recommended for children under 5

  • Pregnant women should consult a doctor before use

  • Use only externally

Storage

Keep the balm in a cool, dry place. It lasts up to 6 months if stored properly.

Final Thoughts

This clove and petroleum jelly remedy is a small but powerful addition to your natural healing toolkit. It combines the deep warming and antimicrobial power of cloves with the moisture-locking benefits of petroleum jelly to create a soothing balm that can be used daily.

Could One Simple Daily Juice Support Healthy Blood Pressure and Better Circulation? A Unique, Everyday Recipe

Many people looking to support healthy blood pressure and circulation assume they need complicated supplements or drastic diet changes. In reality, small, consistent habits often make the biggest difference. One such habit is a thoughtfully designed daily juice made from whole, nutrient-dense ingredients. While no single drink can replace medical care or guarantee results, a well-balanced juice can gently support the body’s natural systems when paired with a healthy lifestyle.

Below is a unique, easy-to-make juice recipe created specifically with circulation and blood pressure support in mind. It focuses on hydration, natural nitrates, potassium-rich produce, antioxidants, and anti-inflammatory compounds, all working together in a simple daily ritual.

Why Juice Can Play a Supportive Role

Blood pressure and circulation are influenced by many factors, including hydration, mineral balance, inflammation levels, and blood vessel flexibility. Whole fruits and vegetables contain naturally occurring compounds that help the body regulate these processes.

A carefully crafted juice may help by:

  • Supporting nitric oxide production, which helps blood vessels relax

  • Providing potassium to balance sodium levels

  • Delivering antioxidants that protect blood vessel walls

  • Improving hydration, which supports smoother blood flow

The key is balance, not sugar-heavy fruit blends or extreme cleanses.

The Daily Circulation Support Juice (Unique Recipe)

Ingredients (1 serving):

  • 1 medium beet (raw, peeled)

  • 1 small cucumber

  • 1 green apple

  • 1 cup fresh spinach

  • 1 celery stalk

  • Juice of ½ lemon

  • ½ inch fresh ginger root

  • 1 cup cold water (or coconut water for added potassium)

Why These Ingredients Were Chosen

Beet:
Beets are naturally rich in dietary nitrates, which the body converts into nitric oxide. This compound supports relaxed blood vessels and healthy circulation. Beets also contain betalains, antioxidants that help reduce oxidative stress.

Cucumber:
Cucumber is highly hydrating and contains potassium and magnesium. Proper hydration supports blood volume balance and circulation without overloading calories or sugar.

Green Apple:
Green apples add mild sweetness while providing polyphenols and soluble fiber. These compounds support heart health without causing sharp blood sugar spikes.

Spinach:
Spinach is rich in potassium, magnesium, and plant-based nitrates. It also provides folate, which plays a role in cardiovascular function.

Celery:
Celery contains natural compounds that may help relax blood vessel walls. It is also low in sugar and adds a refreshing, savory note to the juice.

Lemon Juice:
Lemon adds vitamin C and enhances antioxidant absorption. Its acidity also balances flavors and supports digestion.

Ginger:
Ginger is well known for its anti-inflammatory and circulation-supporting properties. It may help improve blood flow by supporting healthy vessel function.

Water or Coconut Water:
Water ensures proper hydration, while coconut water adds extra potassium if needed, supporting electrolyte balance.

How to Prepare

  1. Wash all produce thoroughly.

  2. Chop ingredients into blender- or juicer-friendly pieces.

  3. Add everything to a blender or juicer.

  4. Blend until smooth. If using a blender, strain if desired.

  5. Drink immediately for maximum nutrient retention.

When and How to Drink It

For most people, this juice works best:

  • In the morning on an empty stomach

  • Or mid-morning between meals

Drinking it consistently, rather than occasionally, is what makes it supportive. Aim for 3 to 5 times per week, not necessarily every single day.

Lifestyle Tips to Enhance the Benefits

This juice works best as part of a bigger picture. Consider pairing it with:

  • Regular walking or light exercise

  • Reduced intake of heavily processed foods

  • Mindful sodium consumption

  • Stress management practices like breathing or stretching

The juice supports your system, but your daily habits guide the results.

Important Notes on Safety

This juice is made from common foods, but a few considerations are important:

  • If you are on blood pressure medication, consult a healthcare professional before making dietary changes

  • Beets can temporarily tint urine or stools, which is normal

  • Start with smaller portions if you are new to raw vegetable juices

This recipe is supportive, not a treatment or cure.

Final Thoughts

So, could one simple daily juice support healthy blood pressure and better circulation? On its own, it is not a miracle. But as a consistent habit, this unique blend can gently nourish the body with hydration, minerals, antioxidants, and plant compounds that naturally support vascular health.

10 Signs You’re Not Drinking Enough Water – Stay Hydrated

Water is the foundation of life, yet many people underestimate how important proper hydration really is. Your body is made up of about 60 percent water, and nearly every system depends on it to function well. From regulating temperature to supporting digestion and brain function, water plays a vital role. When you do not drink enough, your body sends warning signals that are easy to overlook or misinterpret. Here are ten common signs you may not be drinking enough water, and why staying hydrated is essential for your overall well-being.

1. Constant Thirst
Thirst is the most obvious sign of dehydration, yet many people ignore it. When your body is low on fluids, it triggers thirst to encourage you to drink. If you frequently feel thirsty, it likely means you are already mildly dehydrated. Ideally, you should drink water regularly throughout the day rather than waiting until thirst becomes intense.

2. Dark Yellow Urine
Your urine color is one of the simplest ways to check hydration levels. Pale yellow or clear urine usually indicates good hydration, while dark yellow or amber-colored urine suggests you need more water. If you notice a strong odor as well, it is another sign your body is conserving fluids.

3. Fatigue and Low Energy
Feeling tired even after adequate sleep can be linked to dehydration. Water helps transport oxygen and nutrients to your cells. When you are dehydrated, this process becomes less efficient, leading to feelings of sluggishness, weakness, and low energy throughout the day.

4. Headaches and Dizziness
Dehydration can cause the brain to temporarily shrink due to fluid loss, which may lead to headaches or dizziness. If you often experience headaches that improve after drinking water, dehydration could be the underlying cause. Even mild dehydration can affect concentration and mental clarity.

5. Dry Skin and Lips
Your skin is the largest organ in your body and requires water to stay healthy. Dry, flaky skin or cracked lips may indicate that you are not drinking enough water. While moisturizers help externally, proper hydration works from within to maintain skin elasticity and softness.

6. Digestive Problems
Water is essential for digestion. It helps break down food and supports smooth bowel movements. Not drinking enough water can lead to constipation, bloating, or stomach discomfort. Adequate hydration keeps your digestive system running efficiently and reduces strain on your gut.

7. Increased Hunger or Sugar Cravings
Sometimes your body confuses thirst with hunger. If you find yourself snacking frequently or craving sugary foods, it may be your body’s way of asking for water. Drinking a glass of water before reaching for a snack can help you determine whether you are truly hungry or just dehydrated.

8. Muscle Cramps and Joint Discomfort
Water helps lubricate joints and maintain electrolyte balance. When you are dehydrated, muscles may cramp more easily, especially during or after physical activity. Joint stiffness or discomfort can also worsen when your body lacks adequate fluids.

9. Bad Breath
Saliva has antibacterial properties that help keep your mouth clean. Dehydration reduces saliva production, allowing bacteria to grow and cause bad breath. Drinking enough water helps flush out food particles and supports oral health naturally.

10. Difficulty Focusing and Mood Changes
Even mild dehydration can affect your mood and cognitive function. You may feel irritable, anxious, or have trouble focusing on tasks. Your brain relies heavily on proper hydration to function optimally, so drinking enough water can improve mental clarity and emotional balance.

How to Stay Properly Hydrated
Staying hydrated does not have to be complicated. Carry a reusable water bottle, sip water regularly, and increase intake during hot weather or physical activity. Eating water-rich foods such as fruits and vegetables can also help meet your hydration needs. While individual needs vary, listening to your body and paying attention to these signs can guide you.

Conclusion
Your body constantly communicates its needs, and dehydration is one of the most common yet overlooked issues. By recognizing these ten signs and making hydration a daily priority, you can improve your energy levels, digestion, skin health, and overall well-being. Drinking enough water is a simple habit that delivers powerful benefits. Stay hydrated, and your body will thank you.

Pineapple Coconut Dream Cake

This Pineapple Coconut Dream Cake is the ultimate tropical dessert. It combines the sweetness of pineapple with the nutty richness of coconut, creating a cake that feels like a vacation in every bite. The texture is incredibly moist thanks to crushed pineapple folded right into the batter, and the creamy coconut frosting takes it over the top. Whether you’re baking for a family gathering, Eid celebration, or simply to treat yourself, this cake will quickly become a favorite.

Ingredients

For the Cake:

  • 2½ cups all-purpose flour

  • 2 tsp baking powder

  • ½ tsp baking soda

  • ½ tsp salt

  • 1 cup unsalted butter, softened

  • 1¾ cups granulated sugar

  • 4 large eggs

  • 1 cup canned crushed pineapple (with juice)

  • 1 cup coconut milk

  • 1 tsp vanilla extract

  • ½ tsp coconut extract (optional)

  • 1 cup sweetened shredded coconut

For the Coconut Cream Frosting:

  • 1 cup unsalted butter, softened

  • 4 cups powdered sugar

  • ½ cup coconut milk

  • 1 tsp vanilla extract

  • ½ tsp coconut extract

  • 1½ cups shredded coconut for garnish

Instructions

Step 1: Prepare the Cake Batter

Preheat your oven to 350°F (175°C). Grease and flour two 9-inch round cake pans. In a large bowl, whisk together the flour, baking powder, baking soda, and salt. This ensures the cake rises evenly and gives a light, fluffy crumb.

In another bowl, cream the butter and sugar together until pale and fluffy. This step adds air to the batter, making the cake soft and tender. Beat in the eggs one at a time, mixing well after each addition. Stir in the vanilla and coconut extracts.

Next, mix in the crushed pineapple with its juice. The pineapple keeps the cake extra moist and adds a natural sweetness and tangy flavor. Alternate adding the dry flour mixture and the coconut milk into the batter, mixing gently after each addition. Fold in the shredded coconut.

Step 2: Bake the Cake

Divide the batter evenly between the prepared cake pans. Smooth the tops with a spatula and bake for 28–32 minutes, or until a toothpick inserted into the center comes out clean. Let the cakes cool completely before frosting.

Make the Coconut Cream Frosting

In a mixing bowl, beat the butter until creamy. Gradually add powdered sugar and continue beating until light and fluffy. Add coconut milk, vanilla extract, and coconut extract. Beat until the frosting becomes smooth and spreadable. If it feels too thick, add a tablespoon of coconut milk at a time.

Assemble the Cake

Place one cake layer on a serving plate. Spread a thick layer of coconut frosting on top. Add the second cake layer and frost the entire cake, smoothing it evenly. Sprinkle shredded coconut over the top and sides for a dreamy finish. For extra flair, garnish with pineapple slices or toasted coconut flakes.

Serving Suggestions

Chill the cake for about 20 minutes before slicing to allow the frosting to set. This cake pairs beautifully with tea, coffee, or even fresh mango juice. The tropical pineapple-coconut flavor makes it refreshing yet indulgent.

Tips for the Perfect Dream Cake

  • Use full-fat coconut milk for the richest flavor.

  • Do not drain the pineapple — the juice is what makes the cake moist.

  • Toast some coconut flakes for garnish if you want a slightly nutty crunch.

  • Store leftovers in the refrigerator for up to 4 days.

Why You’ll Love This Cake

This Pineapple Coconut Dream Cake is soft, fluffy, and full of tropical charm. It’s not overly sweet, yet it feels luxurious and special. The pineapple keeps it juicy, and the coconut frosting melts into every layer, creating the perfect balance of sweetness and texture.

Spread canned peaches and these 3 ingredients in slow cooker for a warm dessert people scrape the spoon

This dessert is the definition of easy meets irresistible. With only three extra ingredients plus canned peaches, you’ll get a soft, cake-like cobbler that forms its own golden topping and syrupy peach layer underneath. The slow cooker does all the magic, so you can “set it and forget it.”

Why This Recipe Works

Canned peaches are already sweet and tender, so they’re perfect for slow cooking. When combined with cake mix, butter, and cinnamon sugar, they create a rich, caramelized base that slowly bubbles and thickens into a soft cobbler-like dessert.

The cake mix absorbs the peach juices, the butter melts into the mixture, and the cinnamon adds warmth and aroma. The result is a fluffy, spoonable peach cake with crispy edges and a thick, syrupy bottom.

This is one of those desserts that tastes like it took hours of effort — but it’s unbelievably simple.

Ingredients

You only need four ingredients total:

  • 1 large can (28–30 oz) sliced peaches in syrup (don’t drain)

  • 1 box yellow cake mix (about 15–16 oz)

  • ½ cup (1 stick) unsalted butter, sliced thin

  • ¼ cup cinnamon sugar (or mix 2 tbsp sugar + 1 tsp cinnamon)

That’s it. No eggs. No milk. No mixing bowls. No stress.

Instructions

Step 1: Prepare the slow cooker
Lightly grease the inside of your slow cooker with butter or cooking spray. This prevents sticking and helps the edges brown nicely.

Step 2: Add the peaches
Pour the entire can of peaches (including the syrup) into the bottom of the slow cooker. Spread them evenly so the fruit is distributed across the base.

Step 3: Sprinkle the cake mix
Open the box of yellow cake mix and sprinkle the dry mix evenly over the peaches. Do not stir — this is what creates the layered effect.

Step 4: Add the butter
Place the thin slices of butter on top of the cake mix, spacing them out to cover most of the surface. As the butter melts, it soaks into the cake and creates that rich cobbler topping.

Step 5: Sprinkle cinnamon sugar
Dust the cinnamon sugar over everything for warmth, sweetness, and a beautiful golden color.

Step 6: Cook
Cover and cook on LOW for 3–4 hours or HIGH for 2 hours. The dessert is ready when the top looks set and lightly browned and the edges are bubbling.

What You’ll See

As it cooks, the peaches will release syrup, which rises through the cake mix and butter. The top forms a tender, golden crust, while underneath becomes a thick, jammy peach filling.

When you scoop it, you’ll get a fluffy cake layer on top and juicy peaches below — just like a cobbler, but softer and more spoonable.

Serving Suggestions

Serve this dessert warm, straight from the slow cooker. It pairs beautifully with:

  • Vanilla ice cream

  • Whipped cream

  • A drizzle of caramel sauce

  • A sprinkle of chopped nuts

For an extra special touch, add a pinch of sea salt on top — it enhances the sweetness and makes the flavors pop.

Flavor Variations

You can customize this basic recipe easily:

Peach and Berry Blend:
Add a handful of frozen blueberries or strawberries before sprinkling the cake mix.

Peach Caramel Swirl:
Drizzle caramel sauce over the cake mix before adding the butter.

Peach Almond Delight:
Add ½ teaspoon almond extract to the peaches for a nutty, bakery-style flavor.

Spiced Peach Cobbler:
Add nutmeg, cloves, or ginger along with the cinnamon sugar for a deeper, autumn-inspired taste.

Make It Less Sweet

If you prefer a lighter dessert:

  • Use peaches packed in juice instead of syrup

  • Reduce the butter to ¼ cup

  • Use a spice cake mix for more warmth and less sugar

Storage and Reheating

Store leftovers in an airtight container in the refrigerator for up to 3 days.

To reheat, microwave individual portions for 30–40 seconds or warm it gently in a saucepan. It becomes even more flavorful the next day.

Perfect for Any Occasion

This slow cooker peach dessert is ideal for:

  • Family dinners

  • Potlucks

  • Holiday gatherings

  • Weeknight sweet cravings

It’s comforting, nostalgic, and incredibly easy — the kind of dessert that feels homemade and heartfelt.

Final Thoughts

With just canned peaches, cake mix, butter, and cinnamon sugar, you get a warm, indulgent dessert that tastes like a cross between cobbler and pudding cake. It’s soft, gooey, and rich — the kind of treat that disappears quickly and leaves everyone asking for seconds.

Crockpot Cream Cheese Chicken – The Ultimate Dump-and-Cook Comfort Meal

When you want a dinner that feels indulgent yet requires almost no effort, this creamy crockpot chicken recipe is the answer. It’s one of those magical “set it and forget it” meals where the crockpot does all the work. You simply place the raw chicken breasts inside, layer cream cheese on top, add a few pantry staples, and let slow cooking transform it into a luscious, savory, melt-in-your-mouth meal.

This dish creates a thick, velvety sauce that pairs beautifully with rice, mashed potatoes, pasta, or even crusty bread. The cream cheese slowly melts into the chicken juices, forming a naturally rich gravy that coats every bite.

Ingredients

  • 4 large raw chicken breasts

  • 2 blocks (8 oz each) cream cheese

  • 1 packet ranch seasoning mix

  • 1 teaspoon garlic powder

  • 1 teaspoon onion powder

  • ½ teaspoon black pepper

  • ½ teaspoon paprika

  • 1 cup chicken broth

  • ½ cup grated parmesan cheese

  • 1 tablespoon butter

  • 1 tablespoon olive oil

  • Optional: chopped parsley for garnish

Instructions

Step 1 – Prepare the Crockpot

Drizzle the olive oil and butter at the bottom of the crockpot. This prevents sticking and adds extra flavor.

Step 2 – Add the Chicken

Lay the raw chicken breasts flat at the bottom of the crockpot. No need to pre-cook or season separately — everything happens right inside the pot.

Step 3 – Season

Sprinkle the ranch seasoning packet evenly over the chicken. Add garlic powder, onion powder, paprika, and black pepper for a balanced savory taste.

Step 4 – Add Cream Cheese Blocks

Place both blocks of cream cheese directly on top of the chicken breasts. Do not mix or spread — they will melt down naturally during cooking.

Step 5 – Pour the Broth

Slowly pour the chicken broth along the sides of the crockpot to avoid washing off the seasoning.

Step 6 – Cook

Cover and cook on:

  • Low for 6–7 hours, or

  • High for 3–4 hours

The chicken should be fork-tender and easy to shred when done.

Step 7 – Finish the Sauce

Once fully cooked, shred the chicken directly inside the crockpot using two forks. Stir everything together so the melted cream cheese blends with the broth and chicken juices into a thick, creamy sauce.

Sprinkle in the parmesan cheese and stir until smooth.

Serving Suggestions

This creamy chicken is incredibly versatile. Serve it over:

  • Steamed rice

  • Mashed potatoes

  • Buttered noodles

  • Pasta shells

  • Toasted bread or biscuits

It also makes an amazing filling for wraps or sandwiches.

Flavor Variations

If you love experimenting, here are some delicious ways to customize this dish:

Spicy Kick

Add a teaspoon of crushed red pepper or diced jalapeños.

Cheesy Upgrade

Stir in shredded mozzarella or cheddar at the end for extra richness.

Veggie Boost

Add mushrooms, spinach, or broccoli halfway through cooking for a balanced meal.

Mexican Style

Replace ranch seasoning with taco seasoning and add corn and black beans.

Why This Recipe Works

The magic lies in the slow melting of cream cheese. As the chicken cooks, it releases natural juices that combine with the cream cheese and seasoning, forming a silky sauce. Because the chicken cooks directly in this mixture, it becomes incredibly moist and flavorful.

This is a perfect example of “minimal ingredients, maximum comfort.”

Tips for Perfect Crockpot Cream Cheese Chicken

  • Always use full-fat cream cheese for the creamiest texture.

  • Do not over-stir before cooking — let the crockpot work naturally.

  • If sauce is too thick at the end, add a splash of broth or milk.

  • For extra flavor, sear the chicken in a pan before adding (optional).