Who Is Most at Risk of Night Cramps? Causes, Prevention, and a Simple Relief Recipe

Night cramps, also known as nocturnal leg cramps, are sudden, involuntary muscle contractions that occur during sleep. These cramps most often affect the calves, feet, or thighs and can cause intense pain that wakes you from rest. While occasional cramps can happen to anyone, certain people are significantly more at risk. Understanding who is most vulnerable—and how to prevent cramps—can improve sleep quality, muscle health, and overall comfort.

According to experts at Mayo Clinic and Cleveland Clinic, night cramps are very common and usually harmless, but frequent episodes may indicate dehydration, mineral imbalance, or circulation issues.

What Causes Night Cramps?

Night cramps occur when muscles suddenly tighten and cannot relax properly. Several underlying factors contribute to this condition:

  • Dehydration

  • Electrolyte imbalance (low magnesium, potassium, or calcium)

  • Poor circulation

  • Muscle fatigue

  • Nerve compression

  • Prolonged sitting or inactivity

During sleep, blood flow slows slightly, and muscles may shorten depending on sleeping position. If muscles lack proper hydration and nutrients, they are more likely to cramp.

Who Is Most at Risk of Night Cramps?

Certain groups of people are more vulnerable due to physical, medical, or lifestyle factors.

1. Older Adults

Aging is one of the most common risk factors. Muscle mass naturally decreases with age, and circulation may become less efficient. Nerves also become more sensitive, increasing the likelihood of cramps.

Adults over 50 frequently experience night cramps because muscles fatigue more easily and recover more slowly.

2. People Who Are Dehydrated

Dehydration reduces the body’s ability to maintain proper muscle function. Water helps transport essential minerals to muscles. Without adequate hydration, muscles become more prone to involuntary contraction.

Common dehydration causes include:

  • Not drinking enough water

  • Excess sweating

  • Hot weather

  • Excess caffeine consumption

Even mild dehydration can increase cramp risk.

3. Pregnant Women

Pregnancy increases pressure on blood vessels and nerves, especially in the legs. Hormonal changes also affect circulation and mineral balance.

Night cramps are especially common during the second and third trimesters due to:

  • Increased body weight

  • Reduced circulation

  • Magnesium deficiency

Fortunately, cramps often disappear after childbirth.

4. Athletes and Physically Active Individuals

People who exercise intensely place more stress on their muscles. Overworked muscles become fatigued and more likely to cramp at night.

Risk increases when:

  • Muscles are overused

  • Stretching is inadequate

  • Hydration is insufficient

Recovery and electrolyte balance are essential for prevention.

5. People With Certain Medical Conditions

Some health conditions increase cramp risk, including:

  • Diabetes

  • Kidney disease

  • Thyroid disorders

  • Circulation problems

  • Nerve disorders

According to the National Institutes of Health, nerve compression and circulation issues can disrupt normal muscle signals, triggering cramps.

6. People Who Sit or Stand for Long Periods

Remaining in one position for extended periods reduces blood flow and muscle flexibility. Office workers, drivers, and people who stand all day are at increased risk.

Poor circulation causes muscles to stiffen and become more prone to sudden contraction.

Warning Signs You May Be at Higher Risk

You may be more likely to experience night cramps if you notice:

  • Muscle tightness before bed

  • Frequent leg fatigue

  • Tingling or numbness

  • Poor hydration habits

  • Lack of stretching

Early prevention can reduce frequency and severity.

Natural Relief Recipe: Magnesium Banana Evening Drink

This simple recipe supports muscle relaxation and hydration before sleep.

Ingredients

  • 1 ripe banana

  • 1 cup warm milk (or almond milk)

  • 1 teaspoon honey

  • 1 tablespoon oats

  • 1 pinch cinnamon

Instructions

  1. Warm the milk gently. Do not boil.

  2. Mash the banana until smooth.

  3. Add banana to warm milk.

  4. Stir in oats, honey, and cinnamon.

  5. Mix well and drink 30–60 minutes before bedtime.

Why This Recipe Works

Each ingredient supports muscle health:

  • Banana: Rich in potassium, helps muscle relaxation

  • Milk: Provides calcium for nerve and muscle function

  • Oats: Contain magnesium, essential for muscle recovery

  • Honey: Supports steady energy and circulation

  • Cinnamon: Improves blood flow

This combination helps reduce cramp risk naturally.

Additional Prevention Tips

1. Stay Hydrated

Drink water throughout the day. Aim for 6–8 glasses daily.

2. Stretch Before Bed

Gentle calf and leg stretches improve flexibility and circulation.

3. Improve Circulation

Light walking or movement during the day keeps blood flowing properly.

4. Maintain Proper Mineral Intake

Eat foods rich in:

  • Magnesium (nuts, seeds, oats)

  • Potassium (bananas, potatoes)

  • Calcium (milk, yogurt)

5. Adjust Sleeping Position

Avoid pointing toes downward while sleeping. Keep feet relaxed.

When to See a Doctor

Occasional cramps are normal, but consult a healthcare professional if cramps:

  • Occur frequently

  • Cause severe pain

  • Are accompanied by swelling or weakness

  • Do not improve with hydration and stretching

Persistent cramps may indicate underlying health issues.

Conclusion

Night cramps can disrupt sleep and cause discomfort, but understanding who is most at risk helps prevent them. Older adults, pregnant women, athletes, dehydrated individuals, and people with circulation or nerve issues are especially vulnerable.

The good news is that simple lifestyle changes—hydration, stretching, and proper nutrition—can significantly reduce cramp frequency. The magnesium banana evening drink provides natural muscle support and promotes relaxation before bedtime.


Doctors reveal that eating bananas before bed can lead to

Bananas are one of the most widely consumed fruits in the world, loved for their natural sweetness, convenience, and impressive nutritional profile. While many people enjoy bananas as a morning energy booster or midday snack, doctors and nutrition experts are increasingly highlighting the potential benefits of eating bananas before bed. According to sleep specialists and nutrition researchers, this simple nighttime habit may support better sleep, muscle relaxation, and overall nighttime recovery.

Organizations such as the National Sleep Foundation and Cleveland Clinic emphasize the importance of nutrition in sleep quality. Bananas contain several key nutrients that directly support the body’s natural sleep processes. When eaten in moderation as part of a balanced routine, bananas can become a gentle, natural addition to your bedtime ritual.

Why Bananas Are Ideal Before Bed

Bananas contain a unique combination of vitamins, minerals, and natural compounds that help prepare the body for rest. One of the most important nutrients in bananas is magnesium. Magnesium plays a critical role in calming the nervous system and relaxing muscles. Many doctors explain that magnesium helps reduce physical tension, allowing the body to transition into sleep more comfortably.

Bananas also contain potassium, which supports muscle function and helps prevent nighttime cramps. People who experience leg cramps or muscle tension during sleep may benefit from the potassium content in bananas. This mineral works alongside magnesium to promote deeper relaxation.

Additionally, bananas naturally contain tryptophan, an amino acid that the body uses to produce serotonin and melatonin. Serotonin helps regulate mood, while melatonin is the hormone responsible for controlling the sleep-wake cycle. According to sleep research referenced by Harvard Medical School, melatonin production is essential for falling asleep and maintaining restful sleep throughout the night.

Potential Benefits of Eating Bananas Before Bed

1. Improved Sleep Quality

Bananas help the body produce melatonin naturally. This supports the body’s internal clock and encourages more consistent sleep patterns. Many people report falling asleep faster after including bananas in their nighttime routine.

2. Muscle Relaxation

Magnesium and potassium work together to relax muscles. This can reduce restlessness, twitching, or cramps that may interrupt sleep.

3. Stable Blood Sugar Levels

Bananas provide natural carbohydrates that help stabilize blood sugar levels overnight. Stable blood sugar can prevent sudden nighttime awakenings caused by drops in energy.

4. Reduced Stress and Anxiety

Bananas support serotonin production, which promotes feelings of calm and relaxation. This makes them particularly helpful for people who struggle with nighttime anxiety or racing thoughts.

5. Improved Overnight Recovery

During sleep, the body repairs tissues and restores energy. The nutrients in bananas support this recovery process, especially for physically active individuals.

Who Can Benefit Most from This Habit

Eating bananas before bed may be especially helpful for:

  • People who struggle to fall asleep

  • Individuals with muscle cramps or restless legs

  • Those experiencing stress or anxiety

  • Athletes and physically active individuals

  • Older adults with sleep difficulties

However, moderation is important. Eating excessive amounts of any food before bed may cause discomfort.

Best Way to Eat Bananas Before Bed

Bananas can be eaten alone, but combining them with other calming ingredients can enhance their benefits.

Simple Bedtime Banana Relaxation Recipe

Ingredients:

  • 1 ripe banana

  • 1 cup warm milk (or almond milk)

  • 1/4 teaspoon cinnamon

  • 1 teaspoon honey (optional)

Instructions:

  1. Peel and slice the banana into small pieces.

  2. Warm the milk gently, but do not boil.

  3. Add the banana slices to the warm milk.

  4. Sprinkle cinnamon and add honey if desired.

  5. Stir well and let it sit for 2 minutes.

  6. Eat and drink this mixture about 30–60 minutes before bed.

This combination enhances relaxation. Warm milk contains additional tryptophan, while cinnamon supports stable blood sugar levels.

When to Avoid Eating Bananas Before Bed

Although bananas are beneficial for most people, some individuals should be cautious:

  • People with acid reflux may experience discomfort if eating right before lying down.

  • Individuals with diabetes should monitor portion size due to natural sugars.

  • Those with digestive sensitivity should start with small amounts.

In most cases, eating one small to medium banana is safe and beneficial.

Additional Tips for Better Sleep

Eating a banana before bed works best when combined with healthy sleep habits:

  • Maintain a consistent bedtime schedule

  • Avoid caffeine in the evening

  • Reduce screen time before sleep

  • Keep your bedroom cool and dark

  • Practice relaxation techniques

These habits enhance the body’s natural ability to rest.

Conclusion

Doctors and nutrition experts agree that bananas offer valuable nutrients that support sleep, relaxation, and overnight recovery. Their natural magnesium, potassium, and tryptophan content help calm the nervous system, relax muscles, and promote healthy melatonin production. When eaten in moderation, bananas can become a simple, natural tool for improving sleep quality.

Parsley: the simple remedy our grandmothers used for heavy legs and water retention

Parsley is often seen as nothing more than a garnish placed on the side of a plate, but for generations, it has been valued as a powerful natural remedy. Long before modern supplements and pharmaceutical diuretics became widely available, our grandmothers relied on parsley to ease heavy legs, reduce water retention, and support overall circulation. This humble herb, with its bright green leaves and fresh aroma, offers gentle yet effective support for the body—especially when prepared as a simple parsley infusion.

Historically, parsley has been used since ancient times. In fact, the famous physician Hippocrates, often called the father of medicine in Ancient Greece, recommended parsley for its cleansing and detoxifying properties. Today, science confirms what traditional wisdom already knew: parsley contains natural compounds that help the body eliminate excess fluids and support healthy circulation.

Why Heavy Legs and Water Retention Happen

Heavy legs and water retention occur when excess fluid accumulates in the body’s tissues, especially in the lower limbs. This can happen for many reasons, including:

  • Sitting or standing for long periods

  • Poor circulation

  • Hot weather

  • High salt intake

  • Hormonal changes

  • Lack of physical activity

When fluid builds up, you may feel swelling, tightness, discomfort, or fatigue in your legs. While severe cases require medical attention, mild water retention can often be managed naturally, and parsley is one of the gentlest and most effective remedies.

Why Parsley Works So Well

Parsley contains several natural compounds that support fluid balance and circulation:

1. Natural Diuretic Properties
Parsley helps the kidneys eliminate excess water and sodium through urine. Unlike harsh synthetic diuretics, parsley works gently without excessively depleting essential minerals when used moderately.

2. Rich in Potassium
Potassium helps balance sodium levels in the body. Excess sodium causes fluid retention, and parsley’s potassium content helps restore balance.

3. Supports Circulation
Parsley contains antioxidants such as flavonoids and vitamin C, which help protect blood vessels and improve circulation. Better circulation reduces swelling and heaviness.

4. Anti-Inflammatory Effects
Inflammation contributes to swelling. Parsley’s natural anti-inflammatory compounds help reduce tissue inflammation and discomfort.

Parsley Remedy Recipe for Heavy Legs and Water Retention

This traditional parsley infusion is simple, affordable, and effective.

Ingredients

  • 1 handful of fresh parsley (about 10–15 grams), washed thoroughly

  • 500 ml (2 cups) of water

  • Optional: juice of ½ lemon for flavor and added benefits

Instructions

  1. Pour the water into a small pot and bring it to a gentle boil.

  2. Add the fresh parsley to the boiling water.

  3. Reduce the heat and let it simmer for 5–7 minutes.

  4. Turn off the heat and cover the pot. Let it steep for another 10 minutes.

  5. Strain the liquid into a cup.

  6. Add lemon juice if desired.

  7. Drink warm.

How to Use It

For best results:

  • Drink 1 cup in the morning on an empty stomach

  • Drink another cup in the afternoon

  • Use for 5–7 consecutive days

  • Take a break for one week before repeating

Many people notice reduced swelling and lighter legs within just a few days.

Additional Benefits of Parsley Infusion

Besides reducing water retention, parsley offers several other health benefits:

Supports Kidney Health
Parsley helps flush toxins and supports natural kidney function.

Improves Digestion
It stimulates digestive enzymes, reducing bloating and discomfort.

Supports Heart Health
By helping regulate fluid balance and supporting circulation, parsley contributes to cardiovascular wellness.

Provides Antioxidants
Parsley protects cells from oxidative stress and supports overall vitality.

Tips to Enhance the Effect

To maximize the benefits of parsley, combine it with these healthy habits:

  • Drink plenty of water throughout the day

  • Reduce excess salt intake

  • Elevate your legs when resting

  • Walk regularly to improve circulation

  • Avoid sitting or standing for long periods

These simple lifestyle changes work together with parsley to improve fluid balance and comfort.

Who Should Be Careful

Parsley is generally safe when consumed in moderate amounts, but some people should exercise caution:

  • Pregnant women should avoid large medicinal amounts

  • People with kidney disease should consult a doctor

  • Those taking diuretics should use parsley carefully

Always use natural remedies responsibly.

Why This Remedy Has Lasted for Generations

Our grandmothers trusted parsley because it worked. It was affordable, accessible, and gentle on the body. Unlike modern quick fixes that may cause side effects, parsley supports the body’s natural balance.

Nature often provides simple solutions to common problems, and parsley is a perfect example. With consistent use, this traditional remedy can help reduce swelling, improve circulation, and restore comfort to tired, heavy legs.

Creamy Chicken and Carrot Spread

If you’re looking for a versatile, budget-friendly, and incredibly delicious spread, this Creamy Chicken and Carrot Spread is exactly what you need. It’s smooth, savory, slightly sweet from the carrots, and packed with protein. Perfect for sandwiches, wraps, crackers, or even as a party dip, this recipe is simple yet impressive.

The natural sweetness of carrots balances beautifully with tender shredded chicken and creamy dressing. Whether you’re preparing a quick lunch, a picnic platter, or a snack for guests, this spread is guaranteed to be a hit.

Why You’ll Love This Recipe

Easy to make with simple ingredients

Great way to use leftover chicken

Budget-friendly and filling

Kid-friendly flavor

Perfect for meal prep

Ingredients

2 cups cooked chicken breast (shredded or finely chopped)

1 cup finely grated carrot (about 2 medium carrots)

½ cup mayonnaise

3 tablespoons cream cheese (softened)

1 tablespoon lemon juice

1 small garlic clove (minced)

2 tablespoons finely chopped onion (optional)

2 tablespoons chopped fresh parsley

Salt to taste

½ teaspoon black pepper

Optional: pinch of paprika or chili flakes for mild heat

Step-by-Step Instructions
Step 1: Prepare the Chicken

If you don’t have leftover chicken, simply boil or bake two chicken breasts until fully cooked. Let them cool, then shred them finely using two forks or pulse gently in a food processor. For the best texture, keep it slightly coarse rather than completely pureed.

Step 2: Grate the Carrots

Use the fine side of a grater to grate the carrots. Finely grated carrots blend better into the spread and provide natural sweetness and moisture without creating chunks.

If your carrots are very juicy, lightly press them with a paper towel to remove excess moisture.

Step 3: Make the Creamy Base

In a medium mixing bowl, combine:

Mayonnaise

Softened cream cheese

Lemon juice

Minced garlic

Whisk until smooth and creamy. This creates the rich, velvety base that holds everything together.

Step 4: Combine Everything

Add the shredded chicken and grated carrots into the creamy mixture. Stir well until evenly combined.

Mix in:

Chopped onion (if using)

Fresh parsley

Salt and pepper

Paprika or chili flakes (optional)

Taste and adjust seasoning as needed.

Step 5: Chill for Best Flavor

Cover the bowl and refrigerate for at least 30–60 minutes before serving. This allows the flavors to blend and the texture to firm up slightly.

Serving Ideas

This creamy chicken and carrot spread is incredibly versatile:

Spread on toasted bread for sandwiches

Use in wraps or tortillas

Serve as a dip with crackers or pita chips

Fill croissants for a brunch treat

Use as a topping for baked potatoes

Stuff into hollowed tomatoes for a light appetizer

For a party platter, serve it in a bowl surrounded by sliced cucumbers, bell peppers, and toasted baguette slices.

Storage Tips

Store the spread in an airtight container in the refrigerator for up to 3–4 days. Because it contains mayonnaise and cream cheese, keep it chilled and avoid leaving it at room temperature for long periods.

Do not freeze, as the texture may become watery after thawing.

Helpful Variations
1. Healthier Version

Replace half (or all) of the mayonnaise with Greek yogurt for a lighter, higher-protein option.

2. Extra Crunch

Add:

2 tablespoons chopped celery

1 tablespoon chopped walnuts

Finely diced pickles

3. Spicy Kick

Mix in:

1 teaspoon Dijon mustard

A dash of hot sauce

Finely chopped jalapeño

4. Herb Upgrade

Try fresh dill, chives, or cilantro instead of parsley for a different flavor profile.

Nutritional Benefits

This spread isn’t just tasty—it’s nutritious too:

Chicken provides high-quality protein for muscle support

Carrots are rich in beta-carotene and vitamin A

Lemon juice adds vitamin C

Fresh herbs offer antioxidants

When paired with whole-grain bread or fresh vegetables, it makes a balanced and satisfying meal.

Pro Tips for Perfect Texture

Finely shred the chicken for a smoother spread.

Let the cream cheese soften fully before mixing.

Chill before serving for better consistency.

Adjust creaminess by adding 1–2 tablespoons of milk if needed.

Make It Ahead

This spread actually tastes better the next day. The flavors deepen and become more harmonious. Prepare it the night before a gathering to save time and enhance flavor.

Final Thoughts

Creamy Chicken and Carrot Spread is one of those simple recipes that surprises everyone. It’s humble, affordable, and made with everyday ingredients—but the flavor is comforting, balanced, and addictive.

Whether you’re packing school lunches, hosting friends, or just craving something savory and creamy, this recipe will quickly become a favorite in your kitchen.

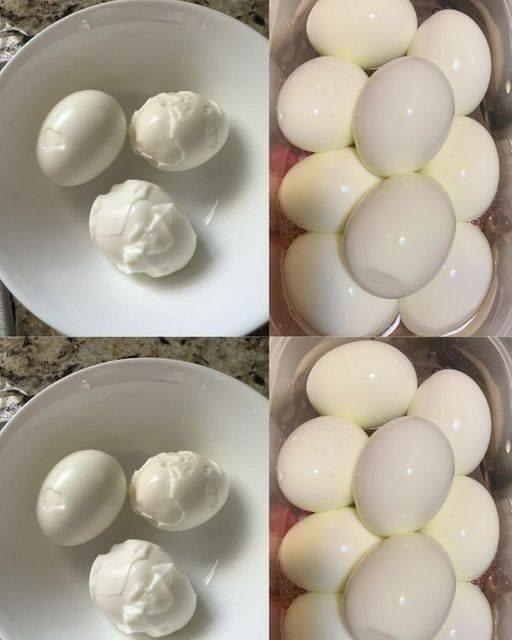
The Secret to Perfectly Peeled Hard-Boiled Eggs

Hard-boiled eggs are one of the simplest and most nutritious foods you can prepare, yet many people struggle with one frustrating problem: peeling them cleanly. Instead of smooth, beautiful eggs, the shell sticks stubbornly, tearing away chunks of the white and leaving behind a rough, uneven surface. The good news is that perfectly peeled hard-boiled eggs are not a matter of luck—they are the result of using the right method. With a few simple techniques and a clear understanding of timing, temperature, and preparation, you can achieve flawless eggs every single time.

Hard-boiled eggs are incredibly versatile. They can be eaten on their own as a high-protein snack, sliced into salads, mashed into sandwiches, or used in countless recipes. Their mild flavor and firm texture make them a staple in kitchens around the world. However, the peeling process can make or break their appearance, especially when presentation matters. Whether you’re preparing deviled eggs, meal prepping for the week, or simply enjoying a healthy breakfast, mastering this technique will make a big difference.

Ingredients

  • 6–12 large eggs

  • Water (enough to cover the eggs by about 1 inch)

  • 1 teaspoon salt (optional)

  • 1 tablespoon vinegar (optional)

  • Ice cubes

  • Cold water

These simple ingredients are all you need. The salt and vinegar are optional, but they can help make peeling easier and prevent egg whites from leaking if a shell cracks during boiling.

Step-by-Step Instructions

Step 1: Choose the Right Eggs

Contrary to what many people believe, slightly older eggs are easier to peel than very fresh ones. Fresh eggs have a lower pH level, which causes the egg white to stick more strongly to the shell membrane. Eggs that have been in the refrigerator for about 5–10 days are ideal for hard boiling and peeling.

Step 2: Arrange Eggs in a Single Layer

Place the eggs in a saucepan in a single layer. Avoid stacking them, as this can lead to uneven cooking or cracking. Add enough water to cover the eggs by about 1 inch. This ensures even heat distribution and proper cooking.

Step 3: Bring Water to a Gentle Boil

Place the saucepan on the stove over medium-high heat. Allow the water to come to a gentle boil. Once the water reaches a rolling boil, let it boil for about 30 seconds.

Step 4: Turn Off Heat and Cover

After 30 seconds of boiling, turn off the heat and cover the saucepan with a lid. Let the eggs sit in the hot water for 10–12 minutes. This gentle cooking method prevents overcooking and helps create tender egg whites and creamy yolks.

  • 10 minutes for slightly softer yolks

  • 12 minutes for fully firm yolks

Avoid boiling eggs for too long, as overcooking can cause a greenish ring around the yolk and make peeling more difficult.

Step 5: Transfer Eggs to an Ice Bath

This is one of the most important secrets for easy peeling. Immediately transfer the cooked eggs into a bowl filled with ice water. Let them sit for at least 5–10 minutes. The sudden cooling causes the egg to contract slightly inside the shell, separating it from the membrane and making peeling much easier.

Step 6: Gently Crack and Peel

Tap the egg gently on a hard surface to crack the shell. Roll it lightly under your hand to loosen the shell. Start peeling from the wider end, where there is usually a small air pocket. This space makes it easier to get under the membrane and remove the shell smoothly.

If needed, peel the egg under running water. The water helps separate the shell from the egg and washes away small fragments.

Why This Method Works

The key to perfectly peeled eggs lies in the combination of gentle cooking and rapid cooling. Cooking eggs in hot water without prolonged boiling prevents the proteins from bonding too tightly to the shell. The ice bath creates a temperature shock that helps separate the egg from its shell naturally.

Older eggs also peel more easily because their internal structure changes slightly over time. The air pocket inside becomes larger, and the egg white becomes less attached to the shell membrane.

Helpful Tips for Perfect Results

  • Always use an ice bath immediately after cooking.

  • Avoid overcooking, which makes eggs rubbery and harder to peel.

  • Slightly older eggs are easier to peel than very fresh eggs.

  • Peeling under running water can make the process smoother.

  • Start peeling from the wider end of the egg.

Storage and Shelf Life

Hard-boiled eggs can be stored in the refrigerator for up to one week. Keep them in their shells if possible, as the shell helps protect the egg and preserve freshness. If peeled, store them in an airtight container and consume within 3–4 days.

Hard-boiled eggs are perfect for meal prep. You can prepare a batch at the beginning of the week and use them in salads, sandwiches, or as a quick snack.

Nutritional Benefits

Hard-boiled eggs are packed with nutrients. They are an excellent source of high-quality protein, vitamins, and minerals. Eggs contain vitamin B12, vitamin D, selenium, and choline, which supports brain health. They are also relatively low in calories, making them a great choice for healthy eating.

Eating eggs can help keep you full longer, support muscle growth, and provide sustained energy throughout the day.

Common Mistakes to Avoid

One common mistake is overboiling eggs. This not only affects taste and texture but also makes peeling more difficult. Another mistake is skipping the ice bath, which is essential for easy peeling. Using extremely fresh eggs can also make peeling harder, so allowing eggs to age slightly in the refrigerator helps.

Conclusion

Perfectly peeled hard-boiled eggs are easy to achieve when you use the right technique. By choosing slightly older eggs, cooking them gently, and cooling them quickly in an ice bath, you can enjoy smooth, beautiful eggs every time. This simple method removes the frustration from peeling and ensures consistent results.

Oregano Oil

Oregano oil is one of the most powerful natural preparations you can make at home. Known for its strong aroma, rich flavor, and remarkable wellness properties, oregano oil has been used for centuries in traditional kitchens and natural remedies. Extracted from oregano leaves, this oil contains beneficial compounds that make it valuable both as a culinary ingredient and as a supportive natural preparation. Making oregano oil at home ensures purity, freshness, and full control over the ingredients. With just a few simple steps, you can create a potent oil that can be used in cooking, wellness routines, and home remedies.

This homemade oregano oil recipe is simple, affordable, and effective. It allows you to capture the natural essence of oregano while avoiding additives or preservatives commonly found in commercial versions.

Ingredients

• 1 cup fresh oregano leaves (or ½ cup dried oregano leaves)
• 1 to 1½ cups carrier oil (olive oil, coconut oil, or almond oil work best)
• 1 clean glass jar with lid
• 1 saucepan
• Water (for gentle heating)

Why Use a Carrier Oil?

Carrier oil plays an important role in extracting the beneficial compounds from oregano leaves. Olive oil is the most popular choice because it preserves nutrients well and has its own beneficial properties. Coconut oil is also excellent, especially if you want a thicker oil with additional antimicrobial support. Almond oil is lighter and absorbs quickly, making it ideal for topical applications.

Preparation Instructions

Step 1: Prepare the Oregano Leaves

If using fresh oregano, wash the leaves thoroughly to remove dust or debris. Let them dry completely, as moisture can reduce shelf life and promote spoilage. Once dry, gently crush the leaves using your hands or a spoon. Crushing helps release the natural oils and improves extraction.

If using dried oregano, you can use it directly, but lightly crushing it still improves results.

Step 2: Fill the Glass Jar

Place the oregano leaves into the clean glass jar. Do not pack them too tightly. Leave some space so the oil can fully surround each leaf. Proper circulation ensures better extraction.

Step 3: Heat the Carrier Oil

Pour the carrier oil into a saucepan and warm it gently for 2–3 minutes. Do not boil the oil. It should be warm, not hot. Gentle heat helps activate the extraction process without damaging the beneficial compounds.

Step 4: Combine Oil and Oregano

Carefully pour the warm oil over the oregano leaves in the jar. Make sure the leaves are fully submerged. Stir gently with a clean spoon to remove air bubbles.

Step 5: Infusion Process

Close the jar tightly. Place the jar in a warm location, such as near sunlight or in a warm kitchen area, for 1–2 weeks. Shake the jar gently once per day to help the infusion process.

For faster preparation, you can use the double-boiler method by placing the jar in warm water for 1–2 hours. However, the slow infusion method produces stronger oil.

Step 6: Strain the Oil

After 1–2 weeks, strain the oil using a fine strainer or cheesecloth into a clean container. Remove all plant material to ensure longer shelf life.

Your oregano oil is now ready to use.

Storage Instructions

Store oregano oil in a dark glass bottle or jar. Keep it in a cool, dry place away from direct sunlight. Properly stored oregano oil can last up to 6 months or longer.

Dark glass bottles are ideal because they protect the oil from light, which can reduce potency.

Common Uses of Oregano Oil

1. Culinary Use

Add a few drops to pasta sauces, soups, roasted vegetables, or marinades. It enhances flavor and adds a rich herbal depth to dishes.

2. Skin Application

When diluted with carrier oil, oregano oil can be used on the skin. Always dilute before applying, as pure oregano oil is very strong.

3. Massage Oil

Mixed with olive or coconut oil, oregano oil can be used for massage to promote relaxation.

4. Aromatic Use

The strong herbal aroma can help freshen indoor spaces naturally.

Benefits of Homemade Oregano Oil

• Natural and chemical-free
• Cost-effective compared to store-bought versions
• Multipurpose use
• Long shelf life
• Easy to prepare at home

Homemade oregano oil also allows you to choose high-quality ingredients, ensuring better results and freshness.

Tips for Best Results

• Always use clean, dry jars to prevent contamination
• Ensure oregano leaves are completely dry
• Use high-quality carrier oil
• Store in dark containers
• Label the jar with preparation date

Following these tips ensures your oregano oil remains potent and safe for use.

Optional Enhancements

You can combine oregano with other herbs like thyme or rosemary for added aroma and flavor. This creates a more complex herbal oil suitable for cooking and aromatic purposes.

Safety Note

Oregano oil is very strong. Always dilute before applying to skin or using in large quantities. Use small amounts when adding to food.

Conclusion

Homemade oregano oil is a valuable addition to any kitchen and natural wellness routine. It combines tradition, simplicity, and effectiveness in one easy preparation. With just oregano leaves and carrier oil, you can create a powerful infusion that supports cooking, self-care, and natural living. This simple recipe provides a pure, affordable, and versatile oil that can be used in many ways. By preparing oregano oil at home, you ensure quality, freshness, and maximum benefit from this remarkable herb.

Low-carb crustless pizza bowl recipe

Low-Carb Crustless Pizza Bowl (Keto-Friendly, Family Favorite)

If you love pizza but want to skip the carbs, this low-carb crustless pizza bowl is about to become your new obsession. It has everything you crave—rich tomato sauce, gooey melted cheese, savory toppings—without the heavy dough crust. It’s perfect for keto, low-carb lifestyles, gluten-free diets, or simply when you want a quick and satisfying dinner without the extra calories.

The best part? It’s incredibly customizable. Make it meaty, veggie-packed, spicy, or extra cheesy. This recipe serves 4 but can easily be doubled for meal prep or family dinners.

Why You’ll Love This Crustless Pizza Bowl

  • Only 5–10g net carbs per serving (depending on toppings)

  • Ready in under 30 minutes

  • Great for meal prep

  • Kid-friendly and picky-eater approved

  • Naturally gluten-free

  • Easy to customize

This dish delivers that classic pizza flavor without the carb-heavy crust, making it ideal for weight loss, blood sugar management, or keto eating.

Ingredients

For the Base:

  • 1 pound (450g) ground beef or Italian sausage

  • 1 tablespoon olive oil (if using lean meat)

  • 1 teaspoon garlic powder

  • 1 teaspoon Italian seasoning

  • Salt and black pepper to taste

For the Sauce Layer:

  • 1 cup low-sugar pizza sauce or marinara

  • 1 teaspoon dried oregano

For the Cheese Layer:

  • 1½ cups shredded mozzarella cheese

  • ¼ cup grated Parmesan cheese

Optional Toppings:

  • Pepperoni slices

  • Sliced mushrooms

  • Black olives

  • Bell peppers

  • Jalapeños

  • Cooked bacon

  • Cooked chicken

  • Spinach

  • Red onion slices

Tip: Avoid watery vegetables like fresh tomatoes unless you pre-cook them slightly to prevent excess liquid in the bowl.

Instructions

Step 1: Preheat the Oven

Preheat your oven to 375°F (190°C). Lightly grease 4 oven-safe bowls or ramekins.

Step 2: Cook the Meat Base

In a skillet over medium heat, cook the ground beef or sausage until fully browned. Drain excess grease if necessary. Stir in garlic powder, Italian seasoning, salt, and pepper.

Divide the cooked meat evenly between the prepared bowls. Press it gently into the bottom to create a firm base.

Step 3: Add the Sauce

Spoon pizza sauce evenly over each meat layer. Don’t overdo it—too much sauce can make the bowl watery. Sprinkle oregano on top for extra flavor.

Step 4: Add Cheese

Top each bowl generously with mozzarella and a sprinkle of Parmesan. Make sure the cheese fully covers the sauce to create that classic pizza melt.

Step 5: Add Toppings

Add your favorite toppings over the cheese. For best results, place heavier toppings like pepperoni and mushrooms slightly pressed into the cheese.

Step 6: Bake

Place bowls on a baking sheet and bake for 15–20 minutes, or until cheese is melted and bubbly. For a golden top, broil for 2–3 minutes at the end.

Step 7: Rest & Serve

Let the bowls rest for 5 minutes before serving. The layers will settle, making them easier to eat.

Nutrition Estimate (Per Serving)

  • Calories: 380–450

  • Protein: 28–35g

  • Fat: 28–35g

  • Net Carbs: 5–10g

Values vary depending on toppings used.

Tips for the Perfect Pizza Bowl

1. Use Full-Fat Cheese

Full-fat mozzarella melts better and keeps you fuller longer.

2. Don’t Skip Seasoning the Meat

The seasoned meat base replaces the crust, so it must be flavorful.

3. Drain Vegetables

If using mushrooms or spinach, sauté them first to remove excess moisture.

4. Make It Spicy

Add crushed red pepper flakes or spicy sausage for heat.

5. Meal Prep Friendly

Store in airtight containers in the refrigerator for up to 4 days. Reheat in microwave or oven.

Delicious Variations

1. Chicken Alfredo Pizza Bowl

Replace marinara with low-carb Alfredo sauce. Use cooked chicken and top with mozzarella and spinach.

2. Supreme Pizza Bowl

Use sausage and beef together. Add olives, peppers, onions, and mushrooms.

3. Buffalo Chicken Bowl

Mix shredded chicken with buffalo sauce, top with mozzarella and blue cheese crumbles.

4. Veggie Lover’s Bowl

Skip meat and use sautéed zucchini, mushrooms, spinach, and olives as your base.

Can You Make It in the Air Fryer?

Yes! Assemble the bowls in air fryer-safe dishes and cook at 350°F (175°C) for 8–10 minutes until cheese is bubbly.

Storage and Reheating

  • Refrigerator: Store up to 4 days

  • Freezer: Freeze up to 2 months

  • Reheat: Microwave 1–2 minutes or bake at 350°F for 10 minutes

If frozen, thaw overnight in the refrigerator before reheating.

Why This Recipe Works for Weight Loss

Traditional pizza crust is made from refined flour, which spikes blood sugar and increases carb intake. By replacing the crust with a protein-rich meat base, you reduce carbs dramatically while increasing protein and healthy fats—keeping you fuller longer.

It’s satisfying enough to stop pizza cravings without sabotaging your goals.

Frequently Asked Questions

Can I make this dairy-free?
Yes. Use dairy-free cheese alternatives and ensure your sauce is dairy-free.

Can I use turkey instead of beef?
Absolutely. Ground turkey or chicken works well for a leaner version.

Is it keto-approved?
Yes, as long as you use low-sugar sauce and low-carb toppings.

The Healing Power of Moses-in-the-Cradle Tradescantia spathacea Discover the Hidden Benefits of This Colorful Medicinal Plant


Using an Electric Kettle to Boil Water: 9 Out of 10 Households Make This Common Mistake—Fix It Today

Electric kettles are one of the most convenient appliances in modern kitchens. Whether you are making tea, coffee, instant noodles, or preparing hot water for cooking, an electric kettle saves time and energy. However, many households unknowingly use their electric kettles incorrectly. This common mistake not only shortens the life of the appliance but can also affect water quality, safety, and efficiency. The good news is that this mistake is easy to fix once you understand it.

The most frequent mistake people make is failing to clean and descale the electric kettle regularly. Over time, minerals from water—especially calcium and magnesium—build up inside the kettle. This buildup is called limescale. Even if your water looks clean, minerals are naturally present, and repeated boiling causes them to stick to the heating element and interior surfaces.

Why This Mistake Is So Common

Many people assume that boiling water naturally cleans the kettle. After all, boiling kills bacteria, so the kettle must be clean, right? Unfortunately, boiling does not remove mineral deposits. In fact, boiling accelerates limescale formation because heat causes minerals to separate from water and attach to surfaces.

This buildup often appears as a white, chalky layer inside the kettle. At first, it may seem harmless, but over time, it creates several problems.

Problems Caused by Limescale Buildup

1. Slower Boiling Time
Limescale acts as an insulating barrier between the heating element and the water. This means the kettle must work harder and longer to heat the water, wasting electricity and time.

2. Higher Energy Consumption
Because the heating element becomes less efficient, the kettle uses more electricity. This can increase your household energy costs without you realizing it.

3. Shorter Appliance Lifespan
Excessive mineral buildup puts extra strain on the heating element. Over time, this can cause overheating and permanent damage, leading to early failure of the kettle.

4. Poor Water Taste
Limescale can affect the taste of water, making tea and coffee taste flat or slightly bitter.

5. Safety Risks
Heavy buildup can interfere with the kettle’s automatic shut-off function, which may create safety concerns.

Another Common Mistake: Overfilling the Kettle

Many people fill the kettle beyond the maximum level line. This can cause boiling water to splash out, creating a burn hazard and potentially damaging the kettle’s internal components. Always respect the minimum and maximum level markings.

Also Avoid Leaving Water Sitting for Too Long

Leaving water in the kettle for many hours or days allows minerals to settle and stick to surfaces more easily. It can also affect freshness. Always empty unused water and refill with fresh water when needed.

The Simple Cleaning Solution Everyone Should Know

Fortunately, cleaning an electric kettle is quick and inexpensive. You only need two common household ingredients: white vinegar and water.

Easy Electric Kettle Cleaning Method

Ingredients:

  • 1 cup white vinegar

  • 2 cups clean water

Instructions:

  1. Pour the vinegar and water into the kettle.

  2. Turn on the kettle and allow the mixture to boil.

  3. Once it boils, turn off the kettle and let the solution sit inside for 15–20 minutes.

  4. Pour out the solution carefully.

  5. Rinse the kettle thoroughly with clean water 2–3 times.

  6. Boil fresh water once and discard it to remove any remaining vinegar taste.

Your kettle will now look cleaner and perform more efficiently.

How Often Should You Clean Your Kettle?

The cleaning frequency depends on your water hardness and usage:

  • Daily use: Clean every 2–4 weeks

  • Moderate use: Clean every 4–6 weeks

  • Light use: Clean every 2–3 months

If you notice white deposits forming, it is time to clean immediately.

Additional Tips for Proper Electric Kettle Use

Always Use the Correct Water Level
Never fill below the minimum or above the maximum line. This ensures safe and efficient operation.

Avoid Reboiling the Same Water Multiple Times
Repeated boiling increases mineral concentration and accelerates limescale buildup.

Keep the Lid Closed While Boiling
This helps the kettle boil faster and prevents unnecessary heat loss.

Empty the Kettle After Use
This prevents mineral deposits and keeps water fresh.

Use Filtered Water If Possible
Filtered water contains fewer minerals and reduces limescale buildup significantly.

Benefits of Proper Kettle Maintenance

When you clean and use your electric kettle correctly, you will notice several improvements:

  • Faster boiling time

  • Lower electricity usage

  • Better tasting tea and coffee

  • Longer kettle lifespan

  • Improved safety

  • Cleaner, healthier water

A Small Habit That Makes a Big Difference

Many people overlook electric kettle maintenance because the appliance seems simple and reliable. However, ignoring basic care can lead to reduced performance and unnecessary costs.

By cleaning your kettle regularly, using proper water levels, and emptying unused water, you can extend the life of your appliance and ensure safe, efficient operation.

Final Reminder for Your Family

This simple maintenance habit takes only a few minutes but provides long-term benefits. Remind your family members to clean the kettle regularly and use it properly. A well-maintained kettle works faster, lasts longer, and provides cleaner water for everyone.

Do you suffer from frequent nighttime muscle cramps

If you’ve ever been jolted awake by a sharp, painful tightening in your calf, foot, or thigh, you’re not alone. Nighttime muscle cramps are surprisingly common, especially in adults over 40. They can last from a few seconds to several minutes, and the soreness may linger long after the cramp fades.

While occasional cramps are usually harmless, frequent nighttime muscle cramps may signal that your body is lacking something important. Understanding the causes — and how to prevent them — can help you sleep more peacefully and wake up feeling refreshed.

What Are Nighttime Muscle Cramps?

Nighttime muscle cramps, also called nocturnal leg cramps, are sudden, involuntary contractions of muscles that occur while you’re resting or sleeping. They most often affect the calves but can also occur in the feet, thighs, or even hands.

Unlike restless leg syndrome, which causes an urge to move, cramps are intensely painful and cause the muscle to tighten visibly.

Common Causes of Nighttime Muscle Cramps

  1. Dehydration
    Not drinking enough water during the day is one of the most common triggers. When your body lacks fluids, electrolyte balance becomes disrupted, making muscles more likely to contract involuntarily.

  2. Low Levels of Key Minerals
    Magnesium, potassium, calcium, and sodium are essential for proper muscle function. A deficiency in any of these minerals can increase your risk of cramping. Many people unknowingly consume insufficient magnesium, especially if their diet lacks leafy greens, nuts, and whole grains.

  3. Poor Circulation
    Reduced blood flow to the legs, especially in people who sit for long hours, can contribute to cramps at night.

  4. Muscle Fatigue
    Overexertion during the day, long walks, intense workouts, or standing for extended periods can strain muscles and trigger nighttime spasms.

  5. Certain Medications
    Some medications, including diuretics, cholesterol-lowering drugs, and certain blood pressure medications, may increase the likelihood of cramps.

  6. Pregnancy and Aging
    Hormonal changes during pregnancy and natural muscle loss with aging can also make cramps more frequent.

Signs You Shouldn’t Ignore

Occasional cramps are usually harmless. However, consult a healthcare professional if you experience:

• Severe pain that doesn’t improve
• Frequent cramps disrupting sleep several times a week
• Swelling, redness, or warmth in the leg
• Muscle weakness or numbness

These could indicate an underlying medical condition that needs evaluation.

The Natural Nighttime Relief Drink (Simple 4-Ingredient Recipe)

If you’re looking for a gentle, natural way to reduce cramps, this easy bedtime drink may help support muscle relaxation and hydration.

Ingredients:
• 1 cup warm water
• 1 tablespoon fresh lemon juice
• 1 teaspoon raw honey
• A pinch of sea salt

Optional: A magnesium supplement (as directed by a professional)

Instructions:

  1. Warm the water until comfortably hot, not boiling.

  2. Stir in the lemon juice and honey.

  3. Add a small pinch of sea salt.

  4. Drink 30 minutes before bedtime.

Why It Works:

Lemon provides potassium.
Sea salt supplies trace minerals.
Honey helps balance blood sugar overnight.
Warm water supports hydration and relaxation.

While this drink is not a medical cure, many people find it soothing and helpful for reducing nighttime cramps.

Additional Tips to Prevent Nighttime Cramps

Stretch Before Bed
Gentle calf and hamstring stretches for 5–10 minutes can significantly reduce cramp frequency.

Stay Hydrated
Aim for steady hydration throughout the day, not just before bed.

Increase Magnesium-Rich Foods
Add spinach, almonds, pumpkin seeds, and avocados to your diet.

Wear Supportive Footwear
Poor arch support during the day can strain calf muscles.

Massage and Heat
Applying a warm compress or gently massaging tight muscles before bed can relax them.

Improve Sleep Position
Avoid pointing your toes downward while sleeping. Try placing a pillow under your knees if you sleep on your back.

When to Seek Medical Advice

If lifestyle changes don’t help and cramps persist, a doctor may test for electrolyte imbalances, thyroid issues, nerve conditions, or circulation problems.

The Bottom Line

Frequent nighttime muscle cramps can be frustrating and painful, but they’re often your body’s way of asking for better hydration, improved nutrition, or reduced strain. Small changes — like stretching before bed, staying hydrated, and adding mineral-rich foods — can make a noticeable difference.

Don’t ignore what your body is telling you. Addressing the root cause may not only relieve cramps but also improve your overall health and sleep quality.

If cramps are waking you up night after night, it may be time to take action — and give your muscles the support they need to fully relax.